
This post and photos may contain Amazon or other affiliate links. If you purchase something through any link, I may receive a small commission at no extra charge to you. Any supplies used may be given to me free of charge, however, all projects and opinions are my own.
A few months ago I had a friend approach me about an idea for her daughter’s birthday party. She had planned a really fun party, with the theme as an “Art Party”. She was full of fabulous ideas. Since the kids would be playing with paint and other materials, she wanted an apron for each child in attendance. She really wanted each apron/smock to be personalized. At first we discussed using my embroidering machine, but I suggest this method as it saves a lot of time, and this was the perfect medium for it! The custom glitter monograms are so easy to make. I’ll take you step by step on how easy.
(****Affiliate Disclosure: I am grateful to be of service and bring you content free of charge. In order to do this, please note that when you click links and purchase items, in most (not all) cases I will receive a referral commission. Your support in purchasing through these links enables me to keep my projects and blog running while providing you with free ideas and content. Thank you!*****)
This is the product I used (specifically the glitter iron on vinyl):
You can usually find it in Michaels, Hobby Lobby, JoAnn’s and other craft stores. Or you can always find it online (link provided below).
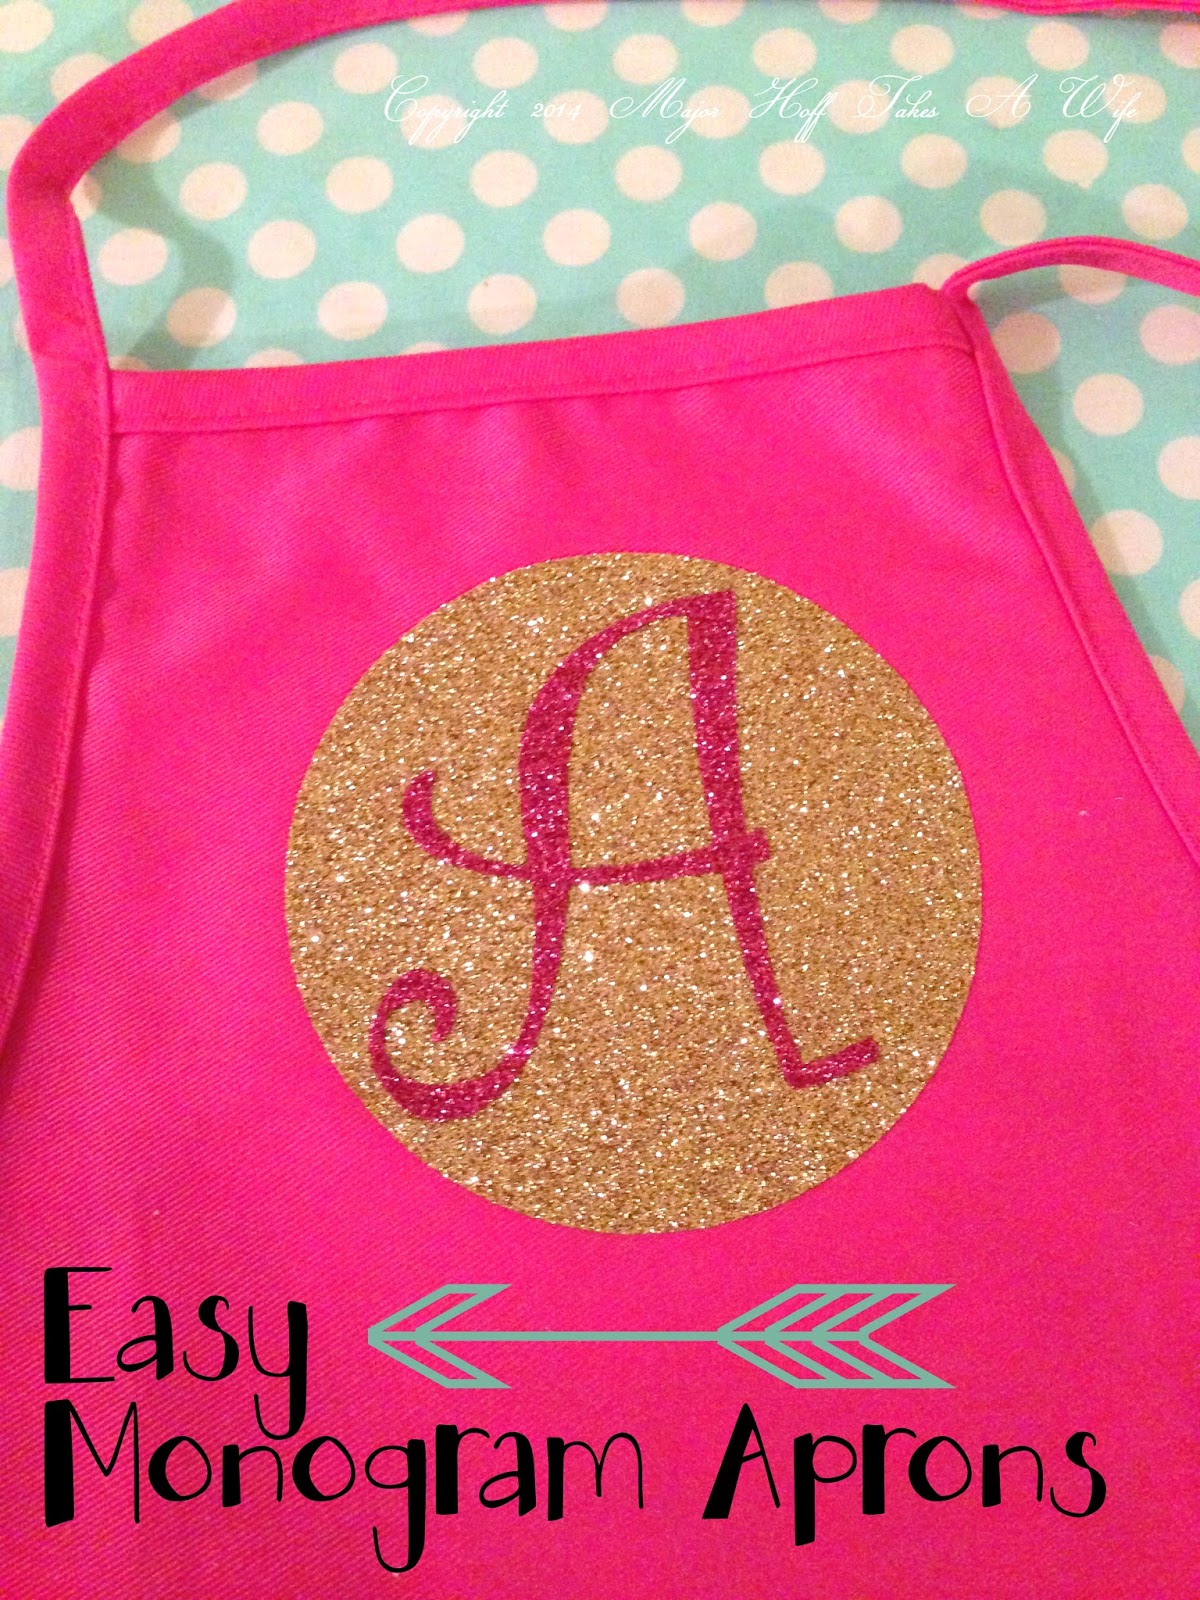
I started off with a plain pink apron from Hobby Lobby for the birthday girl.
First, in your cricut software (or other cutting software), pick a circle and make it the size you would like. This one was about 6 inches. Next, pick the letter of the monogram you would like. You can place it on the circle in the software first to make sure it fits. I kept mine separate so that they would cut separately since I was using the gold glitter and the hot pink glitter vinyl. Using the directions provided from cricut, cut out the circle with one vinyl and the letter with another. The video online for the iron on vinyl is perfect for showing you what to do. I’ll be honest and tell you I watch it. Every. Single. Time. I cut iron on vinyl. I just don’t want to make a mistake—and it’s quick. Once it’s cut, place the gold glitter vinyl centered on the apron and iron as directed. Let your apron cool before moving on to the next step.
Center your letter onto the circle. Be sure to leave enough of the clear top on the letter to cover both the letter and the circle. Iron on as directed. Once it’s cooled remove the clear paper. ENJOY! That’s it. For real. It is that easy. My friend came over and we knocked out about 12 of them in a half hour.
The other children received a white smock with just their initial. My friend purchased these from Oriental Trading company, and they did not like the iron. We finagled them so they worked, but I would only recommend using a knit or cotton material and not this disposable material.
My friend was really pleased with her daughter’s apron, and the smocks were a hit of the party. If you don’t have a machine, you could easily cut out the letters and circles. But the machine—my friends—it is incredible! I am so in love with the new Explore machine from Cricut. It is so user friendly and makes crafting so much easier. If you are interested in a cricut, they are offering Free shipping until the end of the month with the code: MYSTERYSHIP
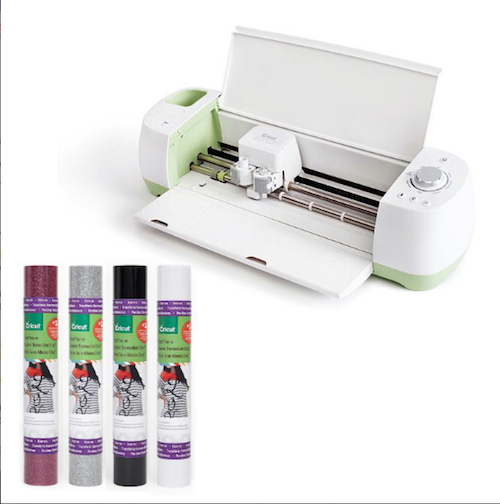
They also have an incredible bundle going right now with the new EXPLORE machine and an iron on bundle. You would have everything you need for this bundle!
Cricut Explore® + Cricut Iron-On Bundle
Need more ideas on what to do with your cricut? There are tons of projects on pinterest, but here are a few of mine:


DIY a Custom Worn Wood Sign
Seasonal Decorations:

HOLIDAY HOME TOUR
Snowman Milk Glasses
Glitter Star Ornaments


MrsMajor Hoff says
I can't believe you haven't tried it yet! It is so great and very good quality!
MrsMajor Hoff says
Oh yes, I think the ideas are endless for these! Cute mama aprons for housewarmings, wedding showers, etc..!
Anne says
Too cute! And I love that it looks way more complicated than it actually is!