
This post and photos may contain Amazon or other affiliate links. If you purchase something through any link, I may receive a small commission at no extra charge to you. Any supplies used may be given to me free of charge, however, all projects and opinions are my own.
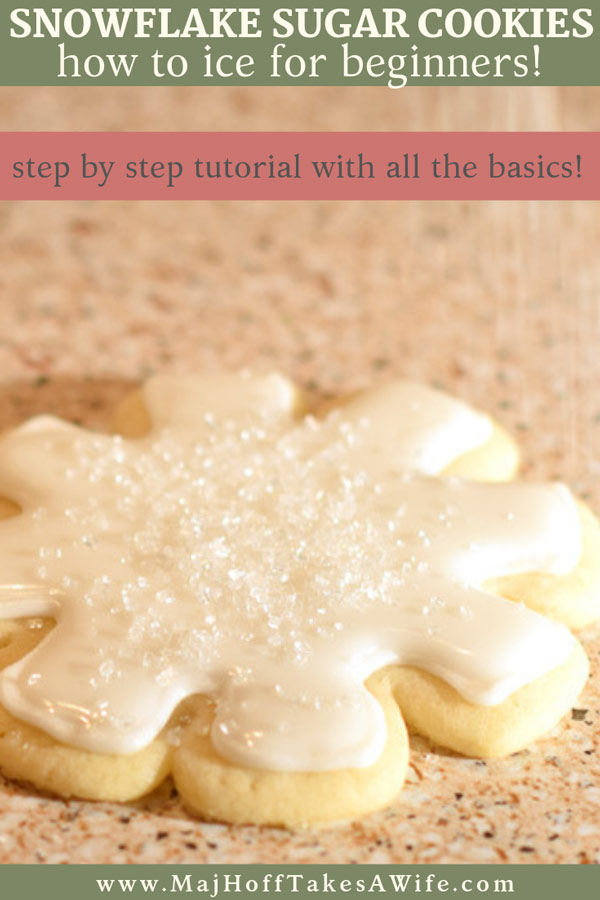
I love a good sugar cookie, don’t you? It wouldn’t be Christmas without the sugar cookies! I was so excited when we were asked to share our favorite Christmas cookie recipes. Um, hello. SUGAR COOKIES! I knew for sure I'd be sharing my Christmas snowflake sugar cookies. They have the name “Sugar” right in them. I think most everyone has a favorite recipe for sugar cookies.
The more I thought about it, and the more I asked around, I realized that more people would like to know how to ice those yummy cookies. I had several people tell me they didn’t know how to make icing, or others who told me the icing slide right off. I’m no gourmet cookie designer. But I have watched enough Martha Stewart shows to know the tricks of the trade. I thought I would share the basic steps for how to make a delightful little delicate snowflake.
But that’s not all! Be sure to check out the favorite cookie recipes of the amazing bloggers behind the “Holidays Made Easy” blog tour.

These would also make cute cookies for a Frozen party (I hear that movie is quite popular, am I the only one who hasn’t seen it?).

These are not perfect snowflakes. I whipped them up quickly after school. I might have had a cup too many of coffee and might not have had the most stable hands. BUT, most snowflakes are unique, and quirky, and so are the cookies. Also, people will be happy to receive such a superb homemade cookie that they won’t mind any flaws.
So let’s get to the nitty gritty.
Let’s start with icing.
This is where I tell you that I’ve made icing like this since I was a kid. With no measuring cups or spoons. I do it all by sight and feel. Kinda like how my Grandma make homemade pie crust. For the purpose of the post, I measured a bit. I’ll explain that down below.

You will need 2 types of frosting/icing for the cookies. One is stiffer, and it’s used to make the outline of the cookie.
The other is more runny, and it is the main icing on the cookie.
I’ve heard of a thing called Royal Icing. Never used it. Maybe that is the fancy name for my recipe. My recipe consists of 2 things. Confectioners sugar and milk. Boom! That was hard. Since it is for a white cookie I don’t suggest adding extracts or butters, etc.

You can see how the icing starts to come together in the middle first. Try to work it for a bit before you are tempted to add more milk.
I usually make my stiff icing first. This was 1 cup of powdered sugar to 3 scant teaspoons of milk. You should have a nice bulky icing. Smooth, a little flexible, but not stiff as a board. It shouldn’t run off the spoon continuously.

I like to do my icing in small batches, so these are smaller amounts.
For the smoother, more flow-y icing, I use a scant ½ teaspoon more of milk. Real technical, huh? The trick is to get to know your icing. Know when you need to add a bit more milk, or add a bit more sugar to make it less runny. Here is the icing that is used for the main icing.

See how it likes to run off the spoon? It should be thin, but not crazy drippy.

For icing sugar cookies, I like to use these little squeezy things I found at World Market. I usually use a size 2, 3, or 4 Tip from Wilton to make the outline with the stiffer frosting in one “jar” and a #6 Wilton tip in the other jar with the thinner icing. Since we are doing snowflakes, I used Wilton white sparkling sugar as well. To decorate a bit more I used some of those Celebration Pearls. Yes, I totally picked out the white ones and a few blue ones.
So let’s start by doing the outline on the cookie. Some people suggest keeping your hand 12 inches away, but I am more like 6. I think it’s whatever you are most comfortable with. Practice, practice, practice. What’s the worst that could happen? You eat the ugly cookies. Gee, that sounds like a horrible thing!

The bottle didn’t show up great in the pictures, so I used a piping bag. Basically I couldn’t ice, hold the stuff, and click my camera button at the same time (hence the wiggly lines).
I usually let my cookie set for a minute or 2 (or 5 if I get distracted). Sometimes I will line up the cookies and do them assembly style, 10 or so at a time, and then switch between the thicker icing to the thinner icing.
The outline serves as a “dam” to make sure the new icing you put on won’t run and drip off the sides. It’s amazing really.

Next, you take the thinner icing and “flood” the inside of the cookie. The amazing thing? It self levels and most of those gaps get filled in. Very rarely will it go over the outline you just made (if it does, try using a smaller tip or not flooding with as much icing). You can use a knife or off set spatula to smooth things out.

Or you can use a small toothpick to get rid of air bubbles or smooth some of the icing over.
Once you have flooded you cookie, it’s time to put the sanding sugar on. My kiddos love this part!


Once that is done, you can use the stiffer icing to make lines or polka dots. Or make dots and put one of those fun candies in. What do you think? Will you give it a try?
What’s your favorite Christmas cookie? The Holidays Made Easy group wanted to share theirs with you! Be sure to check out what these fantastic ladies are sharing! You won’t want to miss these recipes!
The Holidays Made Easy team:


Need a drink with those yummy cookies? You might like one of these:
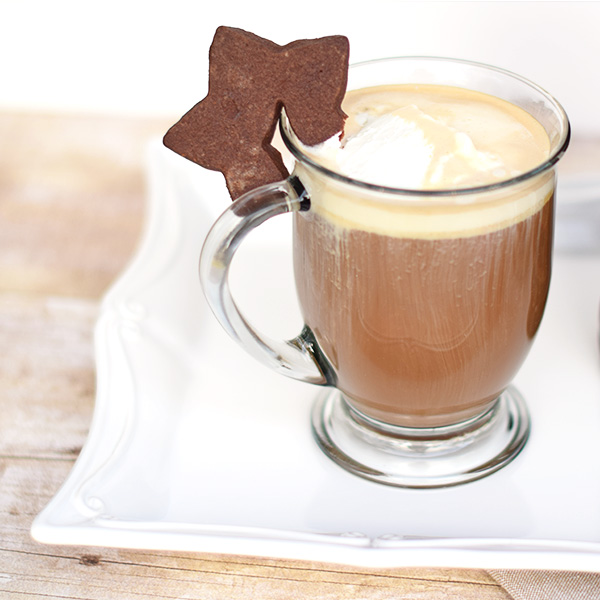
Hot Buttered Latte with Kahlua. Christmas Lattes are the best!
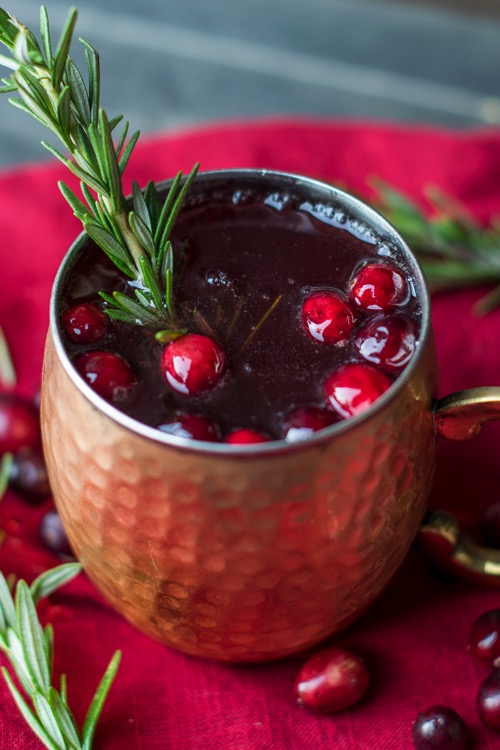
Rosemary Cranberry Moscow Mule


Alli says
This is so helpful. I'm terrible at decorating sweet treats. Love this!!! YUM!
Susan F. says
This is a really well written tutorial - thanks for sharing it! And for leaving a comment on my post today at 2justByou. I hope you enjoy the cranberries if you make them!
Aimee Lane says
I love sugar cookies. Thanks for the great tip! Featuring you tomorrow. XO, Aimee - ItsOverflowing.com
Marci Loehner says
Love royal icing. My girls love decorating with it! Thank you for linking up at the {Online} Christmas Cookie Exchange. You've been pinned!