
This post and photos may contain Amazon or other affiliate links. If you purchase something through any link, I may receive a small commission at no extra charge to you. Any supplies used may be given to me free of charge, however, all projects and opinions are my own.
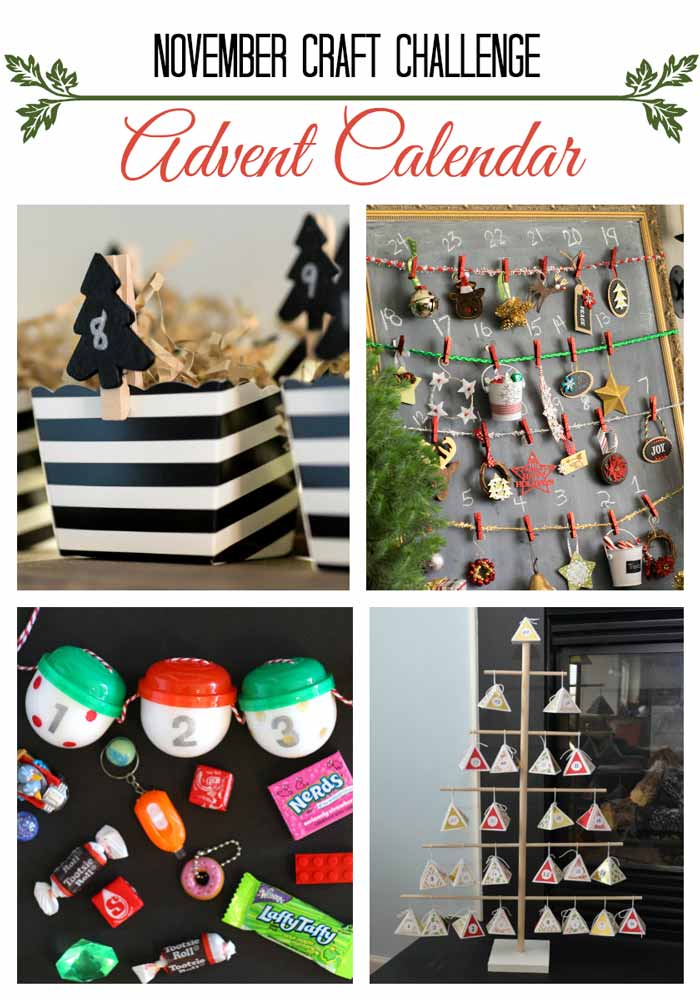
It’s time for another monthly craft challenge! This month our theme was to create a DIY advent calendar. It always amazes me what fun things my bloggy friends create. You’ll find the links down below, so please be sure to stop by and give them some love.
DIY Advent Calendar Challenge:
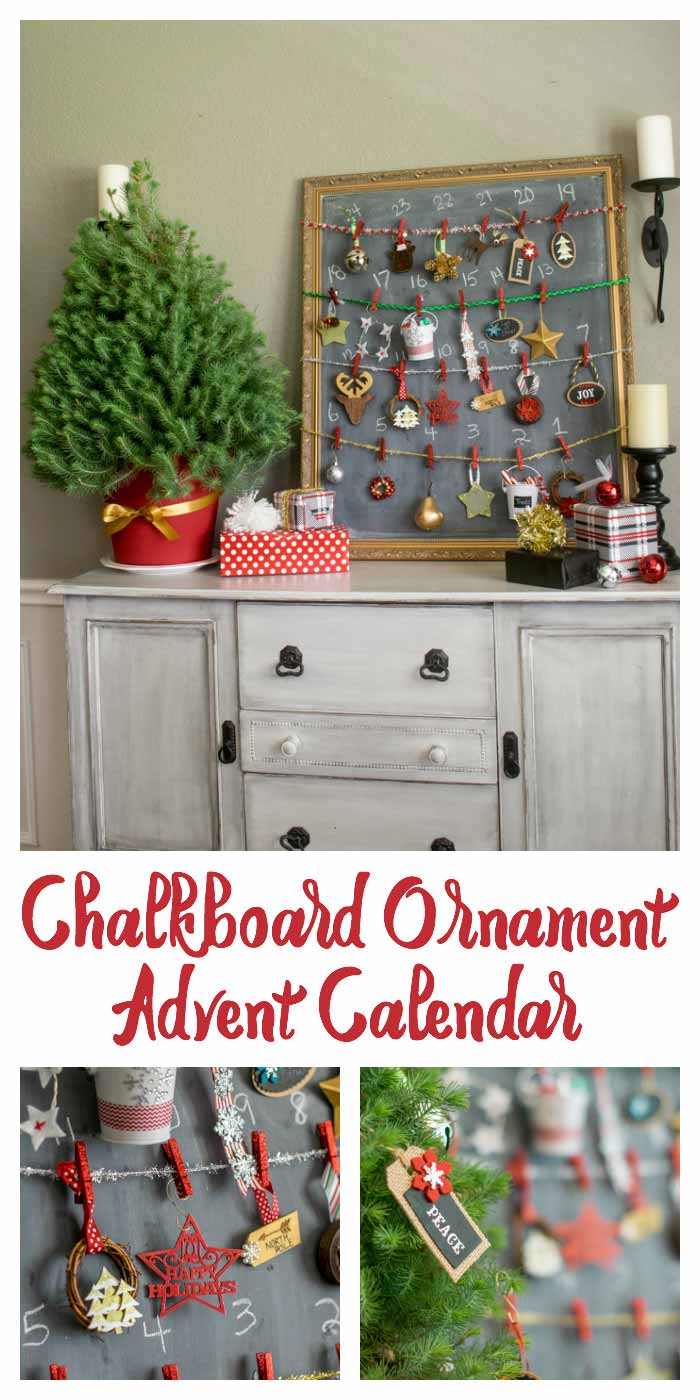
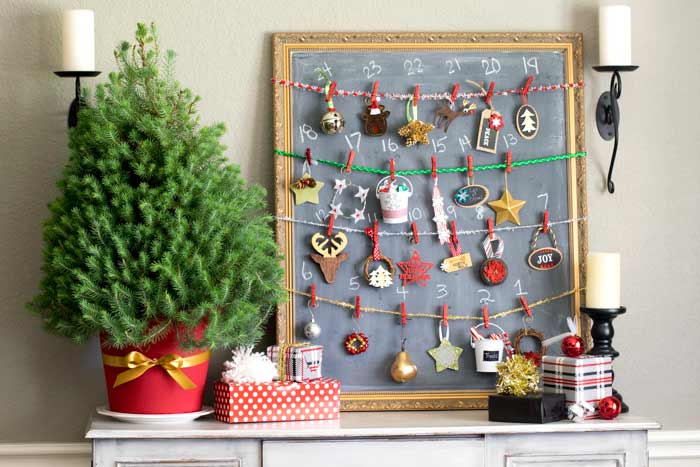
Christmas Tree Ornament Homemade Advent Calendar
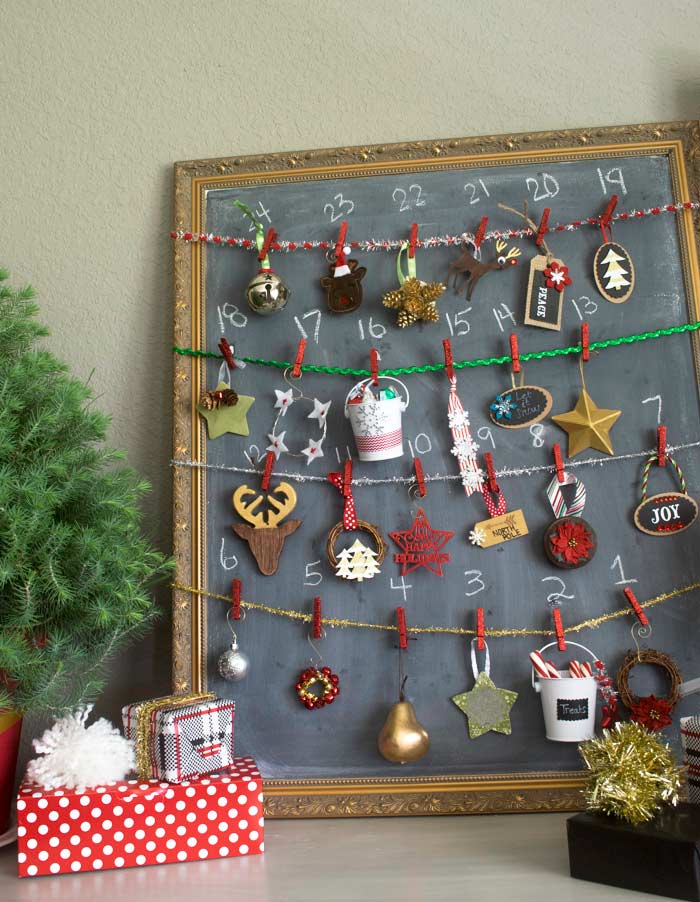
My tutorial is very easy to make and requires little handy work. You can purchase all 24 ornaments from the store, garage sales, online, etc. Or you can be adventurous and create 24 handmade ornaments. You can even print simple numbers in a fun shape from free printables online! I did create all the ornaments on this advent tree because I wanted to use up my holiday craft supplies. Most were simple. Add a pretty ribbon, a touch of paint, or layer some elements onto others.
I did use smaller sized ornaments because the table top tree isn't very large. If you were to use store bought or free printable numbers I would go for something about an inch to 2 inches in size! Amazon even sells these adorable ornaments in a set of 24 that are PERFECT for this project!
I didn’t come up with this on my own. I actually found the idea in a British magazine that I picked up on my last trip to England. It’s several years old. The idea originally came from The White Company. It is no longer being marketed, but they have some other cute advent calendars.
The original silver, white and gold palate was stunning, but I decided to jazz mine up with some colorful pops of red and green. Well, to be honest, I wanted the gold and white, but the kiddos veto'ed me. Since it was *technically* their advent calendar, I went ahead and let them have their way!

Making the ornaments was the most tedious part. It was a fun crafting evening though, and I really did use up a lot of my stash. So that part made me feel a lot better. Some of the crafty things I'd had for years!

If I had skipped that step, I’d say this project would be easily completed in a half hour— 1 hr max. Have an adult do the taping of the ribbon, but kids can help attach the ornaments to the clips. It would be a fun evening if you threw in some hot cocoa and Christmas music. Everyone can get involved in making the homemade advent calendar!
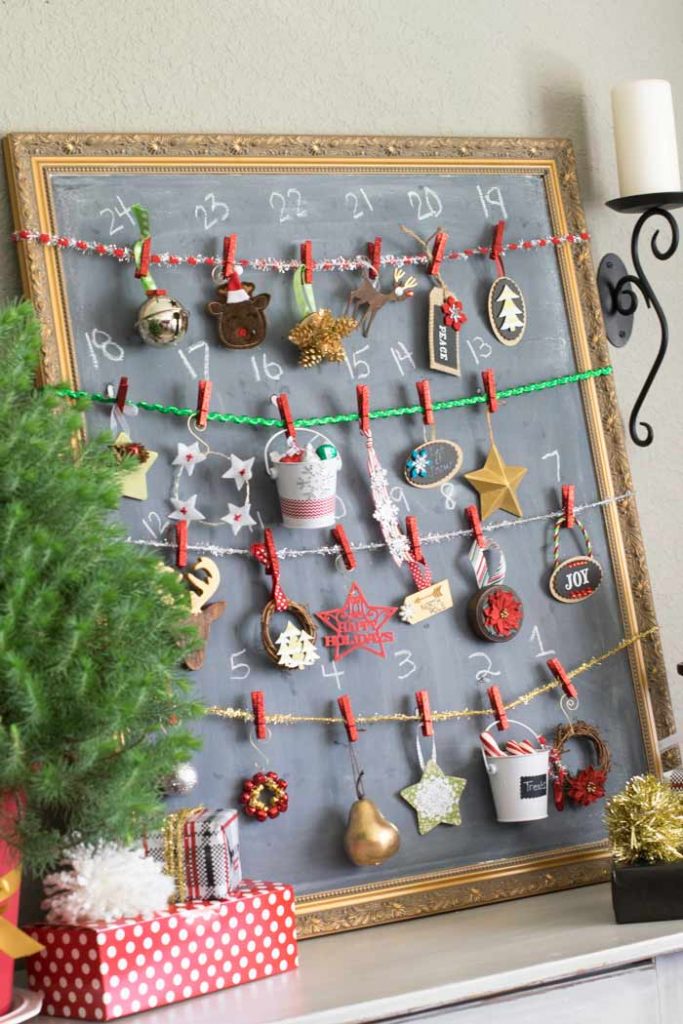
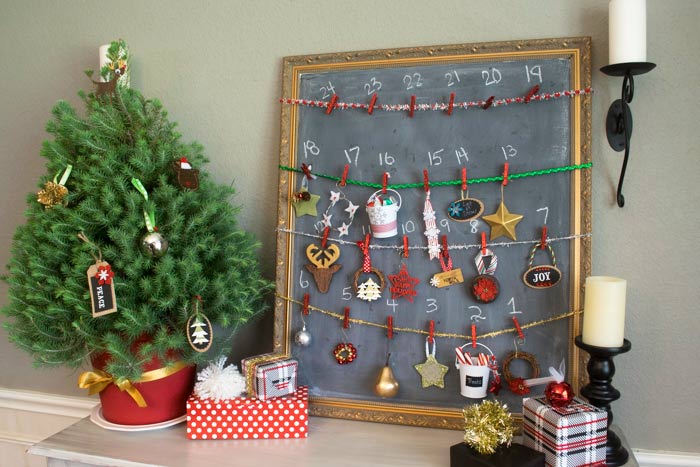
The Chalkboard I already had, but you can find a similar one here. Mine was actually a pretty hideous pink picture from the 80's that I found at the thrift store. The frame is classic though.
I simply used chalkboard paint directly on the glass. I rolled it on with a sponge roller and used a sponge brush to get the edges. I did it several years ago, and it's still going strong!
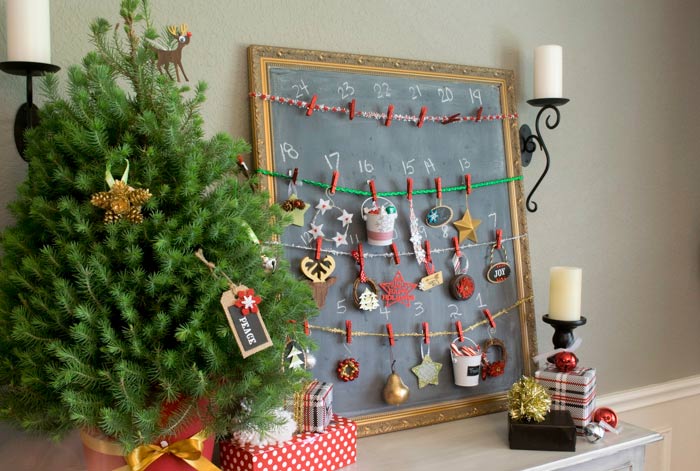
I used a real tree, that I grabbed at my grocery store, but an artificial tree would work too. Mine is about 3 feet tall. It went the whole season, which impressed me.
I might consider doing a large rosemary bush and then transferring to the garden in the spring. The smell would be great and it could be used for cooking later down the road. This time the kiddos were set on a real tree.
I can remember as a kid getting to decorate the tree was a big deal, so I really think my kids will like taking turns decking this advent tree. Update- 3 years later I can say that this is still ALWAYS a hit and they don't fight over whose turn it is. We keep a handy piece of paper that says which kids do what numbers.
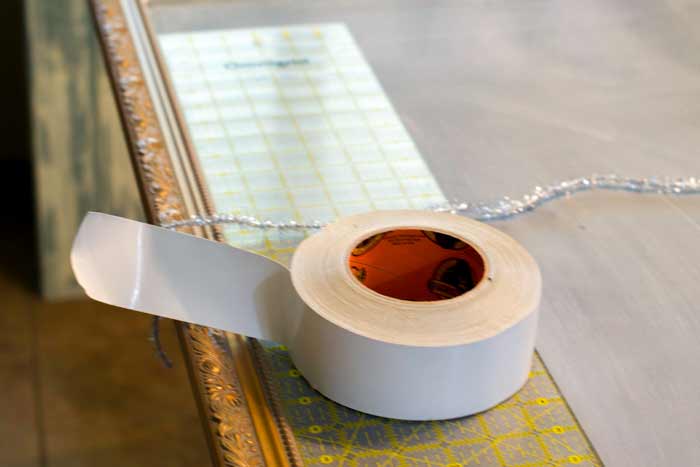
Making the homemade advent calendar is really simple! To get started, I used a large ruler and measured where I wanted my ribbon to go. Remember, the ribbon will sag a bit with the weight of the ornaments. I secured the ribbons on the back of the frame with my trusty Gorilla Glue Tape.
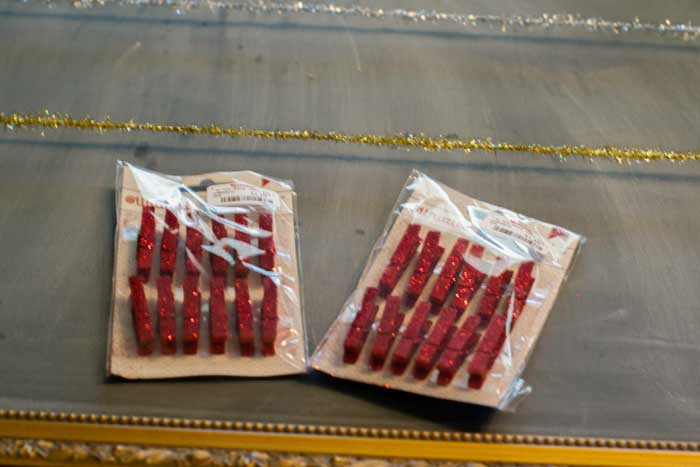
Next, I evenly divided and spaced out my glittery miniature clothes pins.
Once I had that done, I slowly added the ornaments. There were a couple heavier ornaments that I went ahead and secured the pin to the chalkboard to make it more sturdy. I used poster putty (I love this stuff!!!). I wrote the numbers in chalk right over the ornament.
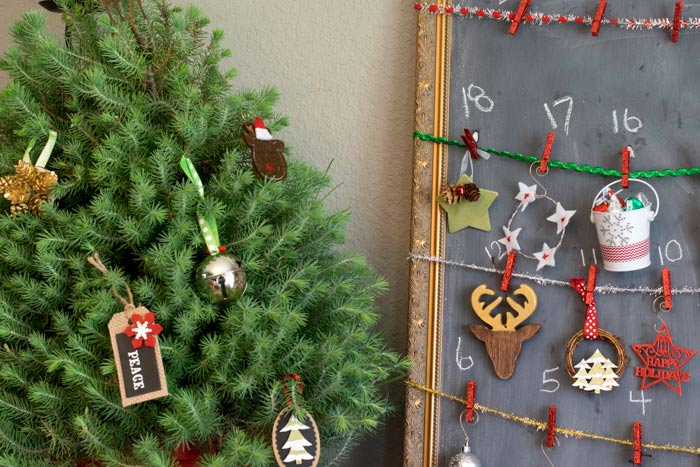
It was seriously that easy. No power tools, no wood to cut, nothing complicated.

I loved all the handmade ornaments! I couldn't stop looking at them, and obviously couldn't stop taking pictures of them!

There are so many unique pieces and they are all very easy to do, with very little time required.

The homemade advent ornament calendar is so easy to recreate— I hope you make one! If you are feeling inspired, I’ve added all the supplies you’ll need! The key components should be a different text color through out the tutorial!
Do you do an advent calendar? I’d love to hear about yours.
I was so excited when the pictures for this link up started rolling in. It just goes to show, an advent calendar can be made out of anything. Everyone made a unique idea! Special thanks to the wonderful ladies who joined me for this months challenge!
Other Advent Calendar Ideas


Lori@thestonybrookhouse says
Sara! This is absolutely adorable! I love all the little mini ornaments!
Sarah Eliza says
This is super cute! Love it. 🙂
Brooke Stephens says
I absolutely love this idea. It is so simple and darling. I will have to make one of these for sure. Thanks for sharing.
Suzy says
Love this twist on the more traditional advent calendars. Simple and sweet!
Mary K.- The Boondocks Blog says
This is really special. I'm a big lover of chalkboard paint. so this makes me happy to look at. And your dresser is pretty snazzy too !!
Jennifer {The Craft Patch} says
This looks so fun! Thanks for sharing such a great idea!
TheKimSix Fix says
Hey Girl! This post was the most clicked one of last week's You're Gonna Love It link up! that means you are being featured tonight on both Kathe and My blog! <3