
This post and photos may contain Amazon or other affiliate links. If you purchase something through any link, I may receive a small commission at no extra charge to you. Any supplies used may be given to me free of charge, however, all projects and opinions are my own.
A winter wreath on your front door is a cozy welcome to all your guests. This tutorial will show you how to make a basket wreath for Christmas and beyond! See the step by step process on how to assemble this inexpensive wreath, how to make it perfect for the holiday season, and how to modify it to be used all winter long!
Winter Door Wreath Using A Basket
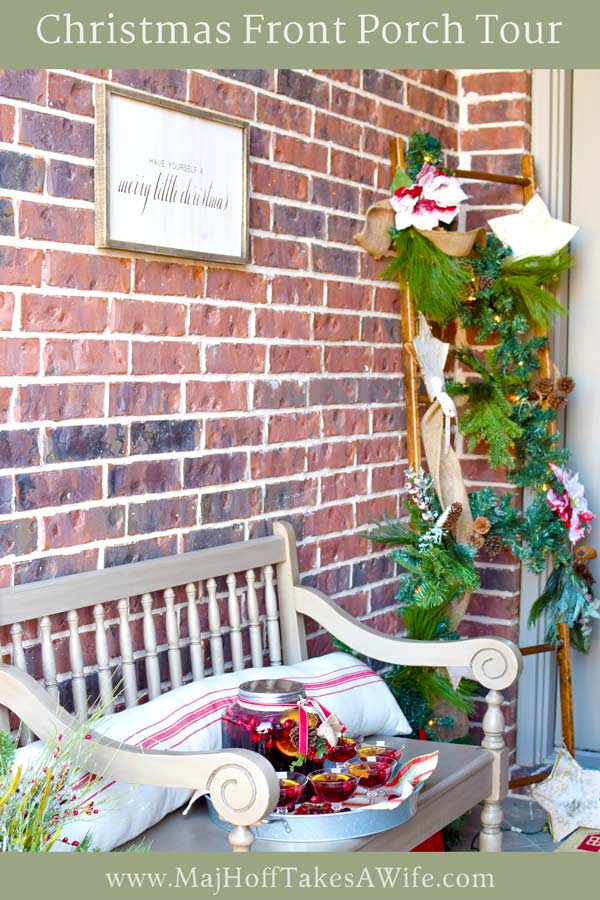
Last week I shared with you my Christmas Porch Tour which was so much fun! Thank you all for your kind words! The one thing you all seemed to love was this wreath! The best part about this wreath is that anyone can make it, with minimal supplies. It's deceptively easy!
I used items I had around the house, but they are all items you can find at your local craft store and Target. I'll link everything you'll need to make it even easier!
This post contains affiliate links. I only recommend products or services I use personally and believe would be a good fit for my readers. This comes at no added cost to you!
Let's get started!
How To Make A Winter Wreath For Your Front Door:
Supplies Needed For A Winter Wreath:
(I've tried to link to my exact product or something similar, Christmas supplies can sometimes go fast!)
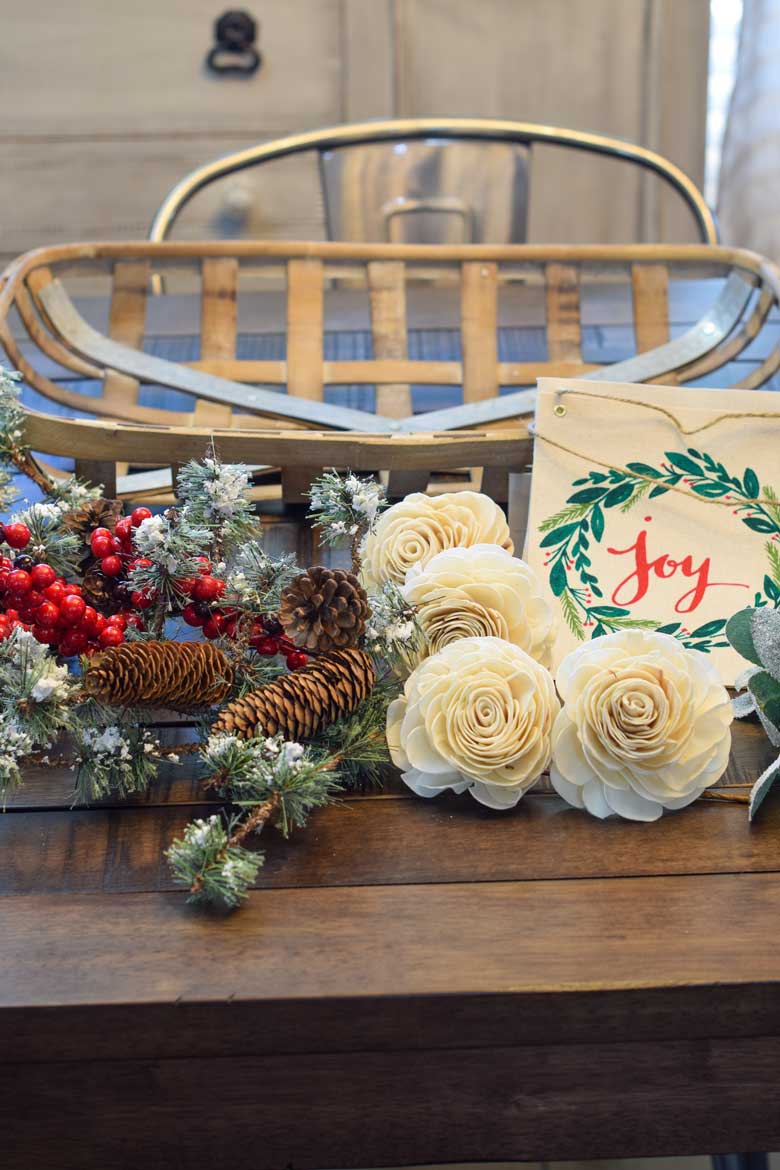
- tobacco basket
- 2 winter floral picks with evergreens, berries and pinecones
- natural sola rose stems
- 3 lambs ear picks
- floral wire or rubber bands
- Target dollar spot "Joy" Banner, or a similar customizable banner
- birch bark glittered star
- glue gun
- hair clips (hair clips and glue gun are totally optional, and not needed if you are using floral wire)
- floral shears and wire cutters
Assembling your Christmas Basket Wreath:
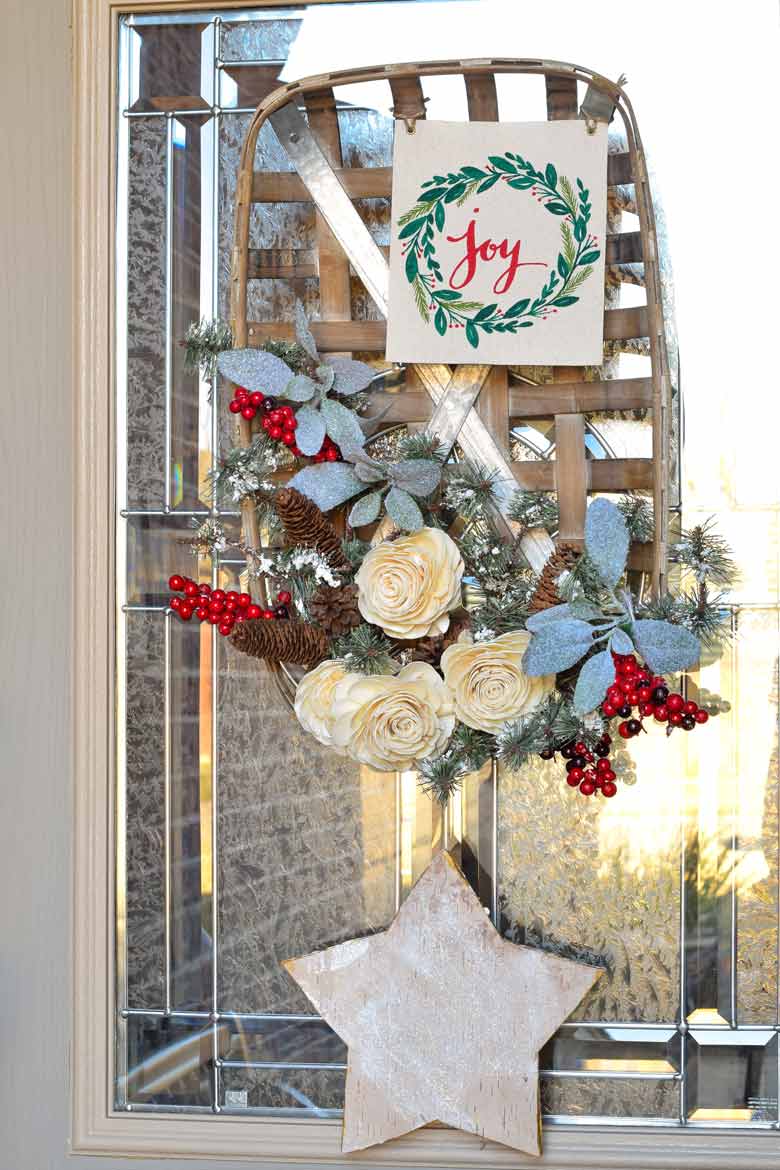
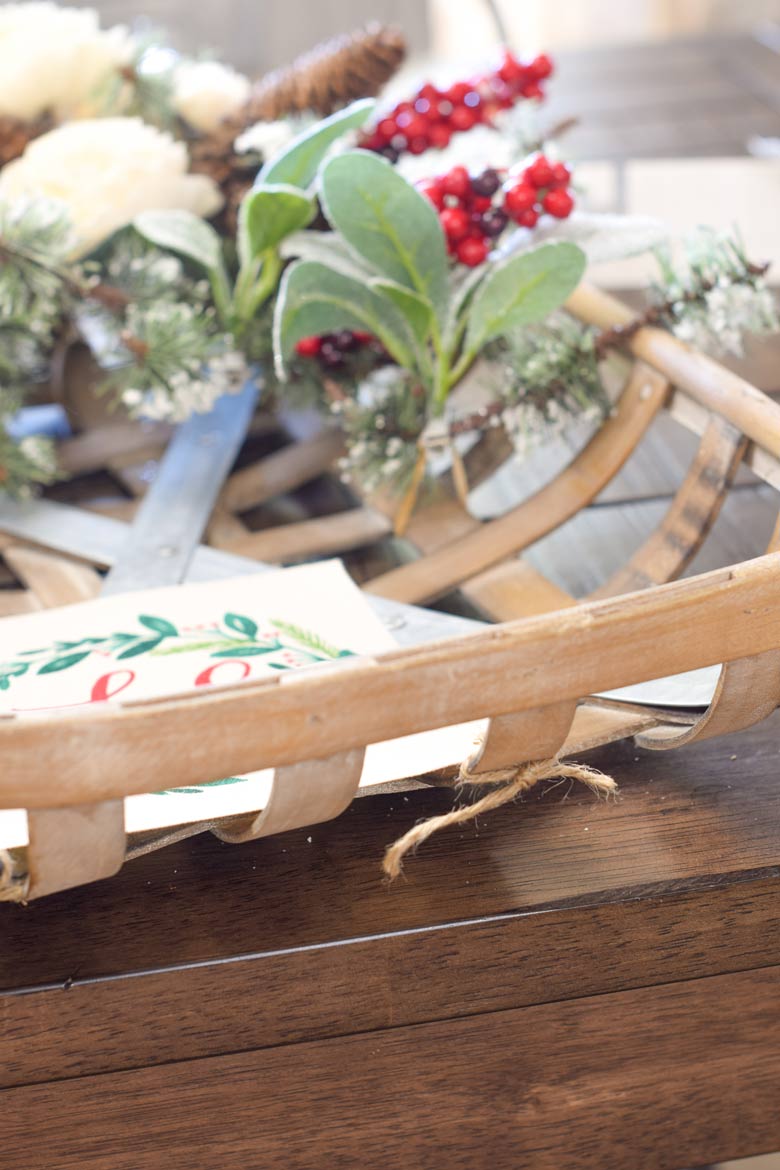
The first thing we are going to do is to roughly place the 2 evergreen picks inside the tobacco basket to get a feel for how they will fit. I've placed mine in a L shape. So that one goes up, and the other goes to the side. Once you've gauged exactly where you think they will fit, use wire cutters to cut off any excess stem.
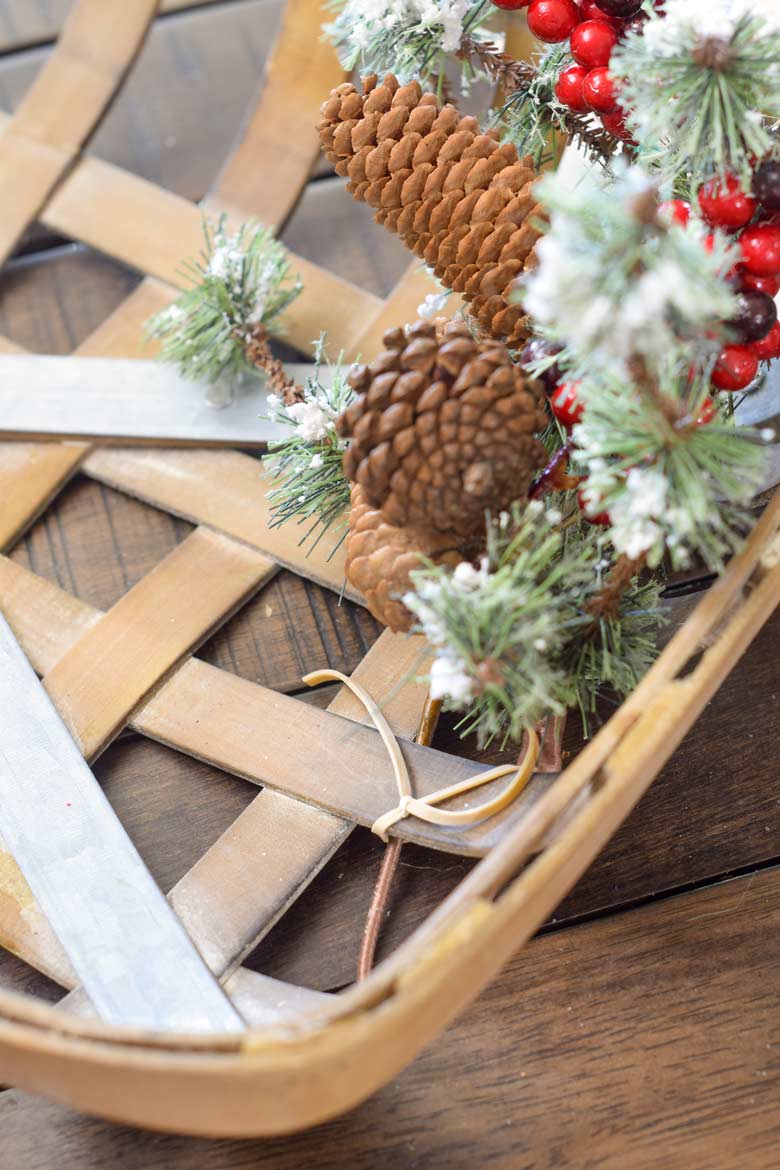
I like to reuse items (because I'm thrifty!), so everything placed on the tobacco basket is removable. I couldn't find my floral wire, so I simply snipped a few rubber bands and used them to attach the evergreen stems to the basket. String would have worked too, but I liked the way the rubber band blends in and that I can get a tighter fit by pulling it taunt before tying.

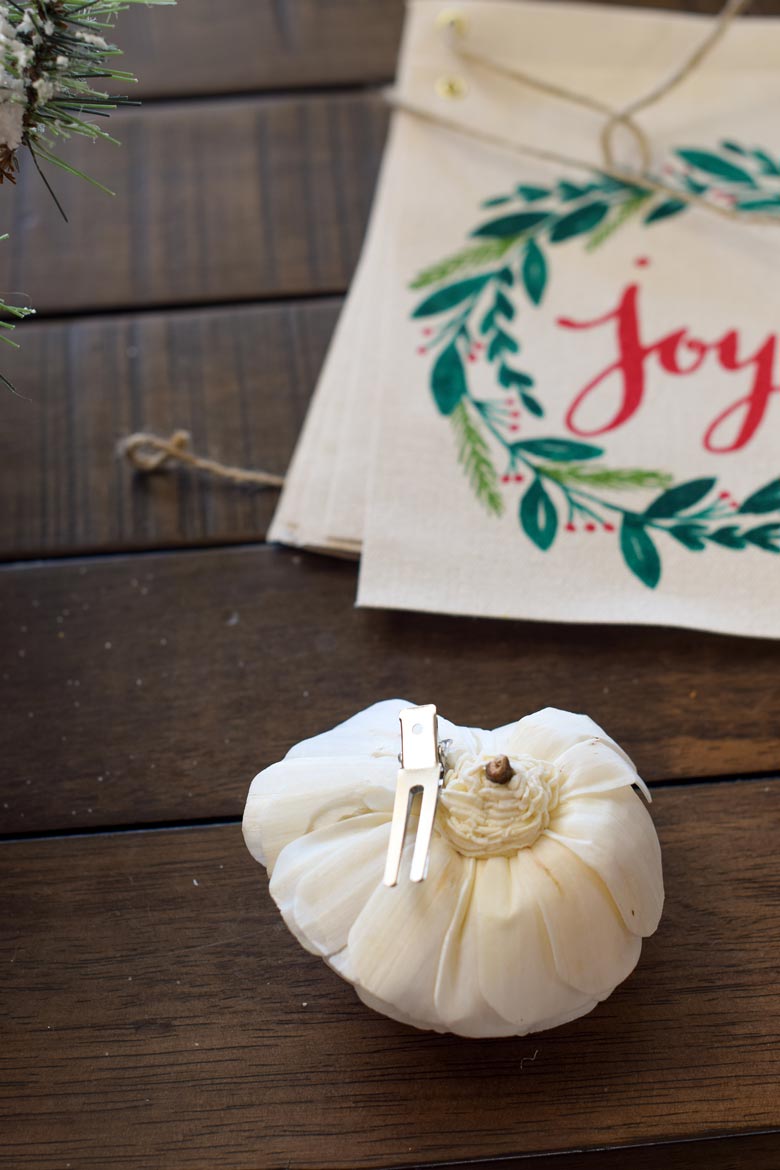
Next, let's place our roses. Aren't these so fantastic? I loved that they looked like wood and was so surprised to realize they are made from a foam material. How cool is that?!!! The stems are long, so I suggest trimming those down short and using floral wire to connect them to limbs of the evergreens.
Remember how I couldn't find my floral wire? I decided to do a trick before that I've done on other wreath elements that I thought I might want to use again. I attached an alligator hair clip to the back of the rose. Then I simply had to clip it to the evergreen pieces. I was able to move them around and really get the exact look I was going for without having to redo floral wire.
That's what the glue gun was used for! I gathered the roses into the bottom left corner which helps cover up where the L shape of the picks connect. Next, I clipped my lambs ear picks on. I found mine in the Christmas ornament section and they had clips on them, along with specks of glitter. I'm a sucker for lambs ear and it gave an added texture to the wreath that I just love!
I thought the upper right hand corner was looking a bit bland. I thought I would add a mini wooden chalkboard or tag with a fun sassy saying cut from vinyl on my Cricut machine. When I went to my craft room, I saw the "Joy" banner that I had found at the Target Dollar Spot and I knew it would be perfect! Plus, less work for me!
I simply used the single end piece with the design on it (there are 2 wreath designs total in the banner, and 5 blank). It already had grommets in it, and I used the string that came with the banner. I tied both ends on one of the woven spokes of the basket, and then clipped the string ends.
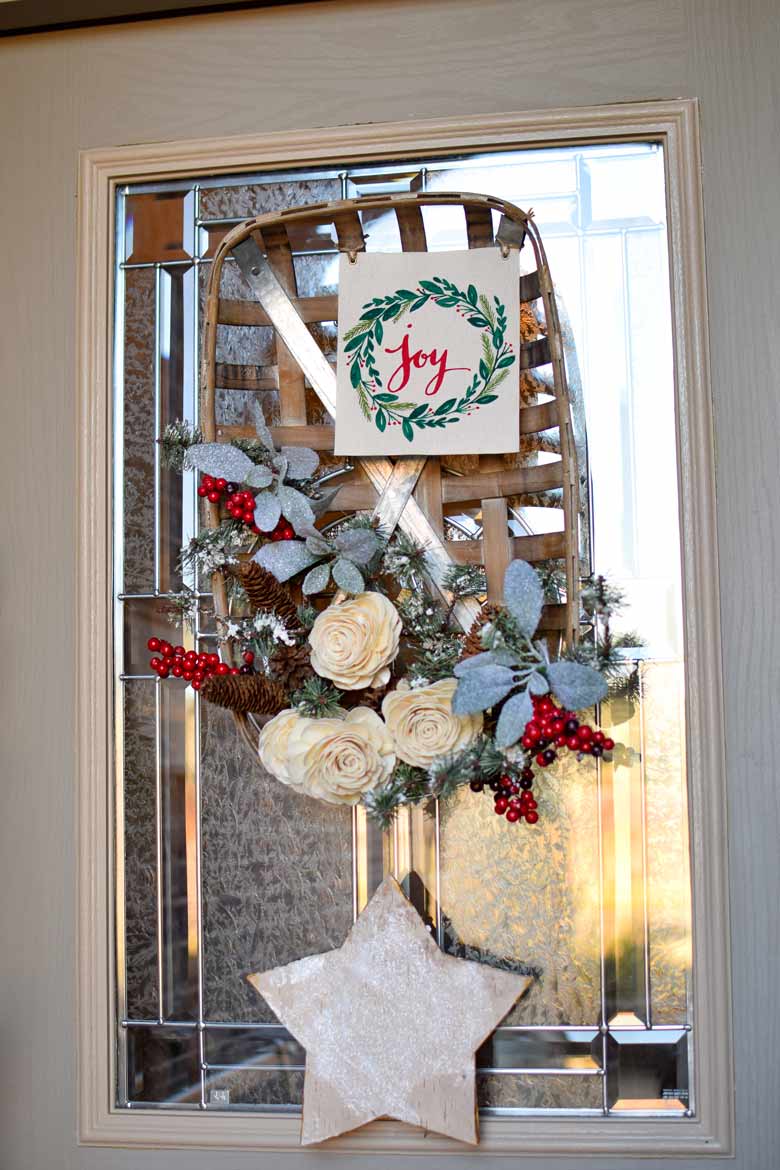
The star was a last minute addition. I used them several years ago in my 2013 house tour. How is it possible that was 5 years ago? I added them onto the wooden ladder outside, and thought it would add to the wreath to have one dangle there. I'm so glad I decided to do this!
You could use a wooden star or even create your own! The star can be made by covering a cardboard star shape with birch bark or scrapbook paper, and adding glitter or a snow effect. My friend Amy has a great tutorial on how to make birch bark look like snowy logs!
How do I make this Christmas wreath a plain winter wreath?
Remember I said I was thrifty? I'm all about cutting costs. A few years ago, I created this fun woodland winter wreath that could be displayed several months as well. More bang for your buck!
To make this a winter wreath, simply remove the star and the "joy" banner. The joy banner came with blank rectangles as well, so I will probably either do our monogram, or a fun winter design on it. What would you suggest?
Want to see the full tour?
Need a Christmas cookie after all that crafting? Okay, so it only took about 10-15 minutes to make, but hey, we like cookies! Grab my recipe for gingerbread reindeer cookies! If you are resting and searching the internet, you might enjoy browsing my Fixer Upper Inspired Christmas Home Tour.
Tips for hanging your wreath!
*** When I hung from the top of the basket, it wouldn't sit evenly with my door. I switched from an over the door wreath hanger to a simple suction cup hook, and hooked the basket a few rungs down, right behind the "joy" banner where no one can see it. That allows it to lay relatively flat!
I hope you've enjoyed this tutorial! Don't forget to pin it to your favorite Christmas craft or decor board on Pinterest!


Comments
No Comments