
This post and photos may contain Amazon or other affiliate links. If you purchase something through any link, I may receive a small commission at no extra charge to you. Any supplies used may be given to me free of charge, however, all projects and opinions are my own.
Need some large scale artwork for your walls? See how easy it is to make your own canvas with this simple step by step tutorial. Save a ton of money will a little bit of wood, some canvas fabric, a stapler and a drill!
Make Your Own Canvas Art Work
This post is sponsored by Frog Tape. All opinions are my own. This post also contains affiliate links. I only recommend products or services I use personally and believe would be a good fit for my readers. This comes at no added cost to you!
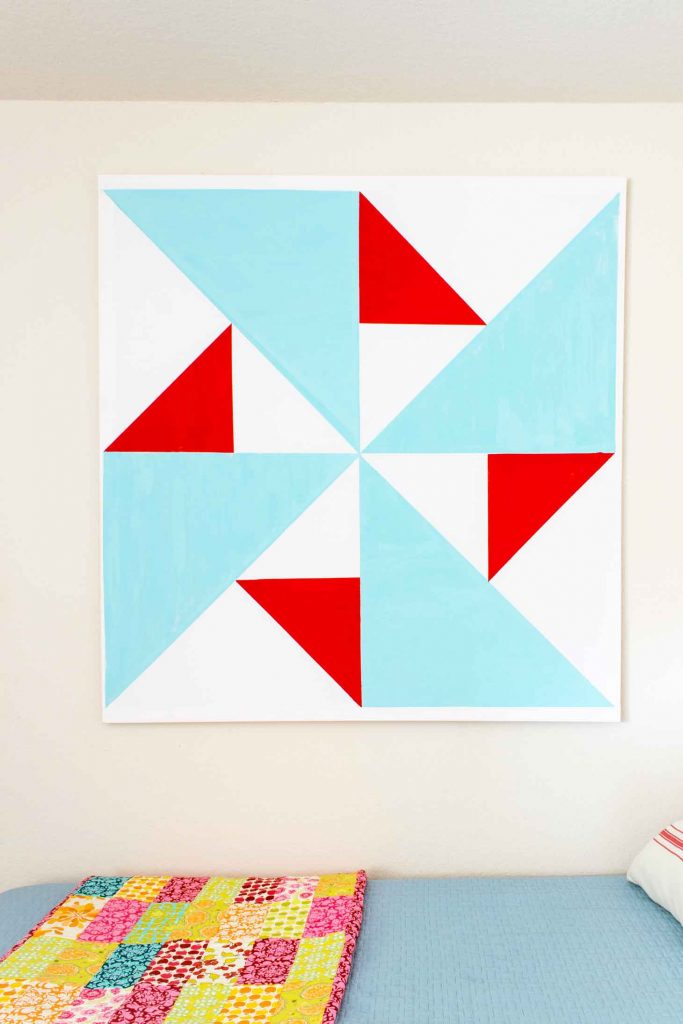
My guest room walls were looking pretty lonely recently, so I decided to tackle the dreaded white space. I debated adding shelves, but since the bed sits right next to the wall, I decided art work would be the best bet but I couldn't find any paintings I liked.
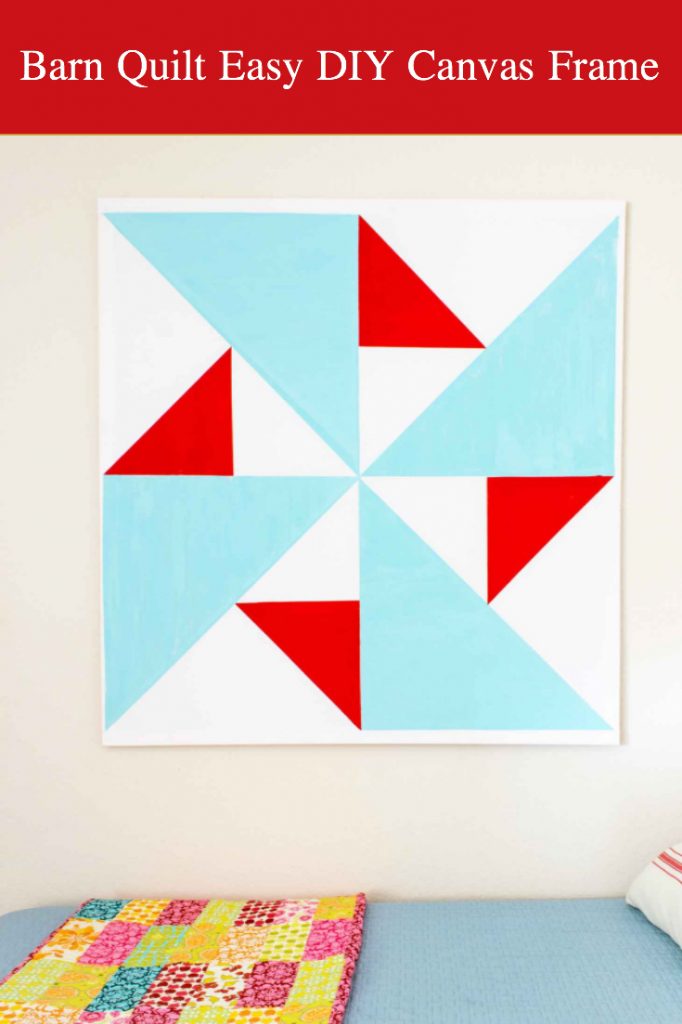
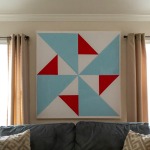
I finally decided to make my own artwork after seeing a fabulous video of a painter inspired by barn quilts. My vision doesn't allow me to sew anymore, so I decided this would be a great way to incorrporate the fun colors of the quilts. I got a reality check though when I visited my local hobby shop. A 36 x 36 frame was still expensive, even when ½ off. I sort of shelved the idea for a while.
A few weeks ago, I started noticing a big trend in the craft world- where people are deconstructing canvases to create stained wooden frames. It's a really cool process. Somehow that trigger the lightbulb in my head, that you could just as easily construct a canvas! The best part is you need very few supplies.
Supplies For Making Your Own Canvas Art Work:
- Frog Tape
- 2 (1 x 2) lumber - I grabbed 8 feet (mine is approximatly 48 inches wide
- 1 ½ yards canvas fabric
- Kreg Jig with Screws
- Drill
- staple gun & staples
- assorted paints
- fabric medium
Steps to DIY your own Canvas Frame:
Cut the lumber to the dimensions you'd prefer (square/ rectangle). Remember that 2 sides will be slightly shorter because of the way they butt up at the joint. Do the calculations carefully!
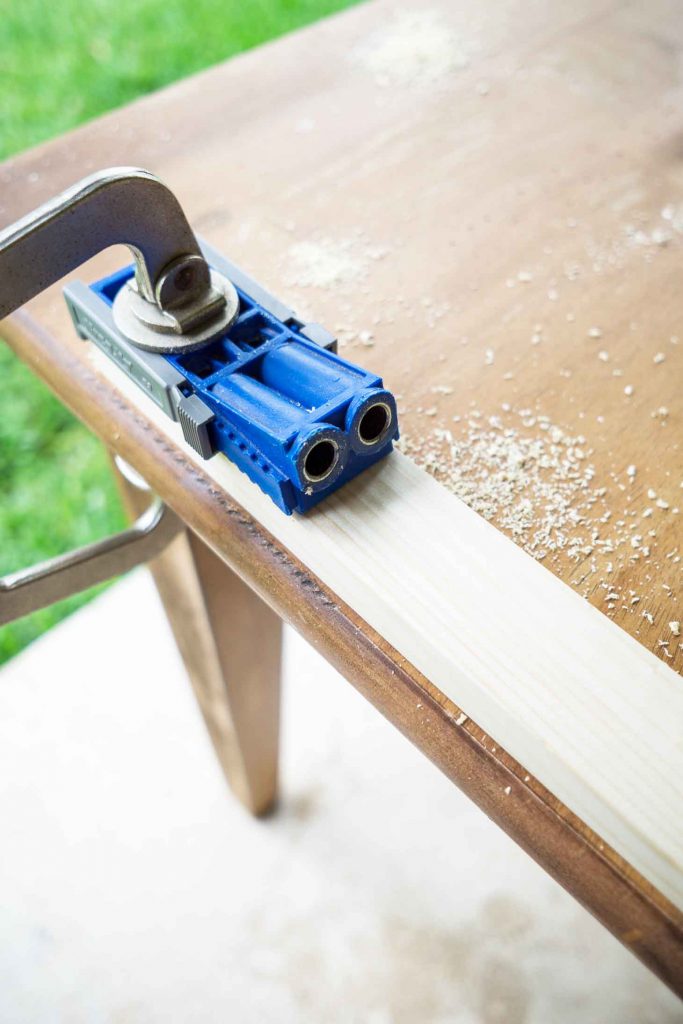
For my oversized canvas, I used a Kreg Jig to connect the sides. You can also use simple screws.
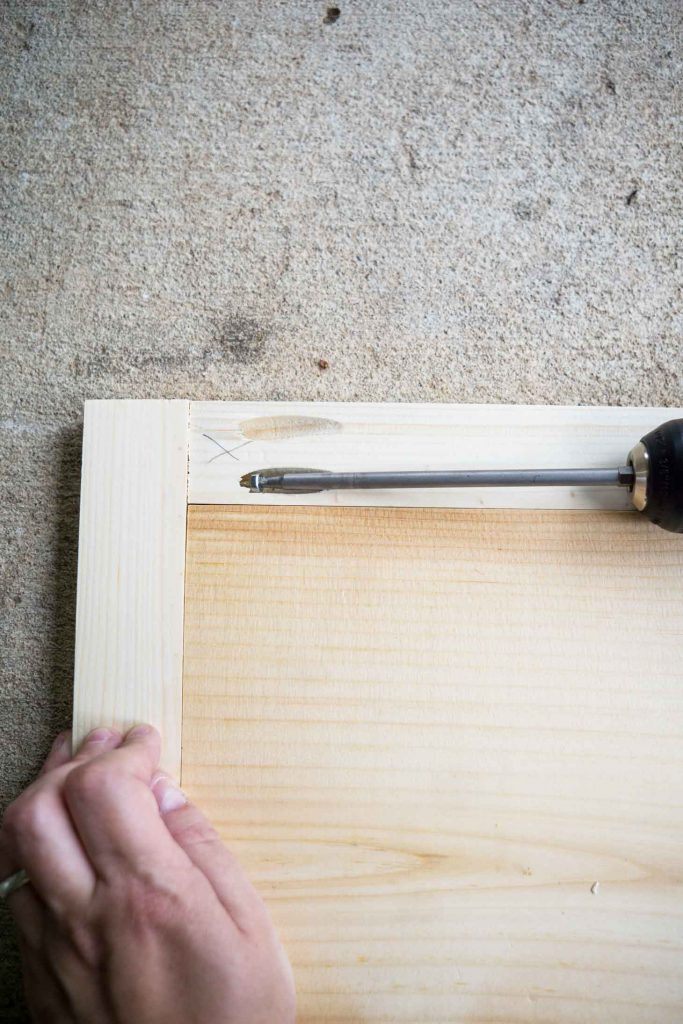
Here I am connecting the 2 boards. I used a 3rd board to make sure I had a nice right angle.
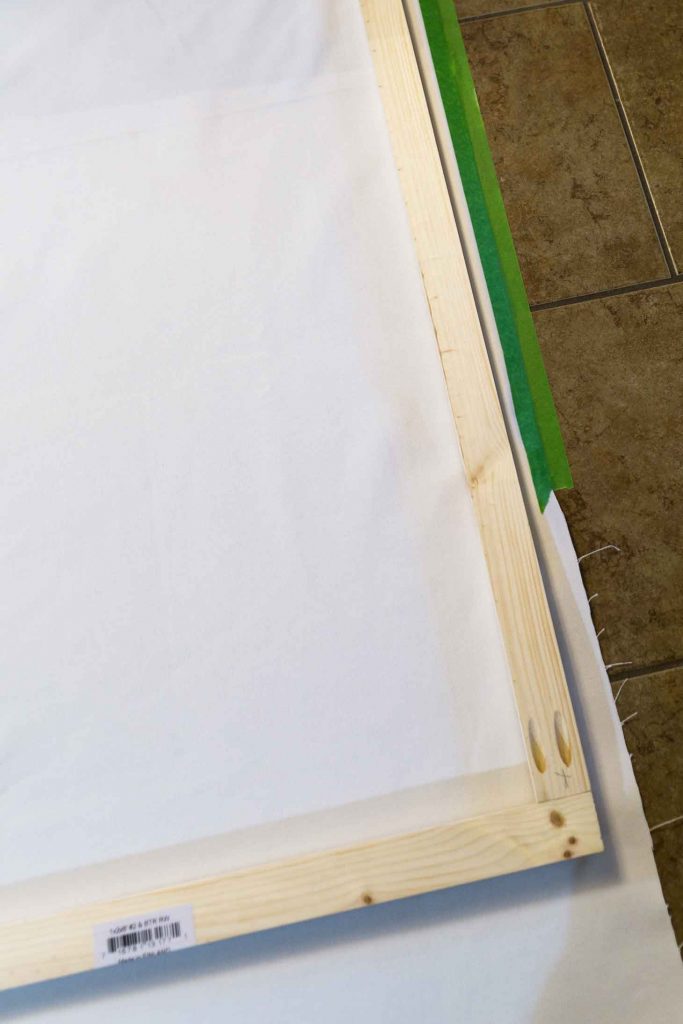
I then ironed the canvas fabric as much as I could. I laid it on my tile floor, and then laid the frame on top, making sure everything was as smooth as possible. To make sure the canvas fabric didn't shift, I used Frog Tape to secure it in place. Pretty clever, huh!
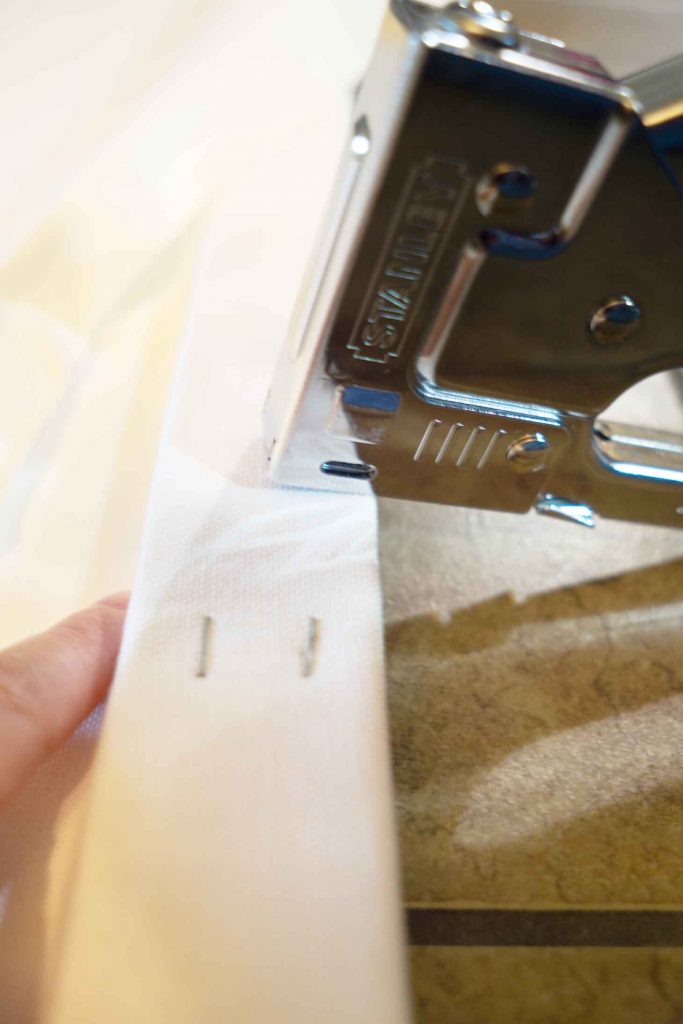
A stapler is key when it comes to making a canvas frame on your own. This is the most time intensive part. Pull your fabric taut in the middle of each side and staple. Next, do your corners, folding in at angles on the corners. Then staple all around, making sure you stretch out any wrinkles, and while keeping the fabric taut and even.
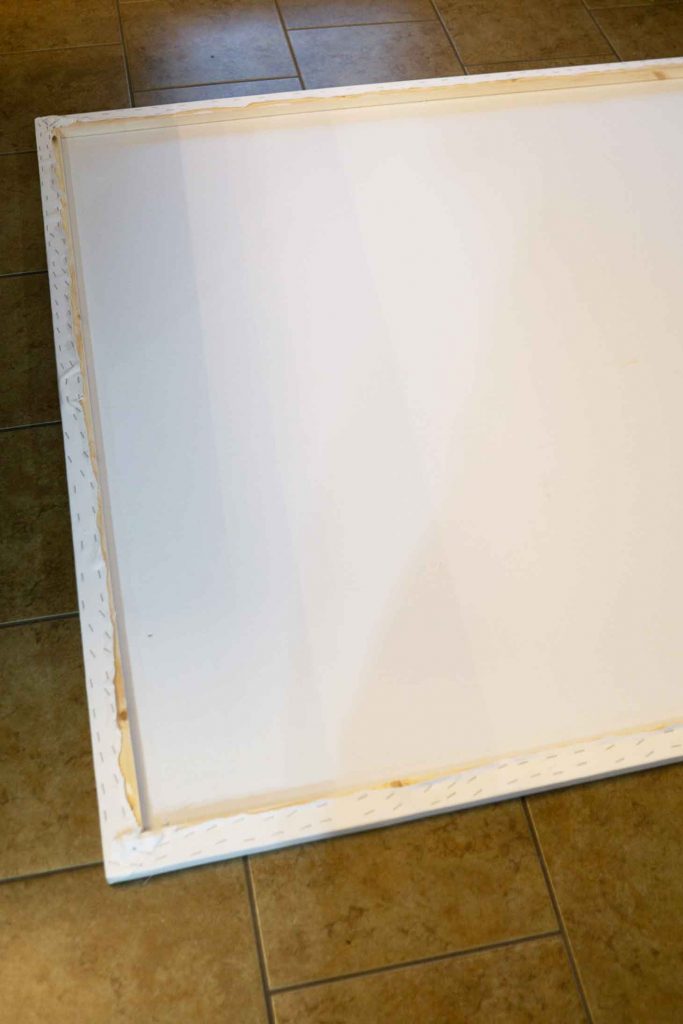
Trim any access fabric off with sewing shears.
Hooray! Your canvas is ready to go!
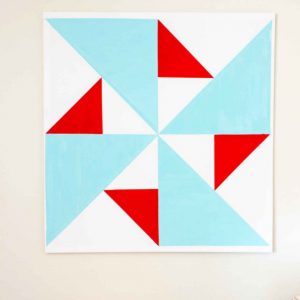
Remember how I said I was inspired by barn quilts? I recalled a book I purchased called "The Civil War Love Letter Quilt: 121 Quilt Blocks Inspired by Love and War". I went through and picked my favorite pattern.
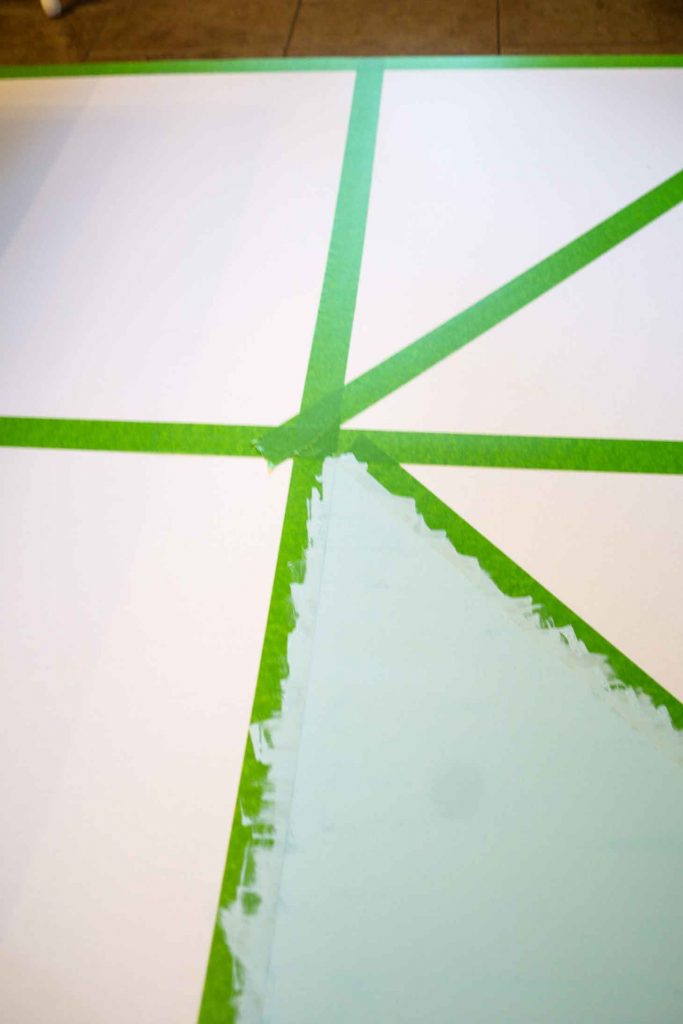
I then used a light pencil and Frog Tape to start creating the design on the canvas. It's tedious, but the results are so worth it.
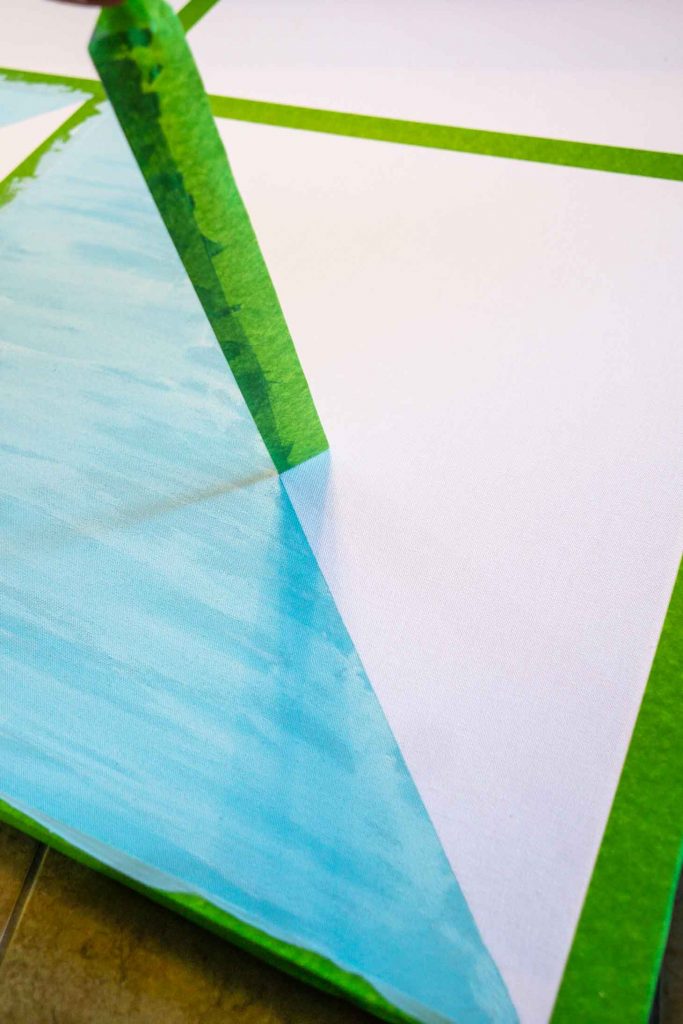
Frog Tape is the key to crisp paint lines! I painted in the designated areas with my paint (mixed with fabric medium). I then allowed it to dry 5-10 mins, and then while slightly damp, peeled the tape off. I love the "magic" formula that Frog tape uses that ensures nothing seeps under the tape! It's a lifesaver for projects like this!
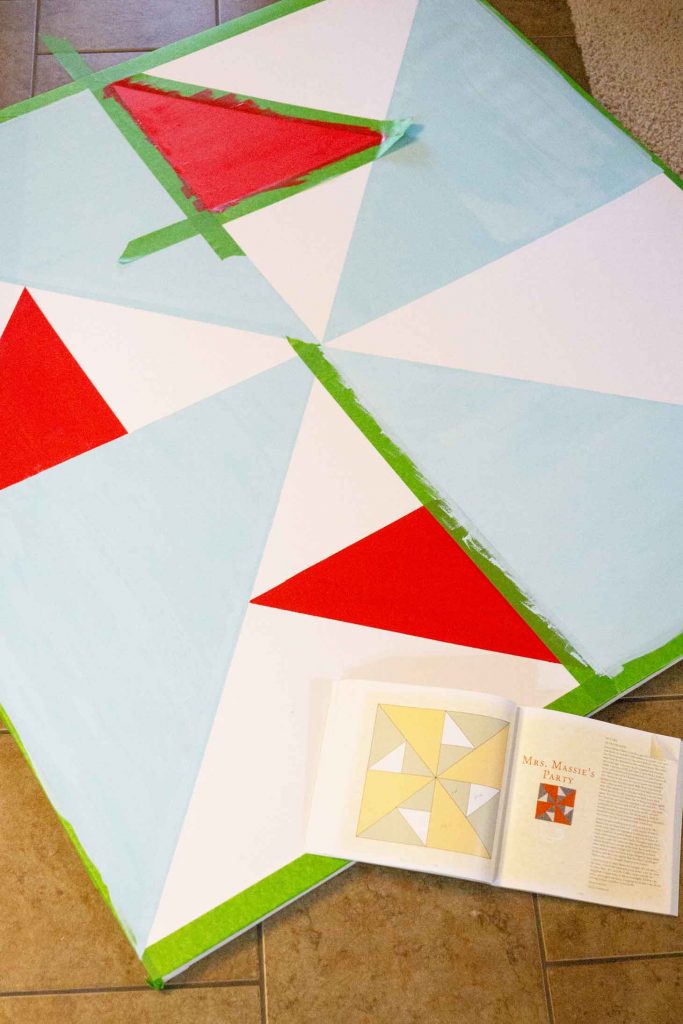
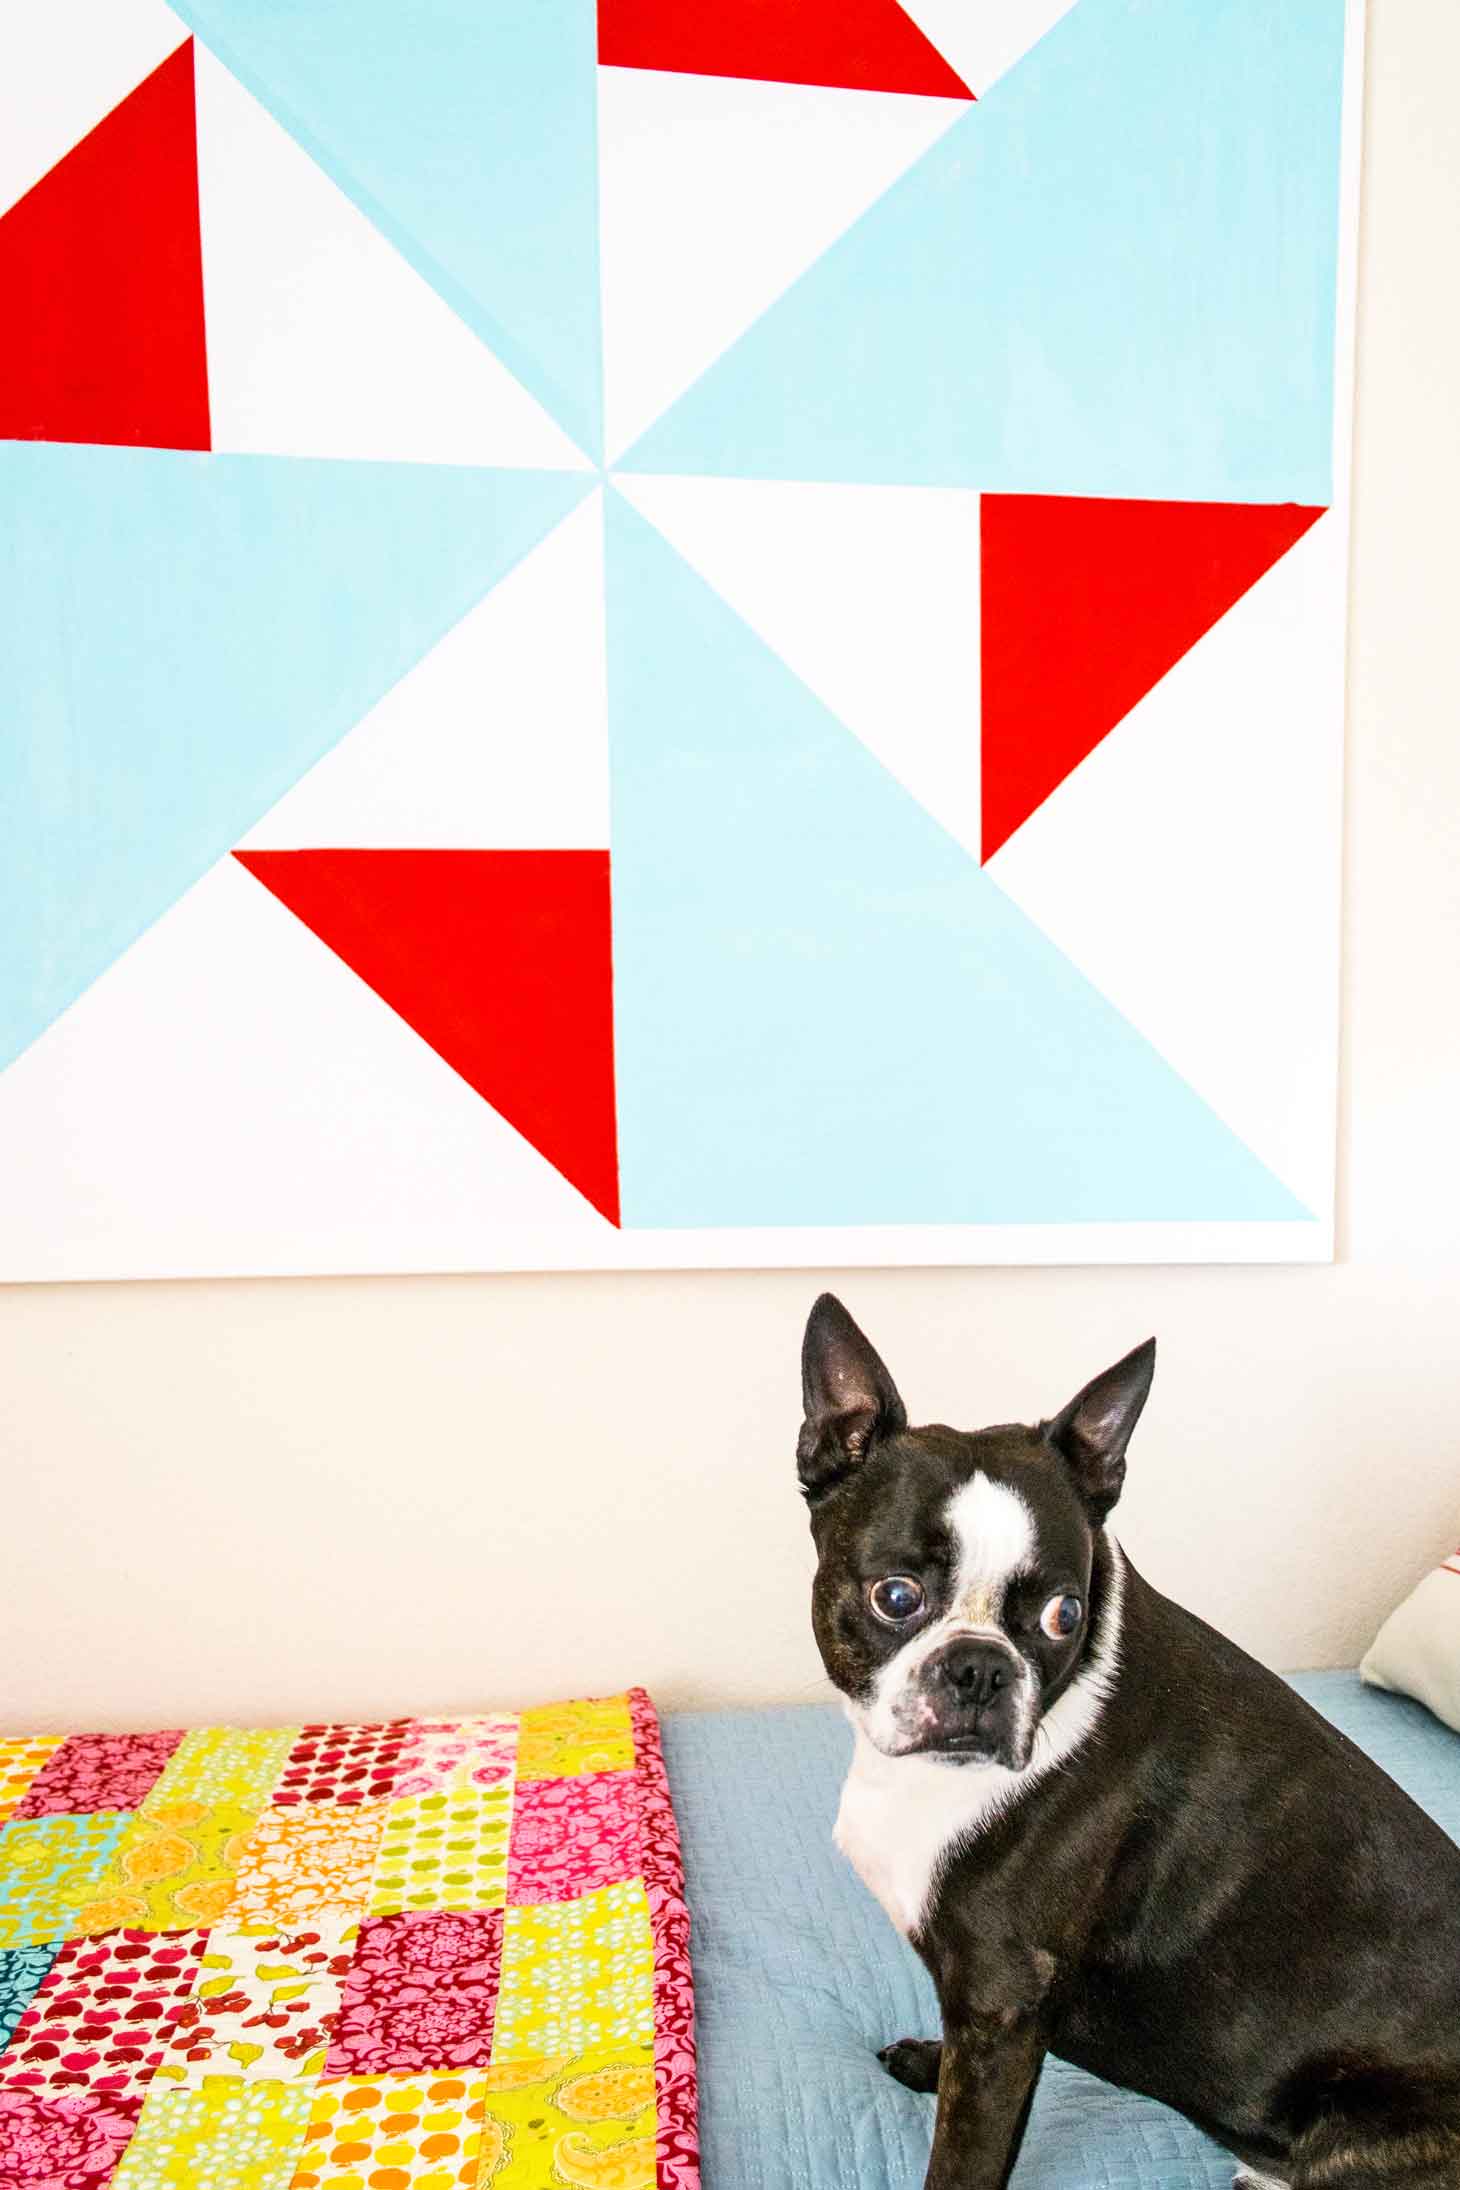
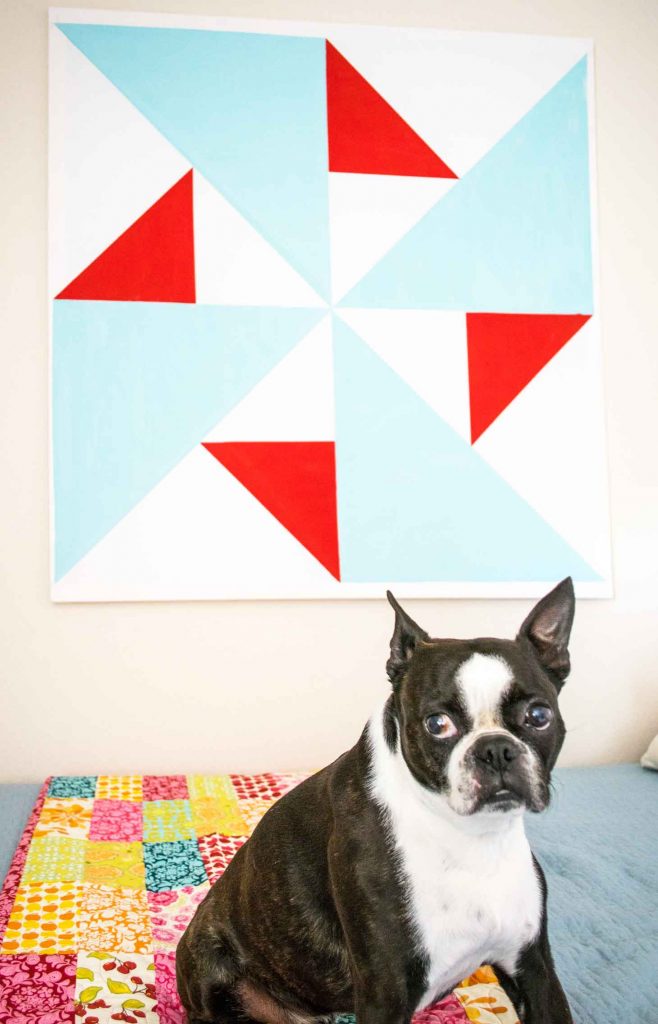
The hardest part was waiting for the paint to dry so I could tape off a new section. What do you think about the design I used? I love the double windmill effect the square has!
Why make your own canvas?
- Pick any size you want! No need to only use what's on the shelves at your favorite craft or hobby store! The possibilities are endless!
- DIY canvases are less expensive. By purchasing canvas in the fabric section vs canvas that had been treated, I paid about 1/10th of the price. You can purchase the liquid needed to "prime" the canvas, but I skipped it.
- I love artwork, but can tire of it easily. Or maybe I've changed all of my accent pieces to a different color. This makes it easier on my wallet to switch artwork out.
Don't have time to make this now? Be sure to pin it to your favorite board on Pinterest!
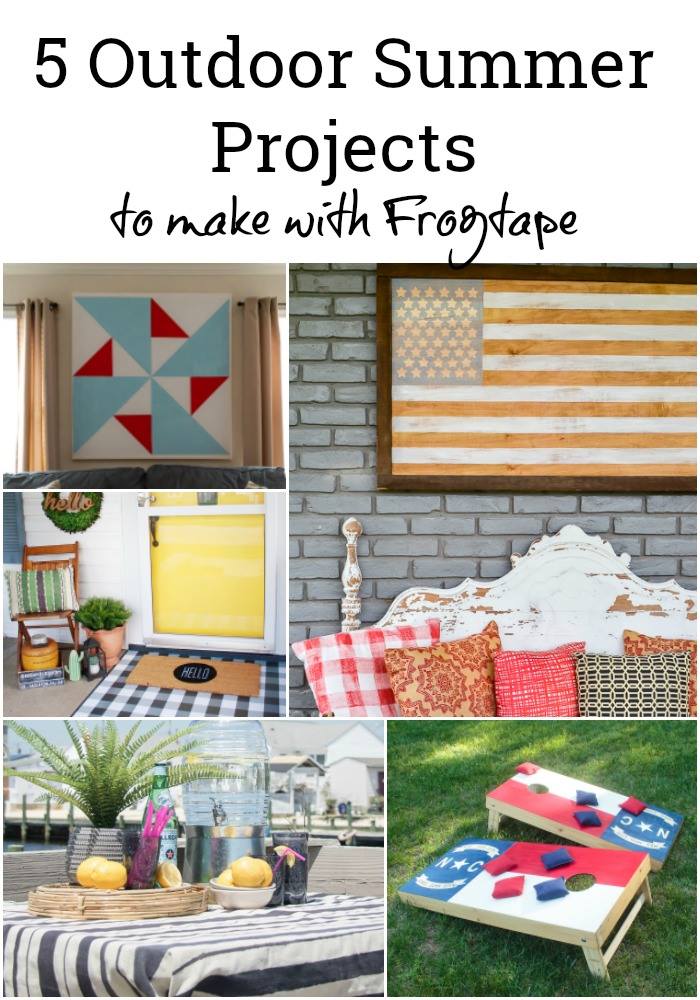
I love the way it makes my quest room wall no longer look so boring! Have you ever used Frog Tape for a project before? I'm not the only one who is a big fan! Check out these other amazing projects using Frog Tape!
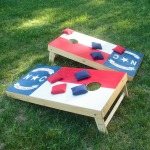
NC Custom Flag Cornhole Boards
What would you do with a roll of Frog Tape? Leave me a comment with your idea below!
Want more great crafty ideas? Follow my Pinterest "Crafty Things Board"
You might also like these easy DIY projects:

Monogrammed Galvanized Oui Jar
Gild glass or metal to make a stunning Gold centerpiece!


kim says
I LOVE this - I can't sew and any non-sew quilt thing get me. The design you picked is perfect and I could totally do this. The barn quilts are a big thing right now and I can see why. so cute!!!
Amy Buchanan says
I never would have thought to make an oversized canvas like this, Sara. But now you've inspired me to make my own quilt block for the porch. I'm thinking something in a patriotic motif for July 4th! Good thing I have plenty of FrogTape on hand!
Deb Foglia says
Sarah this is such a fun piece of artwork that you created. It looks so expensive too!
Kristy Robb says
What an awesome pop of color for your walls! I adore that color combination too. Great project! Cheers! Kristy