This post and photos may contain Amazon or other affiliate links. If you purchase something through any link, I may receive a small commission at no extra charge to you. Any supplies used may be given to me free of charge, however, all projects and opinions are my own.
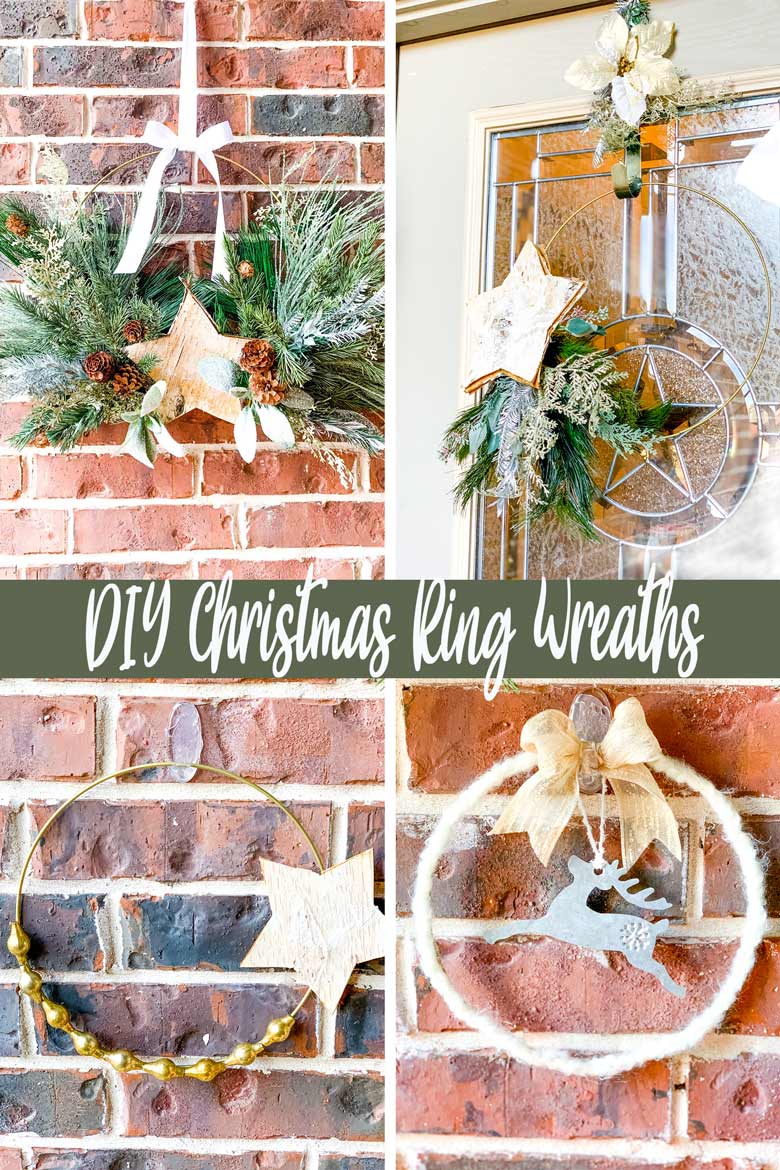
Metal hoop wreaths are all the rage right now, from modern to farmhouse, you can't pick up a magazine without spying at least one! DIY your own for the Christmas holidays using basic supplies, metal wreath rings, and just a few holiday floral stems. Here are 4 gold hanging metal hoop wreaths with step by step instructions to get you inspired to create this easy craft!
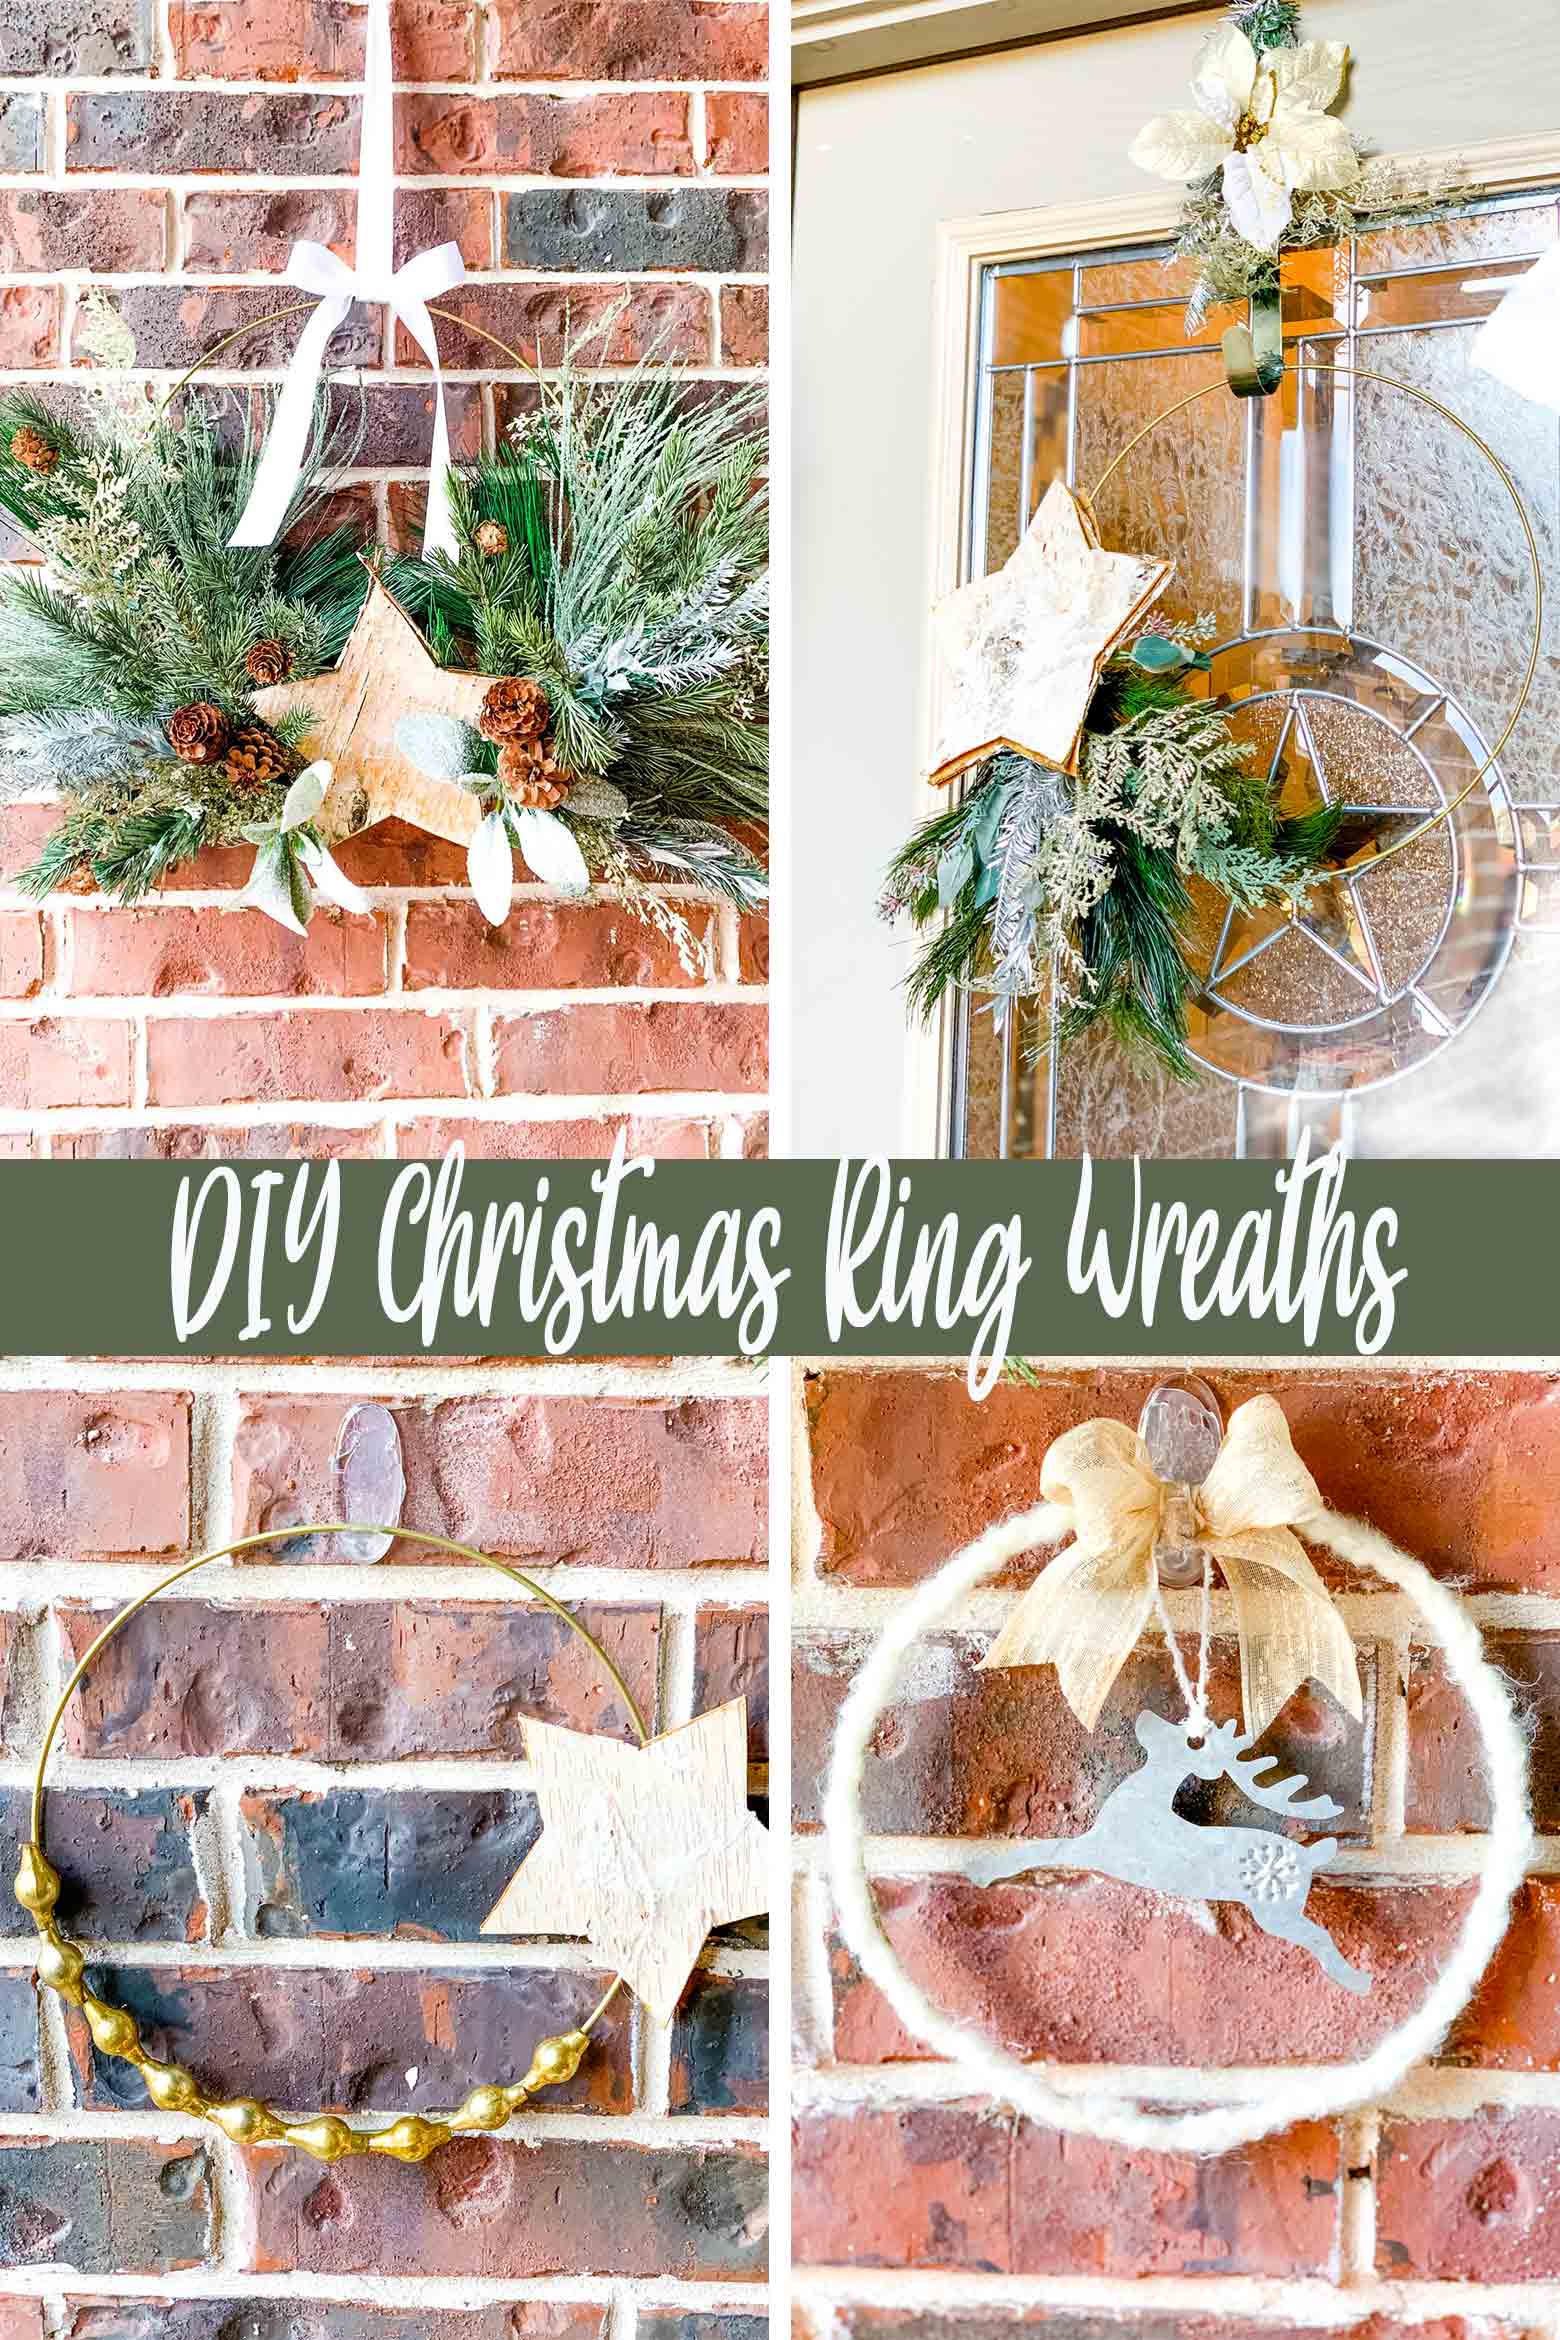
Thank you all again so much for your kind words on my 2020 Christmas Front Porch Tour I posted a few days ago. I love that you all got my sense of humor with my "Staying Home For the Holidays" sign and I hope you got your free SVG file to recreate your own (simply hop on over to that post!). So many of you also requested the instructions for the wreaths so I'm happy to share them with you today!
These four wreaths took just a morning to put together. Some go together faster than others. None are complicated, and a beginner can make them for sure! The possibilities are endless, with a few tweaks they can be modern, farmhouse, classic, or even funky. Totally up to you!
How To Make A Large Christmas Wreath On A Metal Ring:
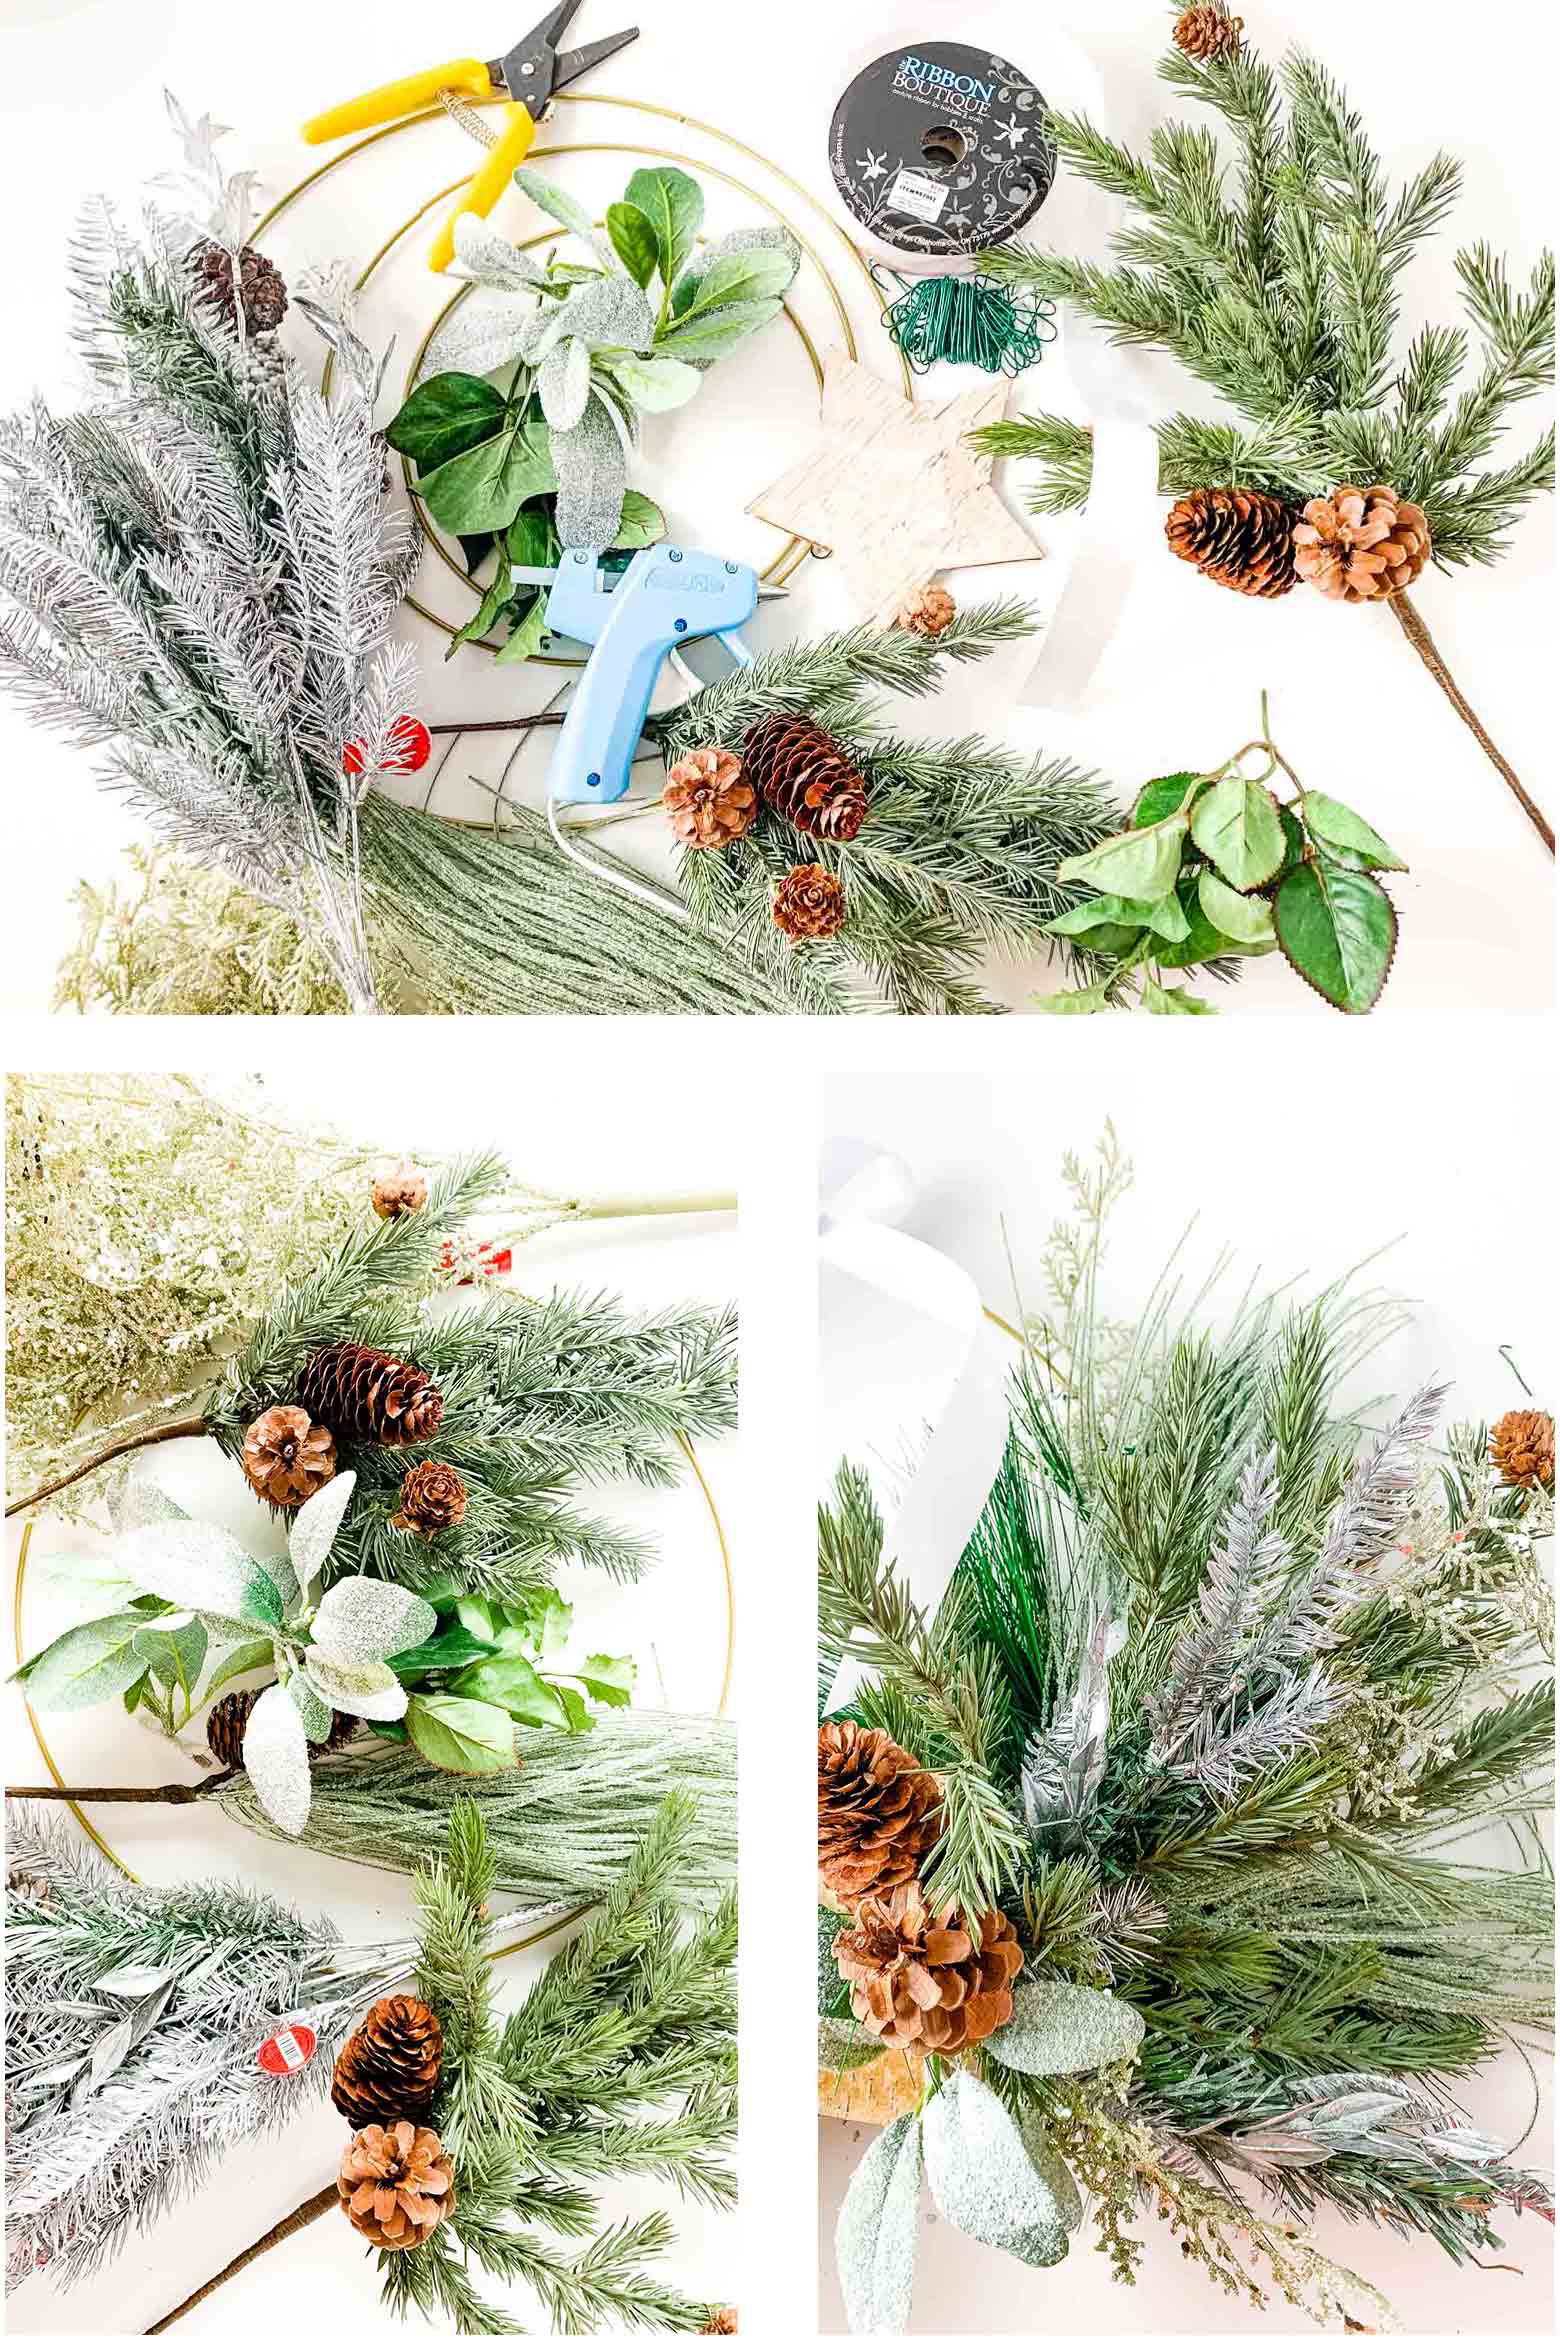
Gather your supplies!
Supplies Needed:
- metal hoops for wreaths
- Floral stems
- Floral wire
- wire cutters
- hot glue gun
- ribbon of your choice
- small elements to add on, such as pinecones, lambs ear clips, or little signs / words
I grabbed my metal hoops in a 3 pack from Walmart for under $3. They are just shy of 8, 10, and 14 inches. The floral stems I had on hand. I always buy a ton when they are on clearance after Christmas, even if I don't like them. At around 10-30 cents apiece, I don't mind spraying them with paint, or cutting off parts I don't like.
For the floral wire, I used 26 gauge. When I couldn't find it at first I used bendable wire ornament hooks! I also couldn't find my wire cutters either so I started with basket reed cutters (not the same!). Halfway through I remembered where I had stashed them, LOL! So much easier!!!!
When you are picking your floral stems, you'll want to select picks that have a variety to them. In the picture above, you can see how much texture the wreath has since I used so many different types. I added in gold and silver stems for that glam look and mixed it in with classic greens and other varieties of pine needles.
Before cutting them, layer them a bit and see what you like. If you think one should be on top, one more towards the back (the bigger in the back tends to work the best). I kept this hoop even on both sides, so I made sure I had enough of each for each side.
Since this floral stem was so bright and glittery, I wanted it on the back so it wasn't overwhelming. I also didn't use the whole stem and cut off the portion that I wanted. I bent the leaves out far so that when other stems were stacked on top, it wasn't fully covered. I also made sure the connection point of the ring was at the top where I knew the bow would hide it.
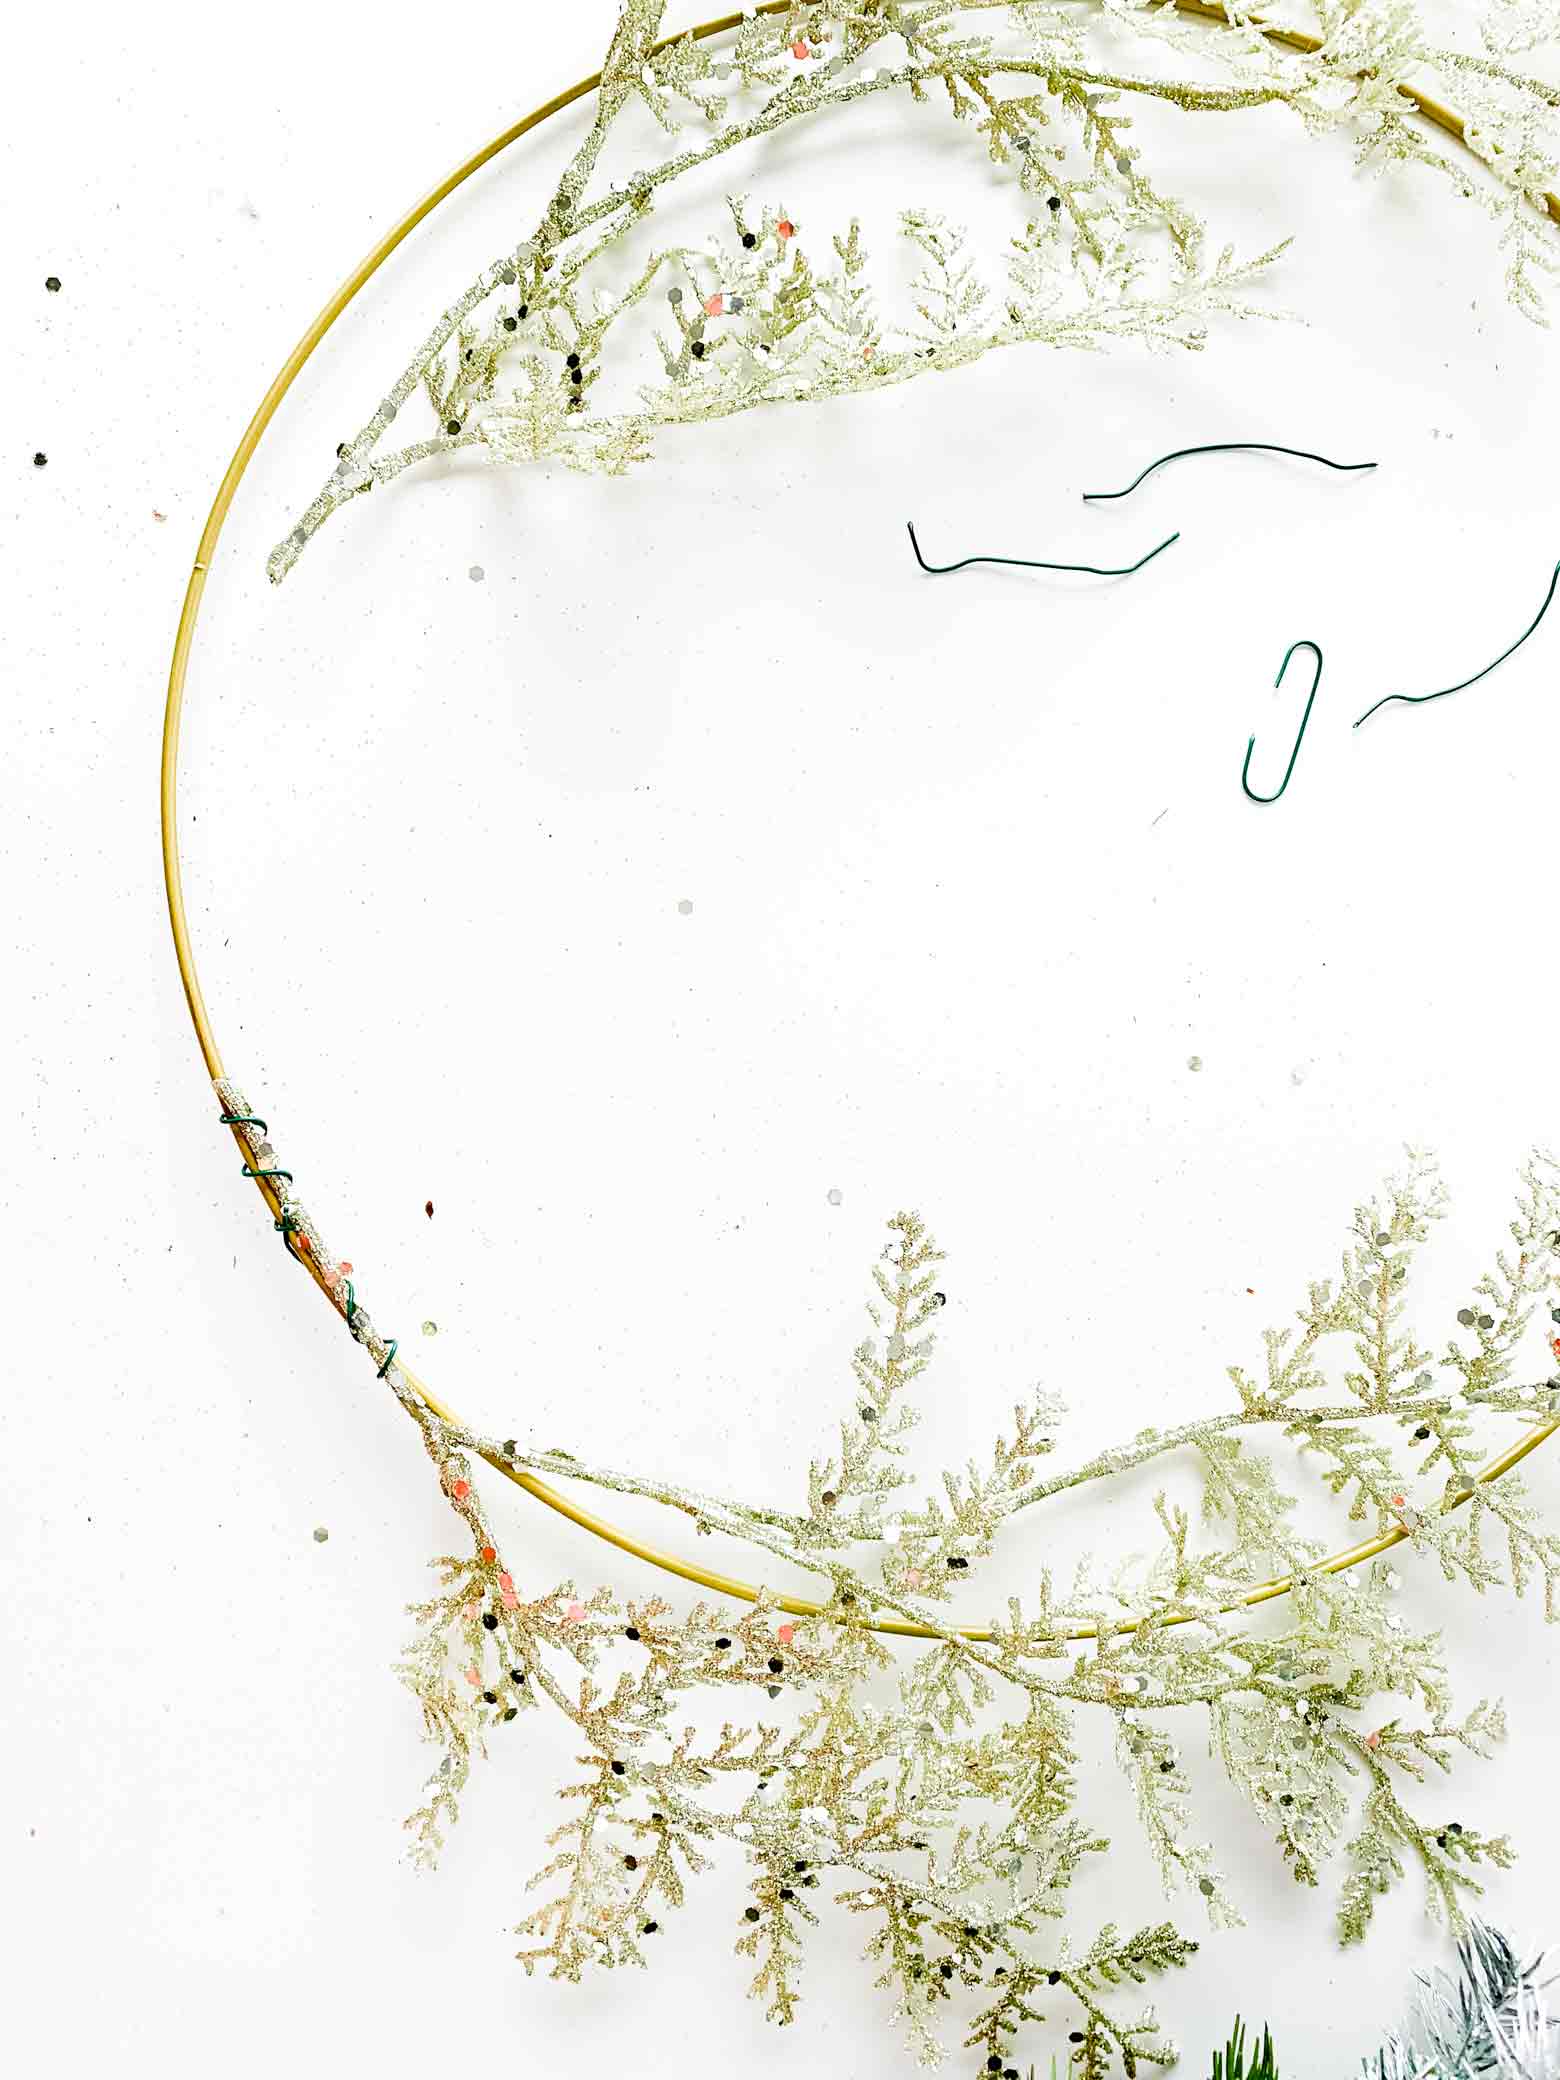
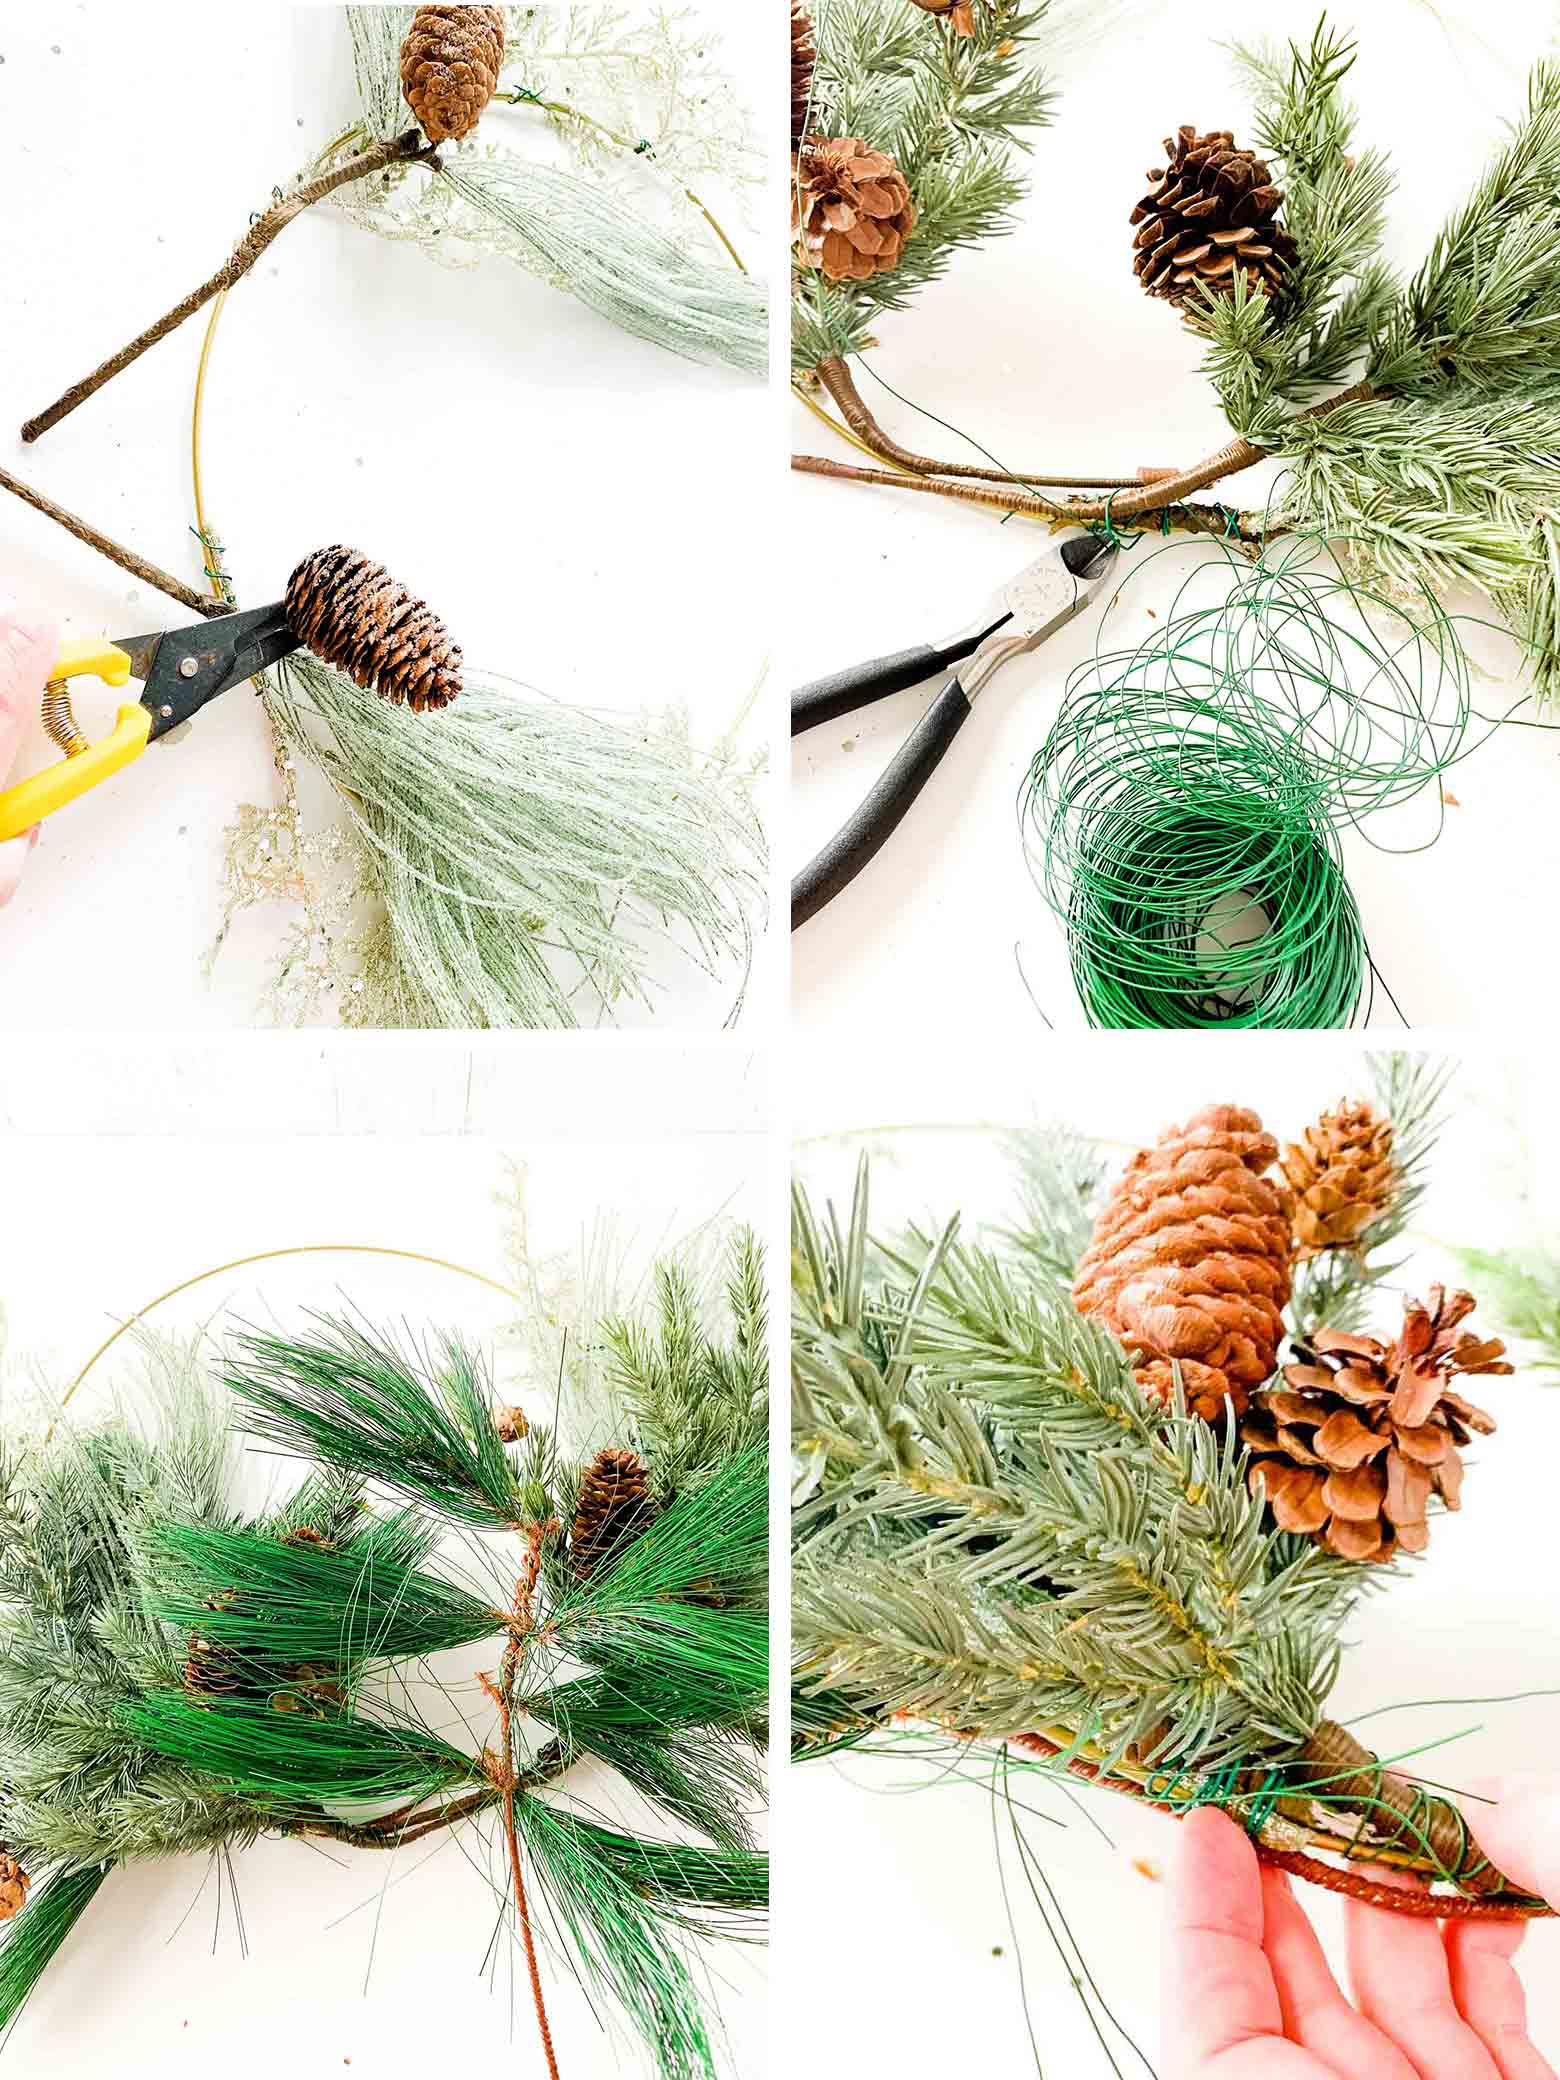
The main trick here is to wrap one end of the stem directly onto the metal ring. Don't worry- it all gets covered up eventually, so no one will notice this. In addition to doing it on the bottom, you'll want to secure it in the middle and on the ends most of the time. This helps distribute the weight and keeps the stem stable on the ring.
The best part of stems is how they bend, so arch them on top of the ring before you add them on, to make life easier.
Next, you'll do the same thing with the second layer. For my next layer, I used these frosted pine needles that are really pretty, but I didn't want the pinecones there getting into the way since I would be layering more on top. I simply snipped them off and put them aside to use later.
Wire as you did before. Notice at this point I was full of joy because I had located my wire cutters and ribbon. I didn't even mind that it's not neat and tidy and is just a jumbled mess!
Once you have built up some layers, you might decide you'd like it to be more full. At this point, I decided to use the dark green pine needles. You can see how they are sticking straight out and look ridiculous. BUT--- you'll want them this way because you will be connecting them to the back of the ring instead of the top and you'll need them sticking out like that in order to not be lost by the other stems. Once you've built several layers out, it's helpful to add one onto the back.
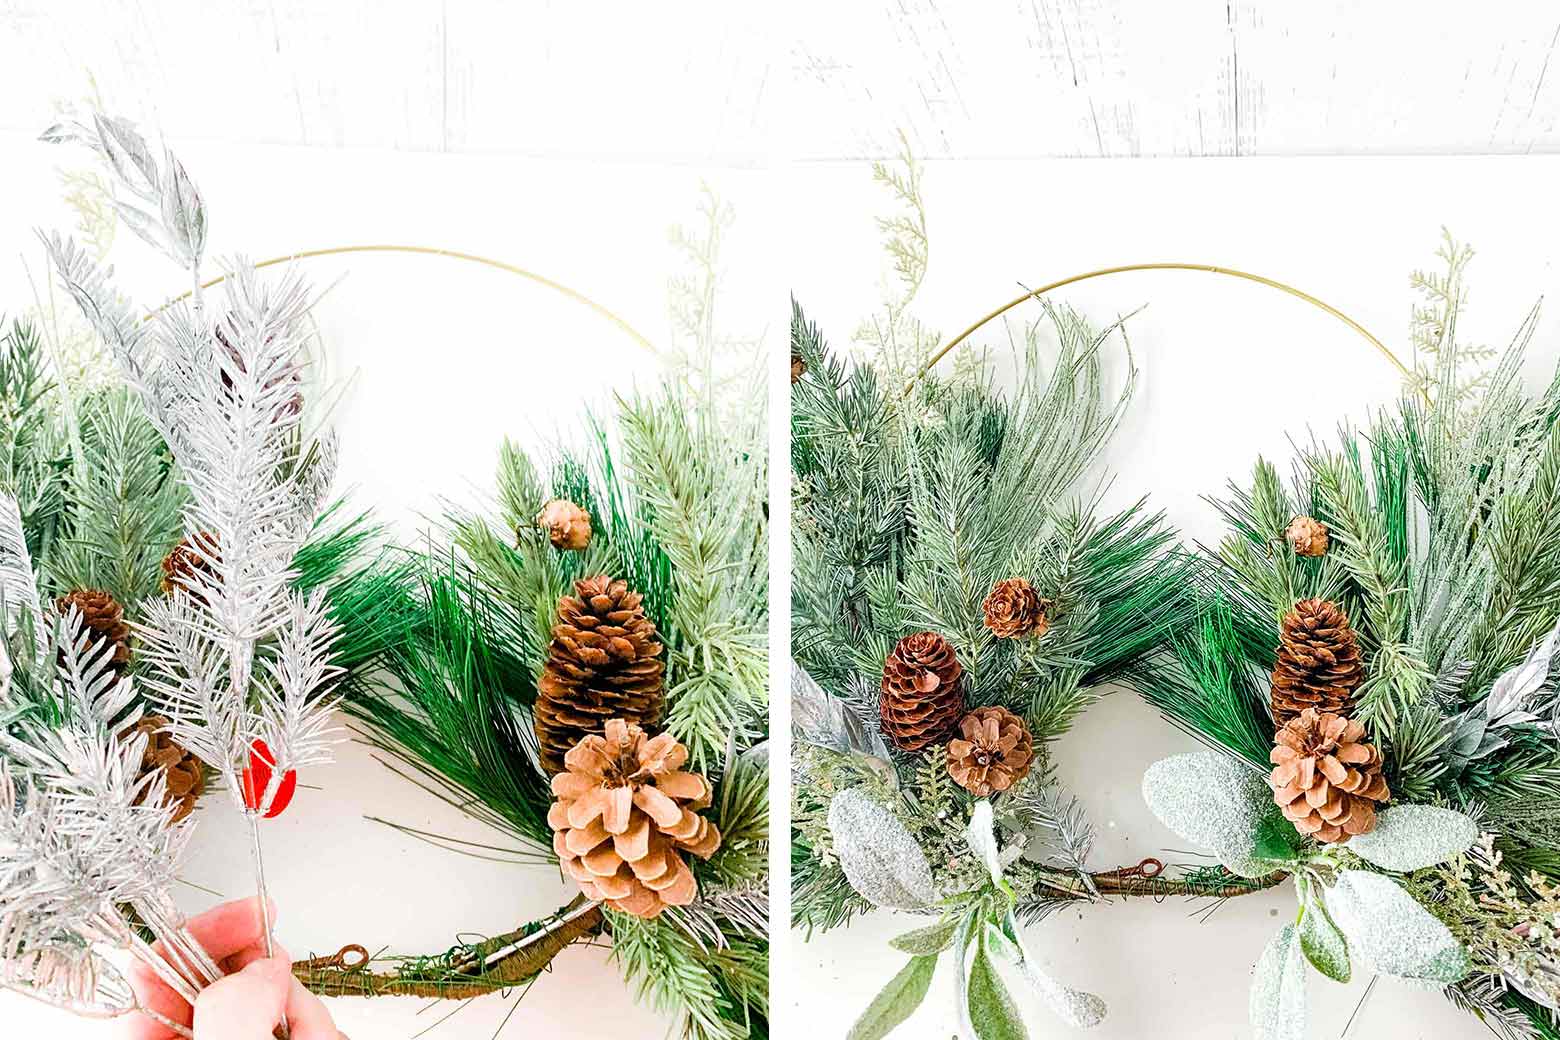
Finish off the layering by adding in little elements to fill in any gaps. I cut off more of the gold floral picks, and also these silver ones. You can use wire or hot glue at this point. The lamb's ear are actually on little clips. I bought them several years ago and used them previously on this winter door wreath using a basket.
Sometimes the leaves on the stems can be moved, so I fluffed some closer to the top since they were cut shorter than the others. Little tree ornaments would look adorable at this point too, or even some tiny words or chalkboards.
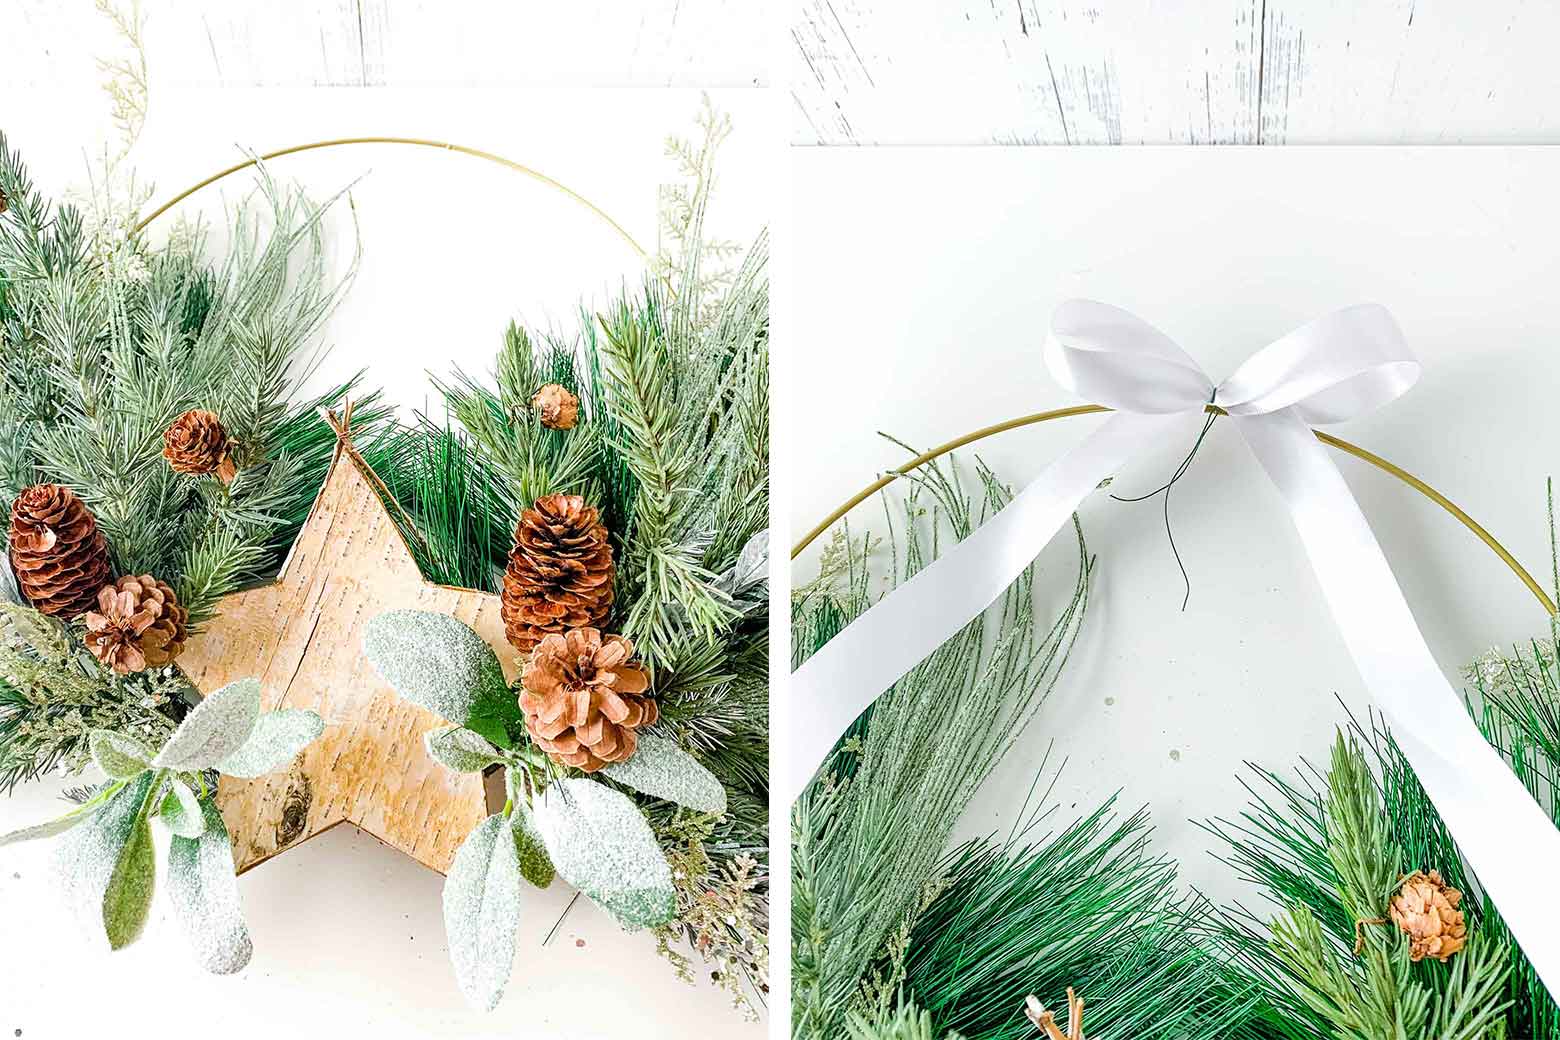
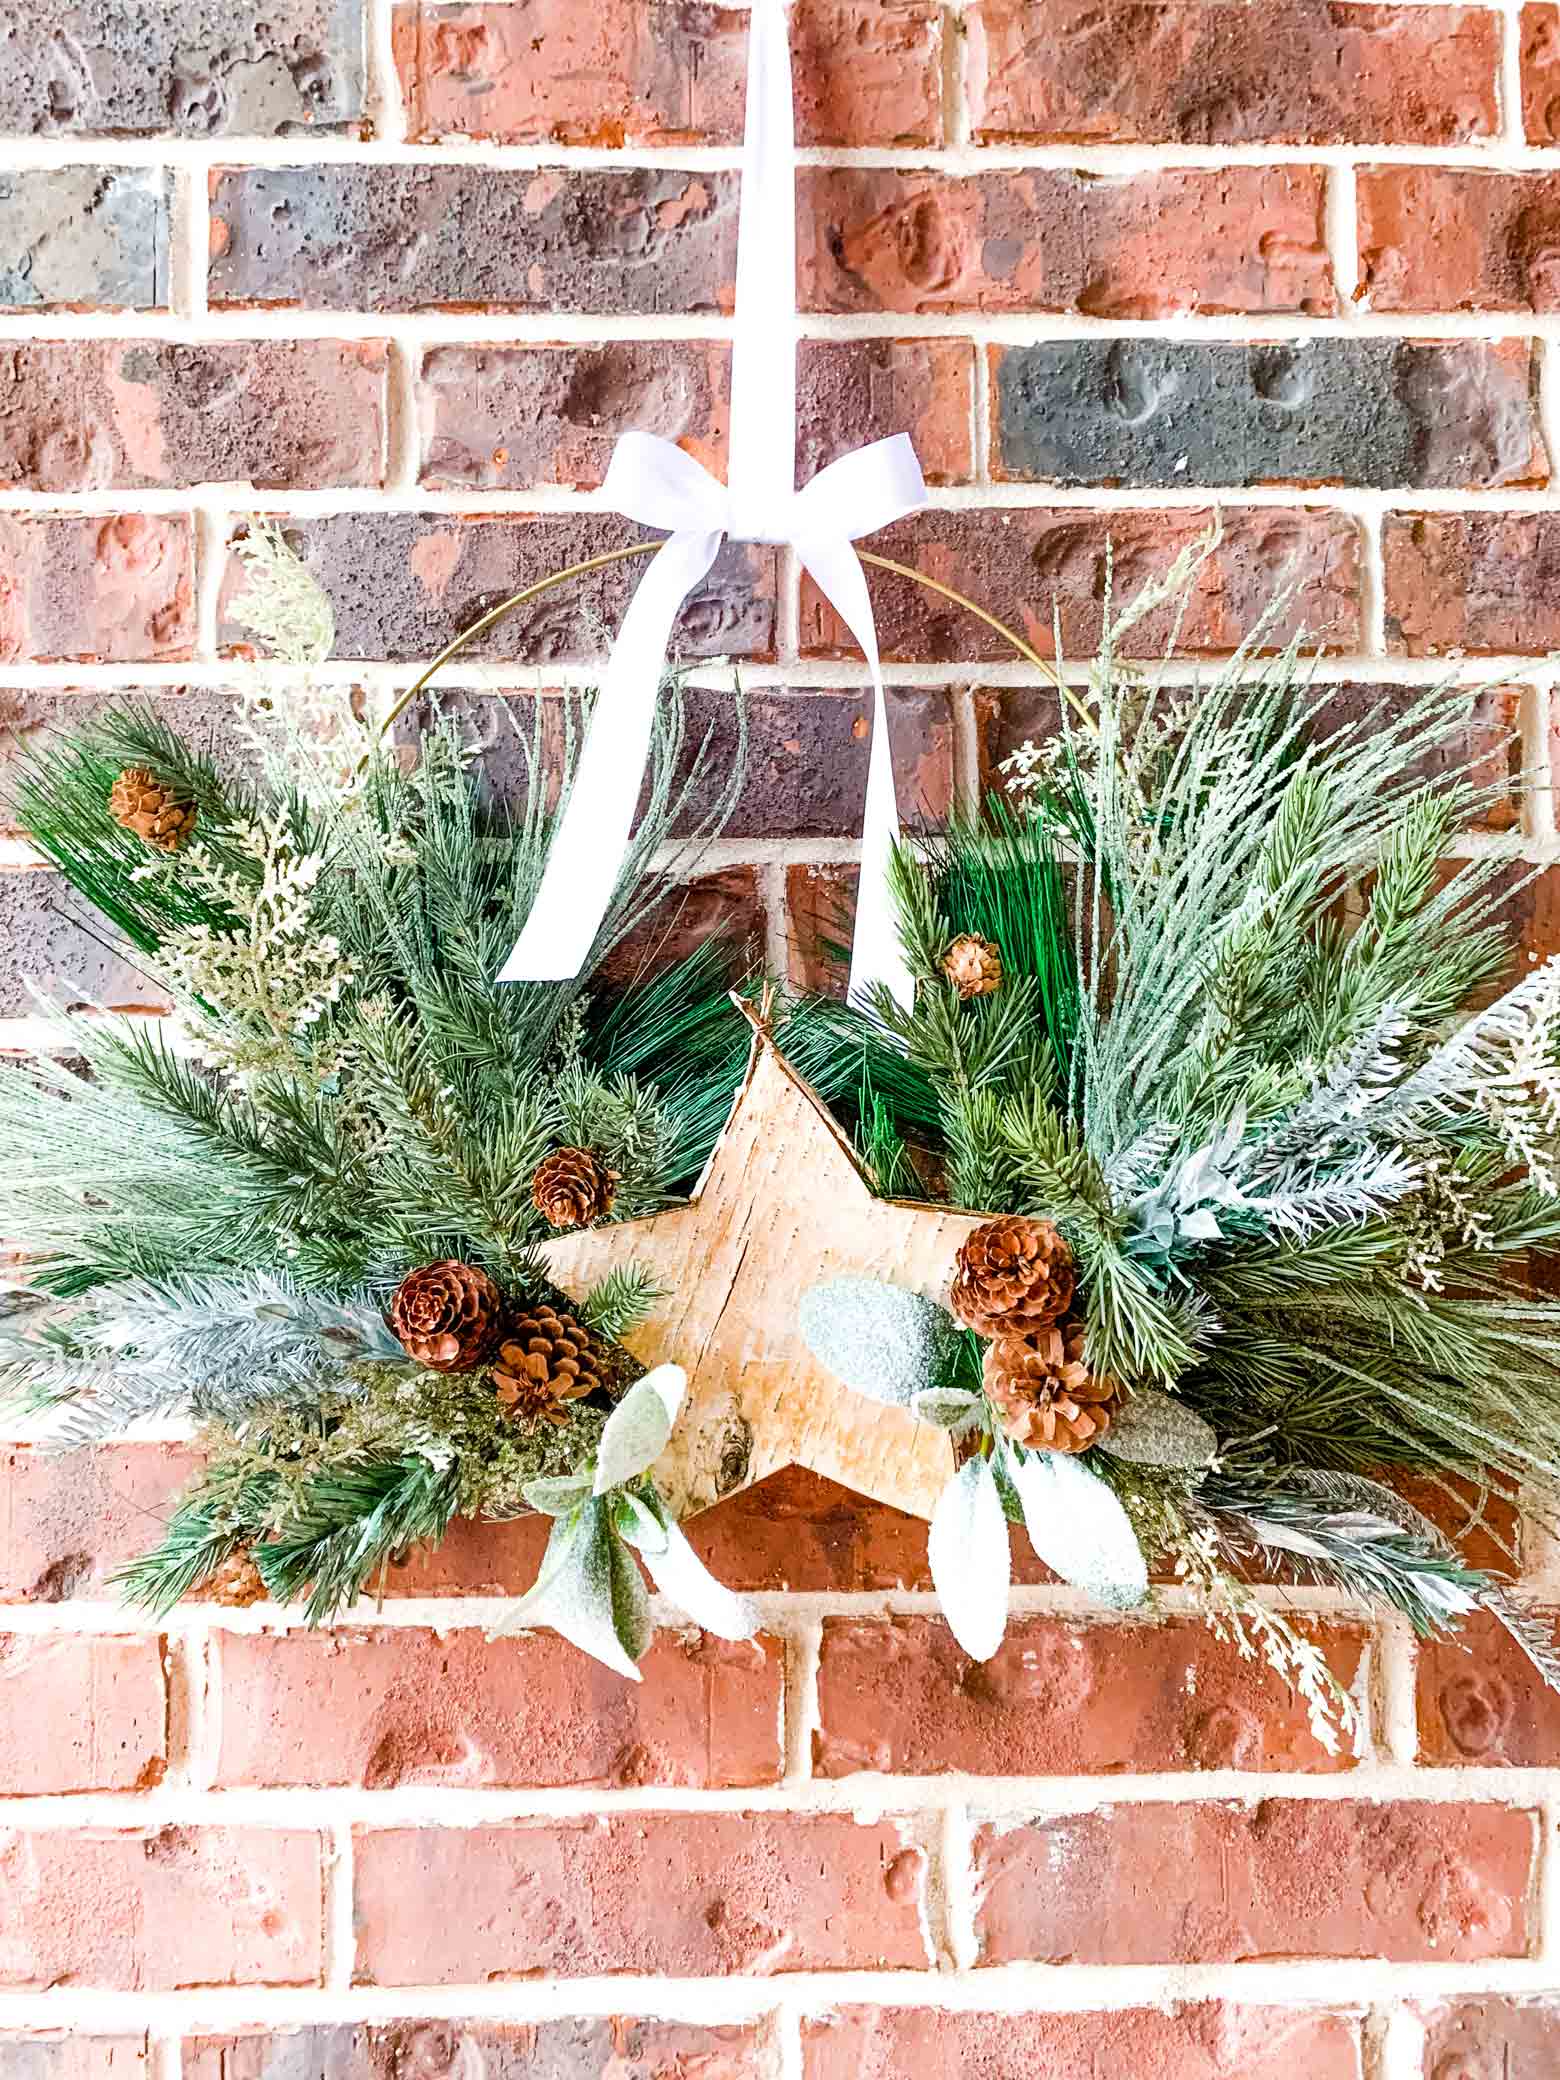
To finish the wreath, I hot glued one of my birch bark stars that I had on hand and wired on a ribbon bow at the top. I used a long ribbon to hang this wreath, so that ribbon covers the wire on the bow. If you see any gaps, feel free to add in smaller stems. You can see how full this one is, with the dark green pine needles poking out above the star.
This wreath was made on the 14 inch ring and is pretty darn heavy. I looped the long ribbon around the bow and tied it to a screw that is in my brick. It weighs about 5 pounds I'd guess, but I knew the screw in the brick would be able to hold its heft.
How to make the medium sized ornament and star metal hoop wreath:
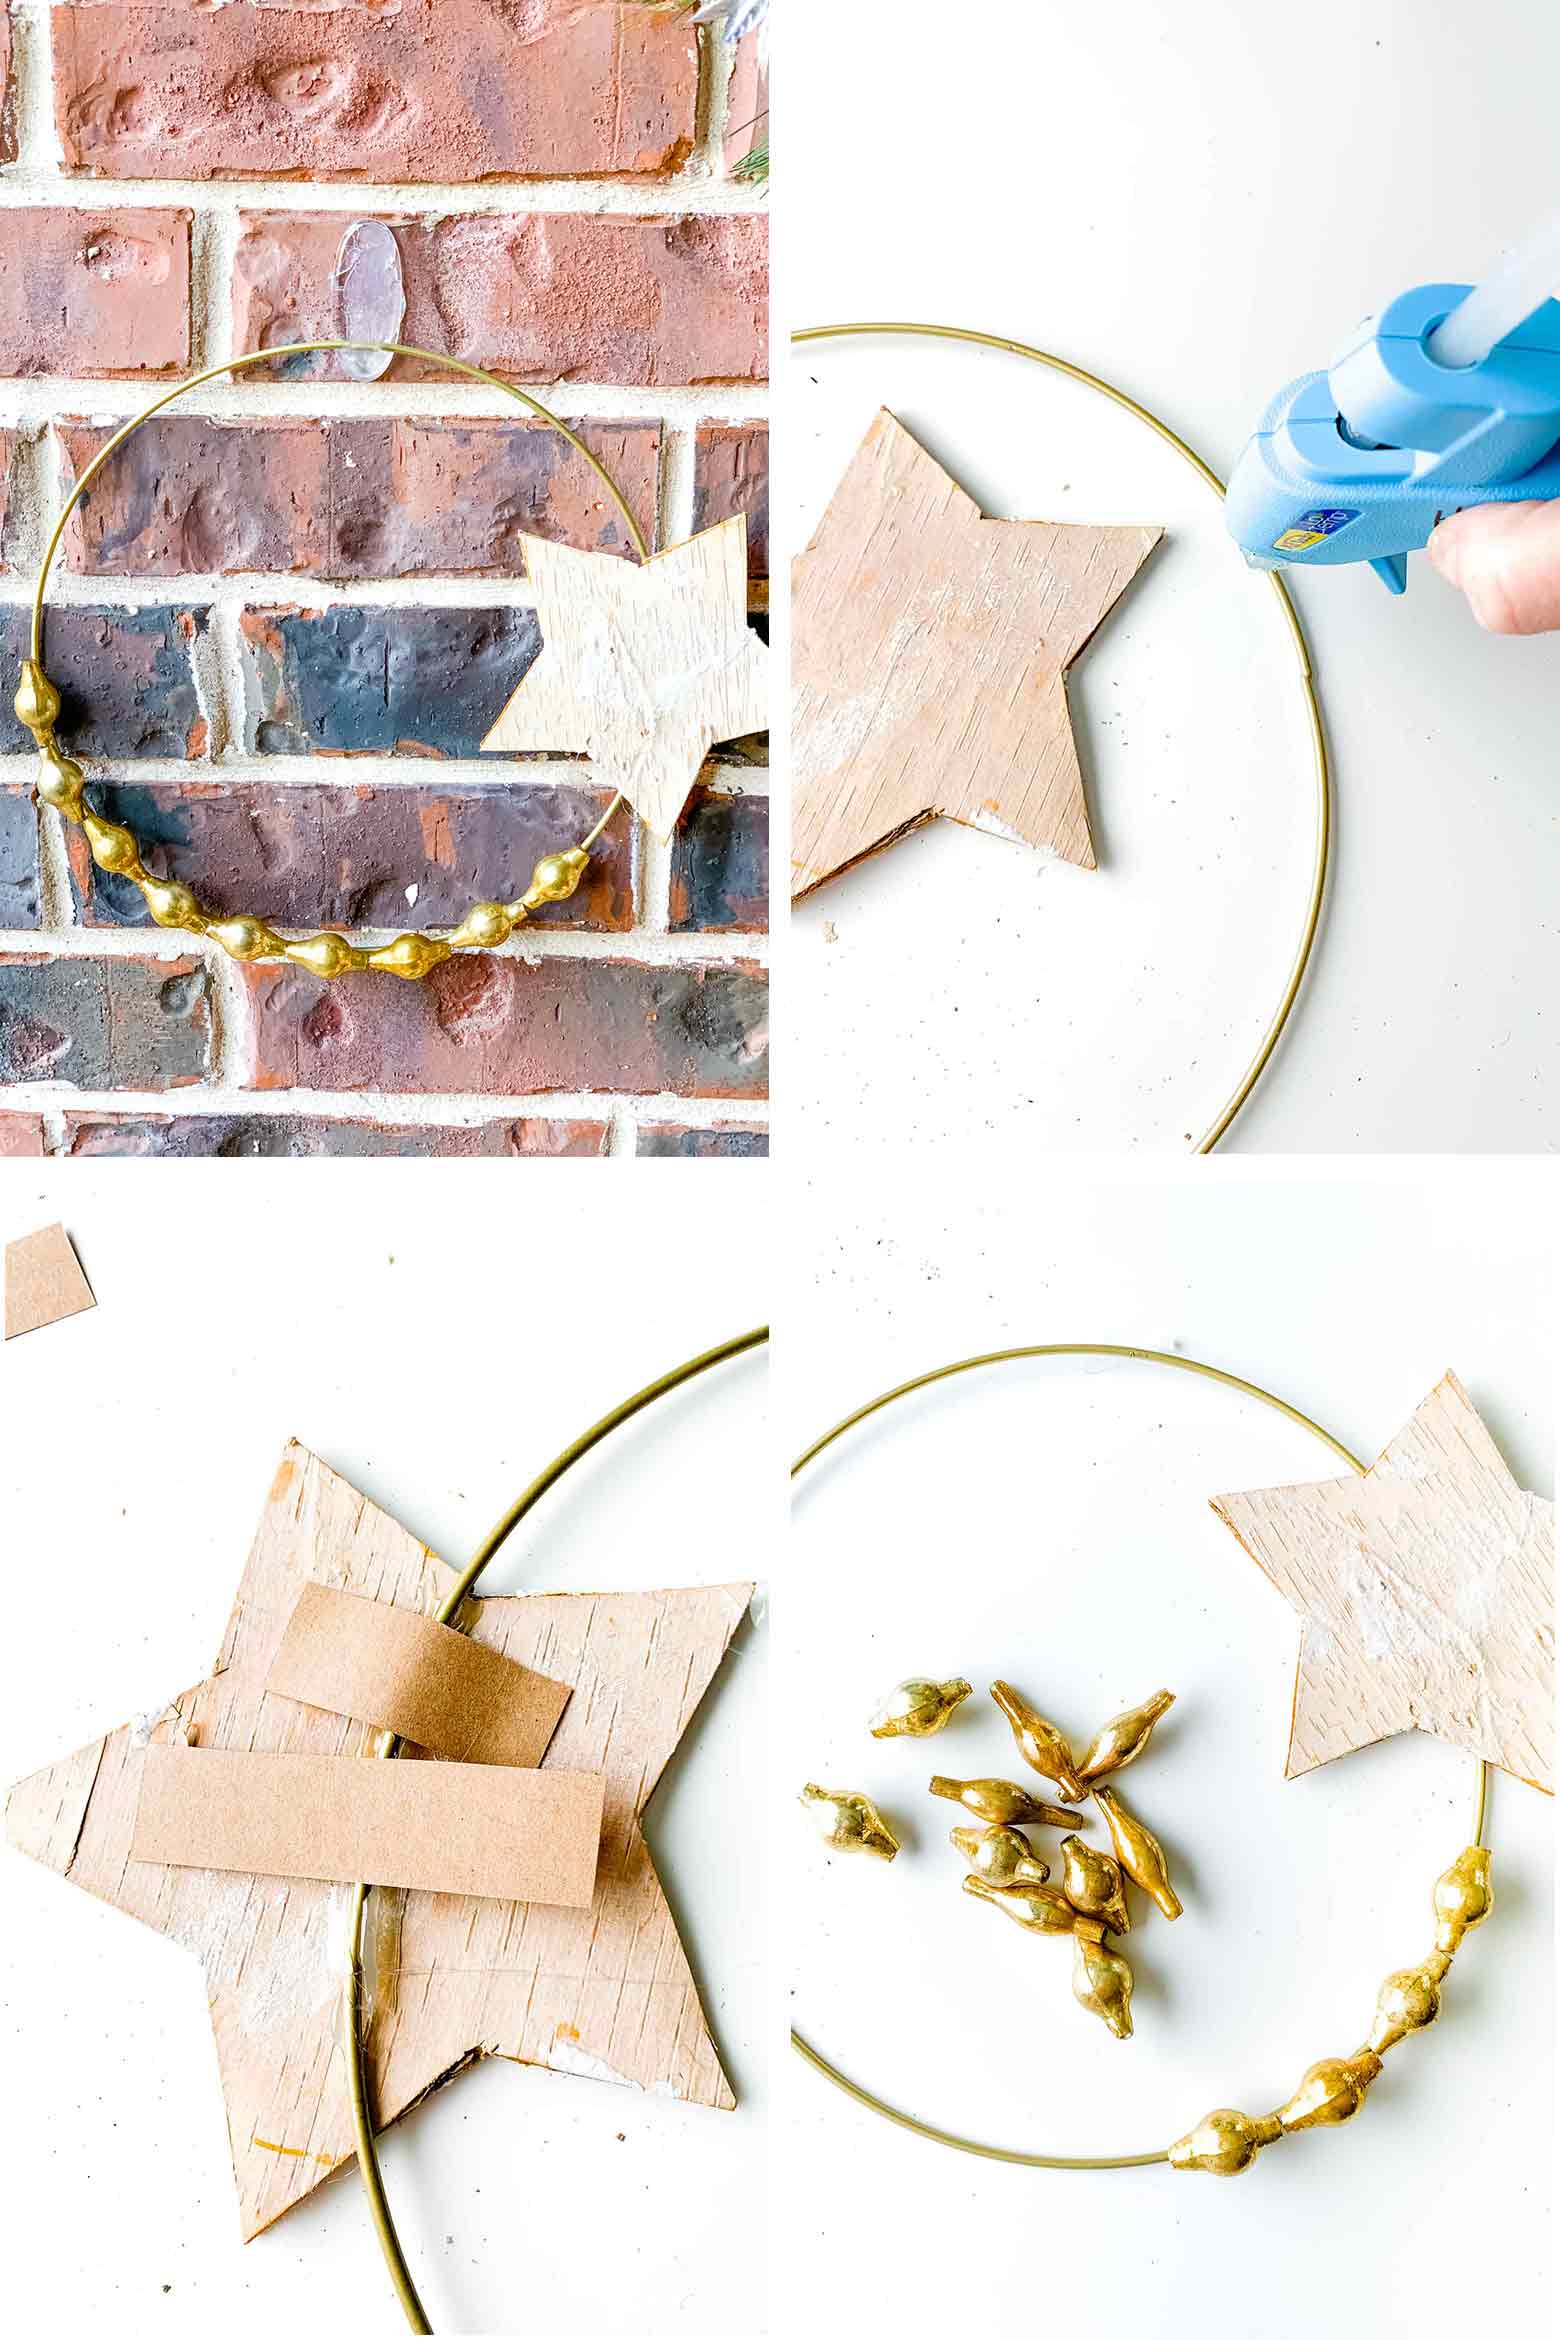
This hoop took less than 5 minutes to make if even that. It took longer to find the supplies and heat up the glue gun! This is the 10 inch hoop. I started by hot gluing the birch bark star around the 3 o'clock position of the hoop. I glued from the front but wanted to make sure it didn't fall off, so I also cut some small strips of card stock and hot glued each end around the wire.
The ornaments are from a restoration hardware strand I purchased on super clearance that was broken. I simply glued each one onto the wreath, holding each for about 10-20 seconds to ensure adhesion. This is a perfect use for things that have been broken that might have just been tossed away, so glad they were able to be repurposed because they are so pretty!
How to make the small reindeer yarn hoop wreath:
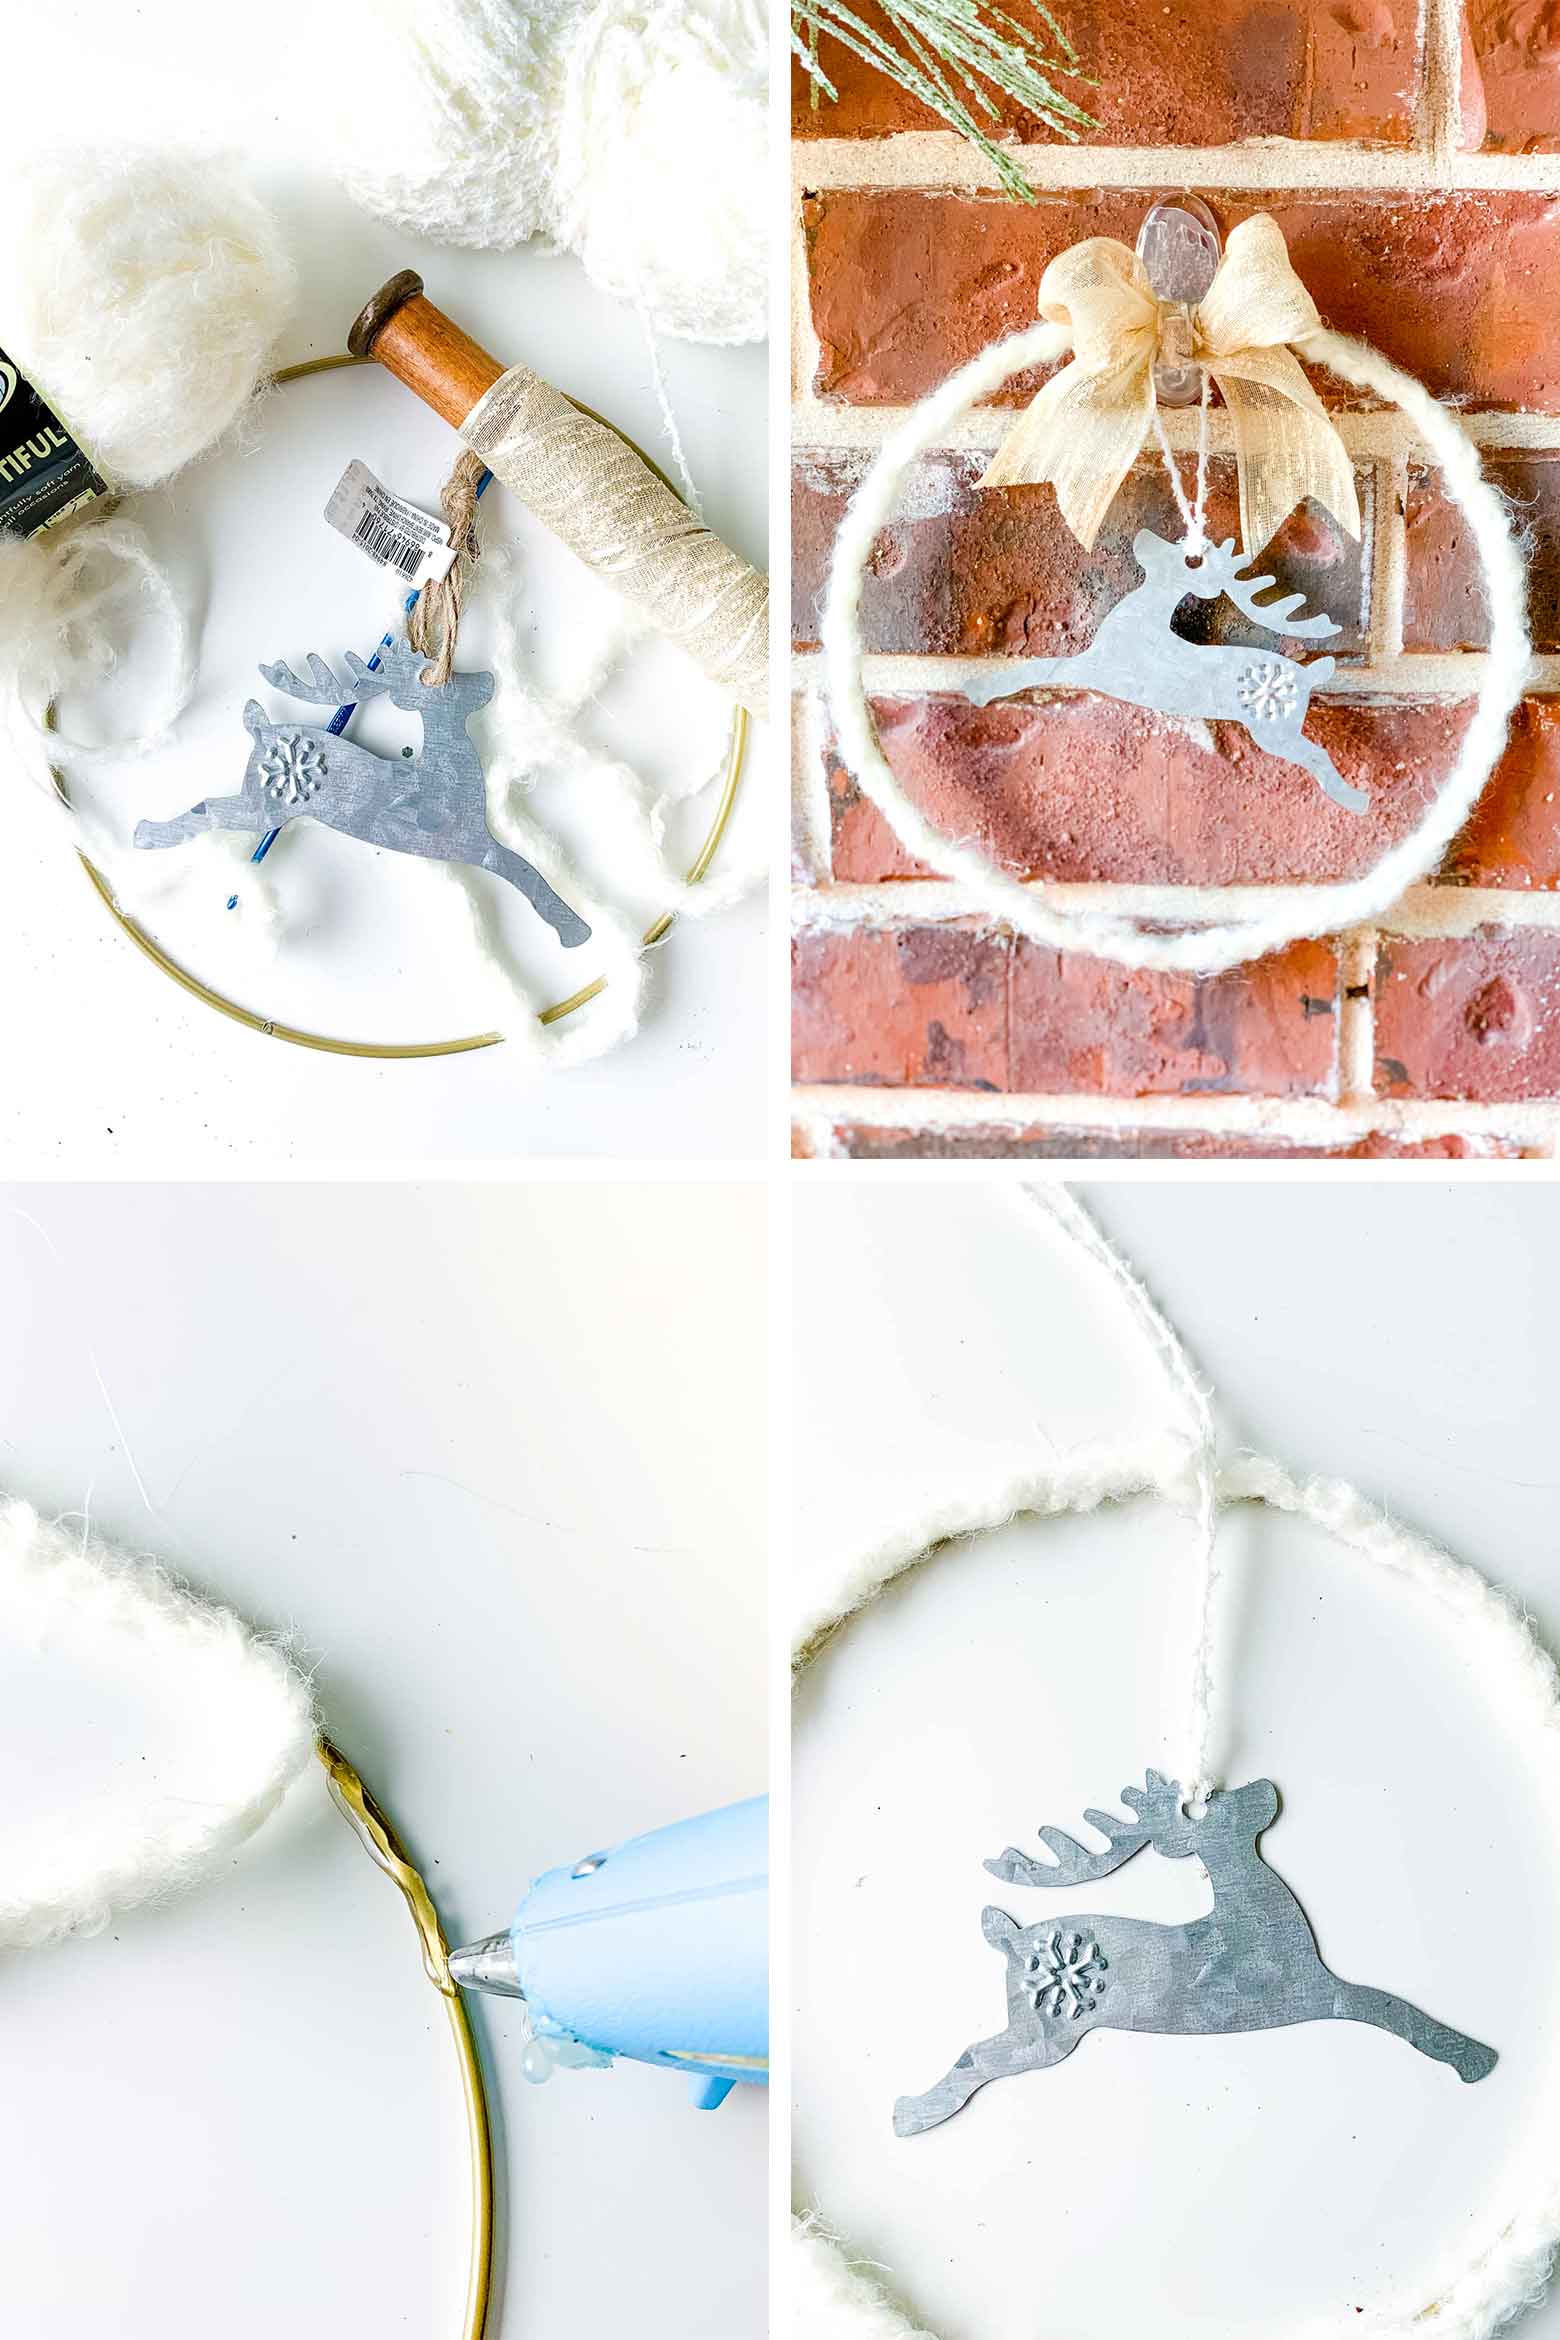
This was another really quick wreath. Again, it took longer to gather the supplies. For this one you need a bit of fuzzy yarn and a simple ornament. I used a basic crochet chain stitch and made the length of it the width of the ring. This was the small ring, so only 8 inches, it didn't take much!
Hot glue the length of the yarn to the hoop ring. The crotchet chain stitch will give you more surface to cover up the ring. If you don't know how to crochet, you could always just wrap it with yarn. I replaced the ornaments burlap ribbon with a slightly different white yarn and topped the wreath off with a gold bow.
How to make the large metal ring door wreath:
This wreath is very similar to the large wreath but with much less greenery. Since I knew it would be hanging on the door, I did not want it to be heavy or too delicate. For this one, you simply take one good size floral stem and attach it to the 9 o'clock position on the ring.
Next, you'll pop in just a few of the sprigs of the glittery, shiny, or other accent items. You can use wire or hot glue. Next, I topped with the birch bark star. It was really that simple!
Hanging it was not so much! But you can learn from me, so I'll share those tips with you!
How to hang a Christmas wreath on a metal hoop:
I mentioned above, my super heavy wreath was hung from a ribbon tied to a screw in the brick that wasn't going anywhere. I've struggled for years to get command hooks to stick, but this year I found the way!!!!
Hot glue. Seriously. I used gorilla glue sticks because I heard they can hold more. Of course, you'll want to test this on an inconspicuous part of your house. I was able to peel mine off and not damage the brick. It's a serious game-changer around here. You don't really notice the clear hooks when walking by, but my camera sure shows them to you! LOL!
For the door wreath--- remember how we put it at the 9 o'clock position? Well, when you hang it from the wreath hook it will fall to the bottom because of the weight. I don't know why I didn't anticipate this. I used the floral wire from the wreath making and twisted it to the hook exactly where it should go, and even hot glued it in place to boot. I just realized if you look at the picture closely, you can see this. The actual hook that comes up covers this though.
To make sure it wouldn't move around while kids are going in and out, I used double sided mounting tape to secure the hook to the door. I need to remember this for next year, no more bouncing wreath!
Wow, this post was so long! I appreciate you sticking around for all the nitty-gritty details! If you make one of these wreaths, please tag me on Facebook and Instagram so I can share your creations with other readers!
Pin For Later!
Looking for other Christmas Crafts? We have plenty around here! You might enjoy these:
- 25 Amazon Christmas Wreaths Worth Ordering!
- free printable secret santa gift tags
- homemade gingerbread hot cocoa mix for gift giving
- nature inspired winter wreath
- vintage inspired paper glitter ornaments
- winter door wreath with a basket
Thanks so much for stopping by today! I hope you are enjoying your holidays!
-Mrs Major Hoff






Comments
No Comments