
This post and photos may contain Amazon or other affiliate links. If you purchase something through any link, I may receive a small commission at no extra charge to you. Any supplies used may be given to me free of charge, however, all projects and opinions are my own.
Sturdy whipped cream frosting is made with heavy whipping cream, vanilla extract, and gelatin! It is a cinch to make! Ditch the whipping cream that melts and learn how to make the BEST sturdy whipping cream to grace the top of your desserts!
Sturdy Whipped Cream Frosting
This post contains affiliate links. I only recommend products or services I use personally and believe would be a good fit for my readers. This comes at no added cost to you!
—Want the recipe right now? Simply scroll straight to the bottom!—
There are a few recipes I think every home cook needs to know, and stabilized whipped cream icing is one of them. It's also one of the most versatile icings out there! It's perfect for piping shapes and details and it's easy to color and to flavor. It requires minimal ingredients like heavy cream, vanilla, powdered sugar and gelatin. It takes a minimal amount of time too!
You've probably had this whipped cream frosting before, and maybe you didn't realize it. It's quite popular for ice cream cakes. In some ways, it's just like your favorite whipped topping except it is totally stable. Have you ever squirted a pretty shape of whipped cream onto a piece of pie, only to have it melt and look not so pretty? This frosting totally eliminates that from happening! In the food blogging world, sometimes you can't take a picture before the whipped cream melts. That is when this really comes in handy!
So let's get started. This frosting can be made and then used to frost a cake, just like any other frosting recipe. My favorite thing to do with the frosting is to pipe shapes. The reason I love to do this is because I find it much easier to pipe directly onto the wax paper, and then position it onto a cake or pie. I don't have to trust my shaky hand on the final product!
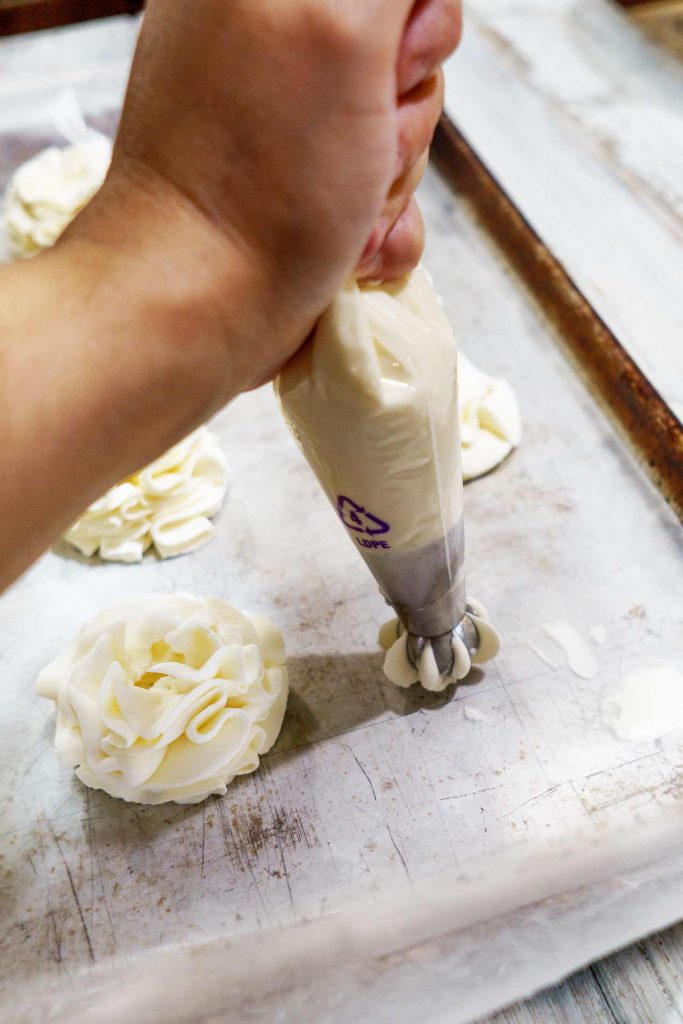
In the picture above, I'm using Russian piping tips. There are many reasons why these are my favorites- but the first reason is because they are big enough to hold up to the sturdiness of the stabilized whipped cream frosting. If you put on a piping tip that is too small, it just won't squeeze through. These tips pipe the whip cream through like butter! I absolutely adore the ruffle like shapes they create too!
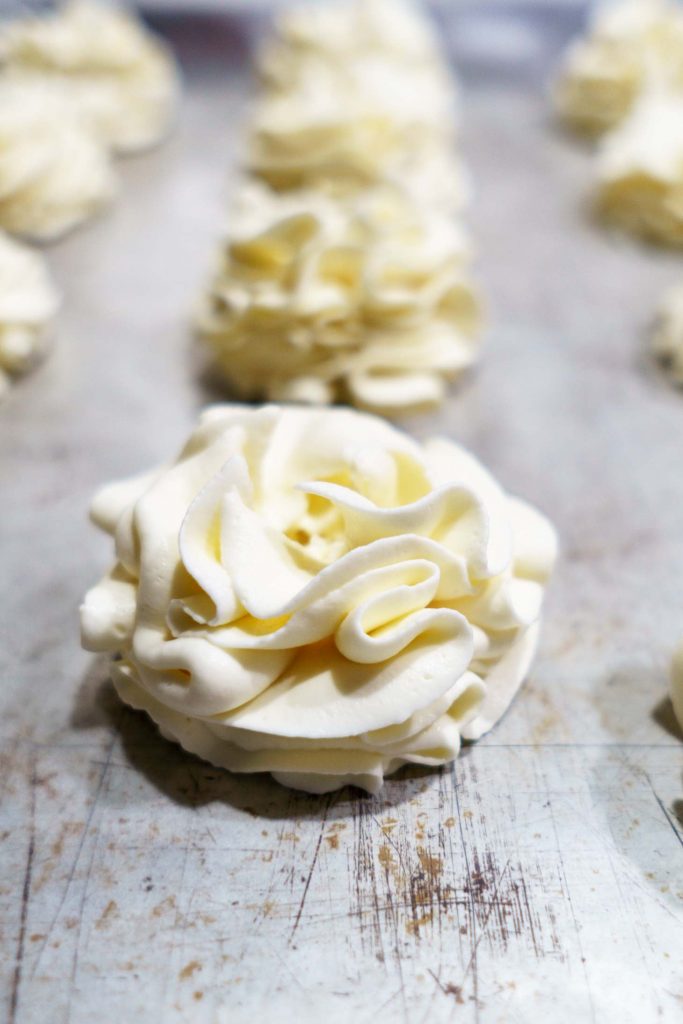
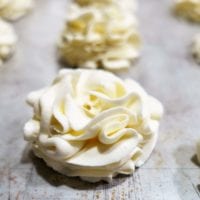
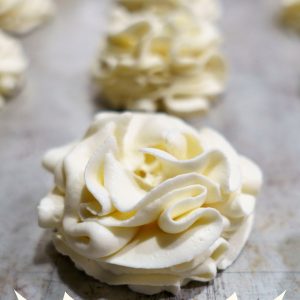
How cute are those swirls? Once I've piped the shaped onto the wax paper, I pop the cookie sheet into the freezer for about 15-20 minutes. Truth be told, I've left them in the freezer for a week and they still tasted great. If you do leave them in for more than 20 minutes, I would cover with cling film once they are stable, frozen and will hold their shape.
If you plan to leave them in the freezer past 2 hours, I would remove them from the wax paper (as described below) and place in freezer bags or plastic freezer containers.
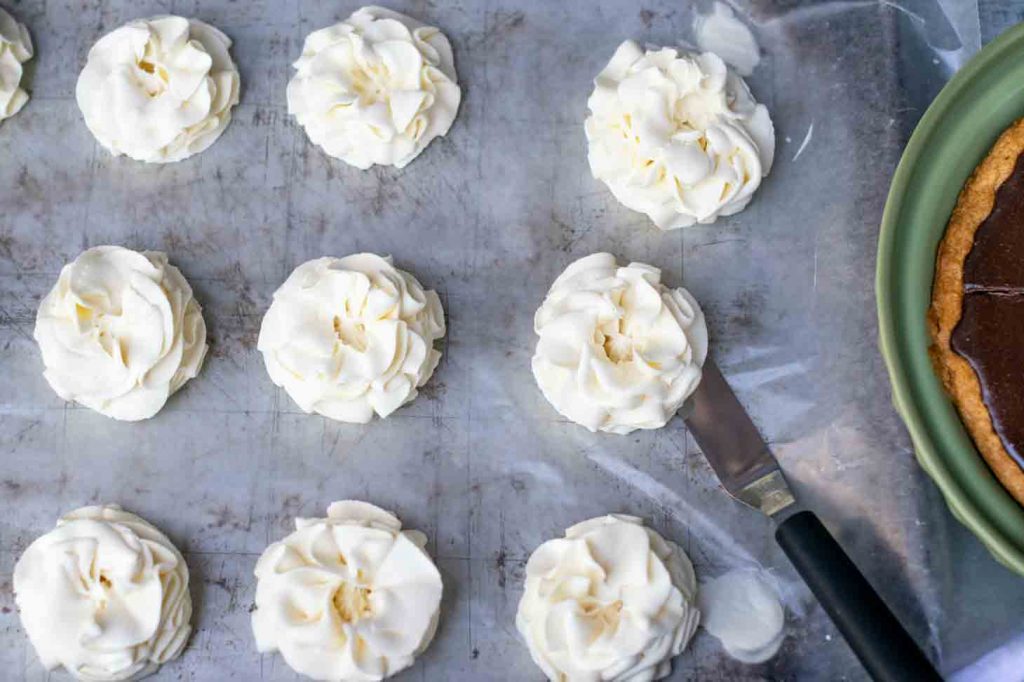
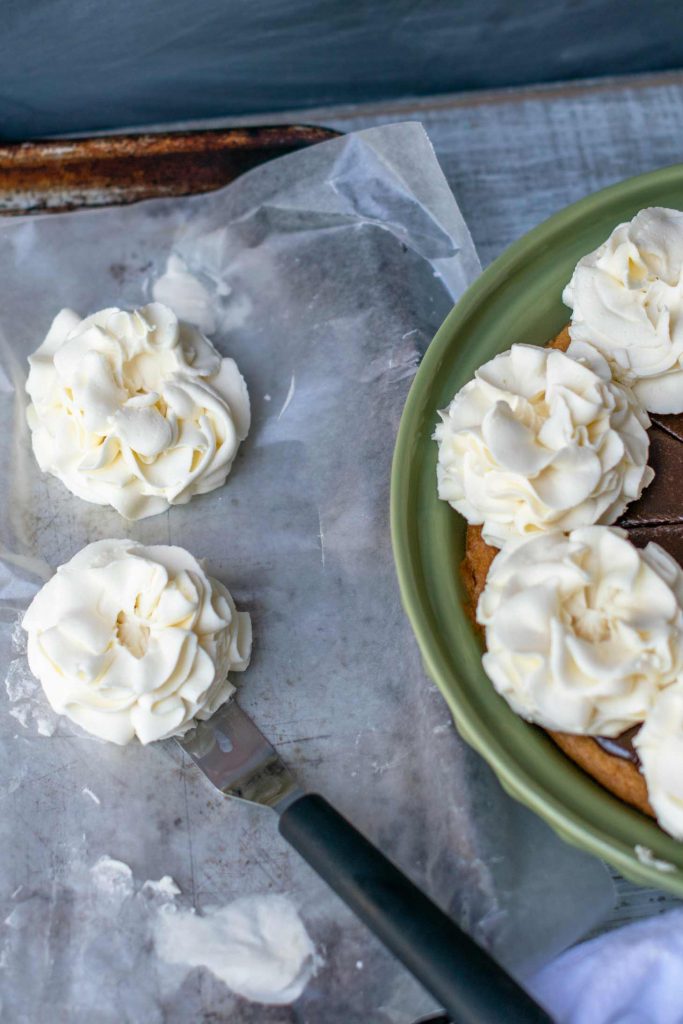
From there, it's pretty easy to move the flowers from the cookie sheet to your frosted cake, or in my case, a pie. The offset spatula is the key to this. Simply run it below the flower shape, and it will then come off the wax paper. Use the spatula to then place it where you'd like it to go. The good news? I *might* have dropped one, and it was fine. Because it's a stable whipped cream shape, no one was the wiser. LOL.
And here is the finalized look!
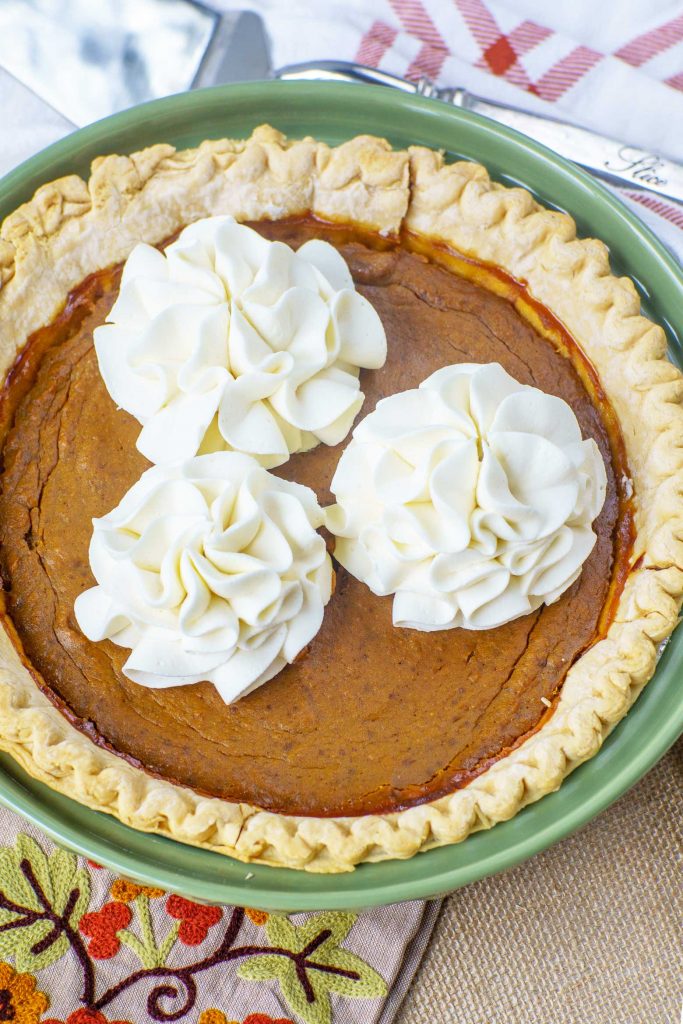
This is a special sneak peak of a new fall recipe coming in the next few weeks- an old fashioned molasses pumpkin pie. Good news, I've since published the recipe for Molasses Pumpkin Pie! In case your craving other pumpkin things- be sure to check out my easy homemade pumpkin frosting that can be used on all your fall breads like pumpkin pie spice cake loaf or just to dress up plain cupcakes!
This was one of the first recipes that I used stabilized whipped cream on, and it was the game changer that started the ball rolling. At Thanksgiving dinner I will now have these whipped cream flowers available for all my guests! Here are some other recipes I've posted on the blog that utilize my sturdy whipped cream frosting or piped flower shapes on:
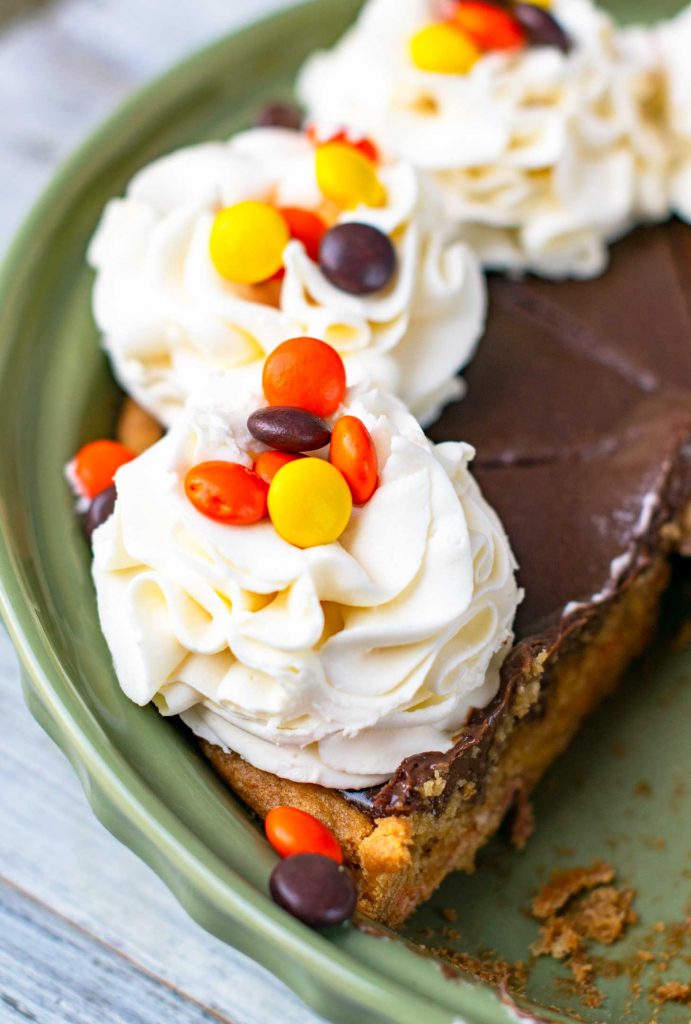
Reese's Pieces Peanut Butter Chocolate Pie
What do you need to make stabilized whipped topping frosting?
The steps are simple and the full recipe can be found at the bottom of the page! These are some hints and tips to get you started.
- A stand mixer or a heavy duty hand mixer is the key to getting the heavy whipping cream to whip. Give your hand a rest and invest in one!
- A very very very cold bowl. I put my stand mixer bowl in the freezer, along with the attachment about 15 minutes before making the frosting
- Gelatin. Some people use items like vanilla pudding or whip it powder, but I have found gelatin does the best without adding any extra taste.
- Vanilla extract or another flavor you prefer. The sky is the limit.
- Powdered sugar. By using powder, you eliminate any graininess that can be brought out by other sugars. This keeps it nice and smooth. It also adds a perfect hint of sweetness.
- For shapes and detailed piping, I recommend the Russian piping tips. They are big enough to allow the sturdy icing to go through, and make a great shape.
- For freezing shapes that are piped in advance, I recommend an offset spatula and wax paper.
FAQ's about Sturdy Whipped Cream Frosting:
How long does the chilled whipped cream last? Does it deflate?
-The whipped cream lasts about 24 hours if you keep it cool in a refrigerator. It does begin to lose shape after that amount of time, but it will not completely deflate. I'd recommend making ahead within 24 hrs of serving, and consuming by 2 days.
Can you freeze stabilized whipped cream?
-Absolutely! That is one of the best parts. If you have any leftover, be sure to pop shapes into the freezer following the method I showed you above. Once you've placed them in freezer bags or freezer containers, they should last 2 to 3 months. Place in a fridge to thaw when you'd like to use them!
Have more questions for me? Leave one in the comments below and I'd be happy to answer them!
Additional tips for making stabilized whipped cream flowers:
- when adding the gelatin to the mixing bowl, scrape down several times as it really likes to stick to the edges of the bowl!
- for the best shapes, I find the Russian piping tips that have wider openings work well. The thinner cracks work, but are not as easy to use as the wider ones.
- if a small piece of gelatin gets caught in one of the openings, use tweezers to pull it out. This happens occasionally. It's pretty easy to see if an opening is clogged.
Recipe for Sturdy Whipped Cream Icing:
📋Recipe
Sturdy Whipped Cream Frosting
Ingredients
- 2 ½ teaspoon gelatin knox brand, this is one pouch
- 3 tablespoon cold water
- 2 cups heavy whipping cream
- ½ cup powdered sugar
- 1 teaspoon vanilla feel free to sub other extracts.
Instructions
- Before whipping your cream, place your beaters or mixer attachment, and your mixing bowl into a freezer for about 15 minutes to allow them to cool.
- In a microwave safe bowl, sprinkle the gelatin over the cold water. Stir, and allow to "bloom". This takes about 5 minutes.
- Microwave the gelatin mixture for 10 seconds. It will become a liquid versus the solid shape it had been (looks like ugly jello!). Stir to make sure everything is dissolved.
- In your chilled mixing bowl, begin whipping the cream on a low speed. Add in the powdered sugar, followed by the vanilla. Move to a higher speed and watch for good peaks to begin to form.
- Once the whipping cream is starting to peak, switch back to a lower speed and slowly drizzle the melted liquid gelatin mixture in. Once it's in, switch back to a higher speed and continue to beat until it's reached stiff peaks.
- Place in piping bags and pipe shapes, or ice your cake. You can also place in the fridge for a few hours before using, but you may have to thaw a few minutes to get it to be more manageable.
- Once you've iced your item, place in a fridge to hold it's shape, or serve immediately.
Video
Nutrition


Toni says
This looks amazingly delicious! Such an amazing dessert!
Lindsay Cotter says
This is such a great idea and perfect for adding that special touch to desserts!
Em says
hello i love this recipe... it really holds well... i do have a problem at times... i notice that there will be clumps of the knox gelatin mix once i have poured it on the whipped cream... please advise... thank you so much...
MrsMajHoff says
Hi Emily! I found that the slower you pour in the gelatin mixture, the better. Also, I try to stir the mixture really really really well before putting into the cream. Also, I try to look in the cream bowl before putting in a piping bag for any clumps I might have missed. Thanks for asking!
Shaynon says
HI! I am so excited to find this recipe! I have a question, can i use this to frost a cake? Will it hold up well enough? Thank you!
Bridget says
Have you used gelatin sheet to do this before?
MrsMajHoff says
Hi Bridget!
I have not. I've never been able to find them, although I see they are on amazon. I did google the difference, so if you do use them, I'd read what the conversion and process is. Thanks!
MrsMajHoff says
Yes, I love to use it on cakes as well! My kids love it on a jello poke cake!
Zoe says
Would you use this as a cake filling? I'm thinking of a strawberry shortcake, so it would be layered along with fresh strawberries (and sugar). I would like to also frost the outside of the cake, perhaps with buttercream, so I want to be sure the layers are stable enough. And if so, how long it might keep well (still the 24 hours you mentioned?)
Many thanks!
April says
Hello,
Can you tell me which Russian ball tip you used to make those cute ruffle flowers?
MrsMajHoff says
Hmmm, I've used so many of them. I want to say it was the one with the widest opening and a notch out of the center top. I will look in old photos to see which one specifically. Thanks!
MrsMajHoff says
Yes, it would be perfect for that! I would agree the 24 hrs is a good time period!
MrsMajHoff says
Thanks! It is one of our absolute favorites. It tastes sooooo soooo good on a jello cake! Perfect for spring time!
MrsMajHoff says
Thanks for stopping by! I hope everyone sees how simple and easy this truly is- and what a game changer!
MrsMajHoff says
I think you will really love it! One of those tricks all home chefs should know! Thanks for stopping by!
Kat says
Hi, can you tell me if this will work on top of a cake that has been glazed with a buttery sugar glaze? I am thinking of a Mountain Dew layer cake, for my son.
Normally I just make a sheet cake and I glaze the cake with a mixture of butter sugar and mountain dew. I would still like to at least brush the layers with this glaze, but I wasn't sure if the butter would keep the whipped cream from sticking, as I want to frost the cake with whipped cream frosting.
MrsMajHoff says
Hi there! Honestly, I have never ever used it in that way before. I guess you could put a little bit of glaze on one side and test it first? If it didn't work, you could serve the whipped frosting on the side. It would look pretty on the plate with a slice! Thanks for asking, and please let me know how it works!
Catie says
This is a FABULOUS recipe! I made this for my moms birthday cake, neither of us are big fans of traditional frosting. It was SO easy to make and delicious!! Thank you!!
Charity says
I’d like to make this but want to make it chocolates to but on chocolate cupcakes. Have u done it before and how? Just add coco powder?
Thanks in advance
Michelle says
Hi, can I fold this to cream cheese? I'm making a whipped cream cheese frosting. Ive done just cream cheese and heavy cream whipped to stiff peaks but with the heat here in the Philippines it doesnt really hold that long.